

Getting your queen bed pillows to look just right shouldn’t feel like rocket science. Yet here you are, staring at a messy pile of cushions that never seems to cooperate.
You’re not alone in this struggle. Most people toss their pillows around randomly, hoping for the best. But there’s a method to the madness.
In this article, you’ll learn simple pillow arrangement formulas that work every time, how to mix different pillow sizes like a pro, quick fixes for common styling mistakes, and budget-friendly ways to upgrade your look.
I’ve spent years helping people transform their bedrooms. These aren’t fancy designer tricks – they’re practical solutions that work in real homes.
I’ll show you exactly how to achieve hotel-style sophistication or cozy comfort. No guesswork. No complicated rules. Just straightforward steps that make your bed look amazing every single day.
Ready to finally master this? Let’s get started.
Essential Pillow Types and Sizes for Queen Beds
Getting the right pillows is half the battle. Size matters more than you think. Let me break down exactly what you need to create that perfect look.
Foundation Sleeping Pillows
Your sleeping pillows are the backbone of any great arrangement. These do the heavy lifting.
Queen-size pillows measure 20″ x 30″. Standard pillows, Queen-size 26″. That 4-inch difference? It’s huge for your final look.
Here’s what I recommend:
- Use 2 pillows for a clean, minimal style
- Go with 3 pillows for a fuller appearance
- Try 4 pillows for maximum luxury
Stacking technique: Place your pillows upright against the headboard. Slightly overlap them for a natural look. Don’t make them too perfect – bedrooms aren’t museums.
Decorative Pillow Dimensions Guide
Now for the fun part. Decorative pillows add personality.
Euro shams at 26″ x 26″ create your dramatic backdrop. These large squares make everything else stand out.
Large squares range from 22″ x 22″ to 24″ x 24″. Perfect for your main accent colors.
But wait – there’s more to consider.
Medium squares at 20″ x 20″ give you balanced proportions. They’re not too big, not too small.
Small squares measuring 18″ x 18″ work as finishing touches. Use these sparingly.
Lumbar pillows come in three main sizes:
- 14″ x 20″ – the classic choice
- 14″ x 36″ – modern and sleek
- 14″ x 48″ – extra-long statement pieces
Each size serves a different purpose. Choose based on your bed’s scale and your style.
Five Proven Queen Bed Pillow Arrangements
Stop guessing. These formulas work every single time. I’ve tested each one in real bedrooms. Here’s what works.
The Classic Graduated Look
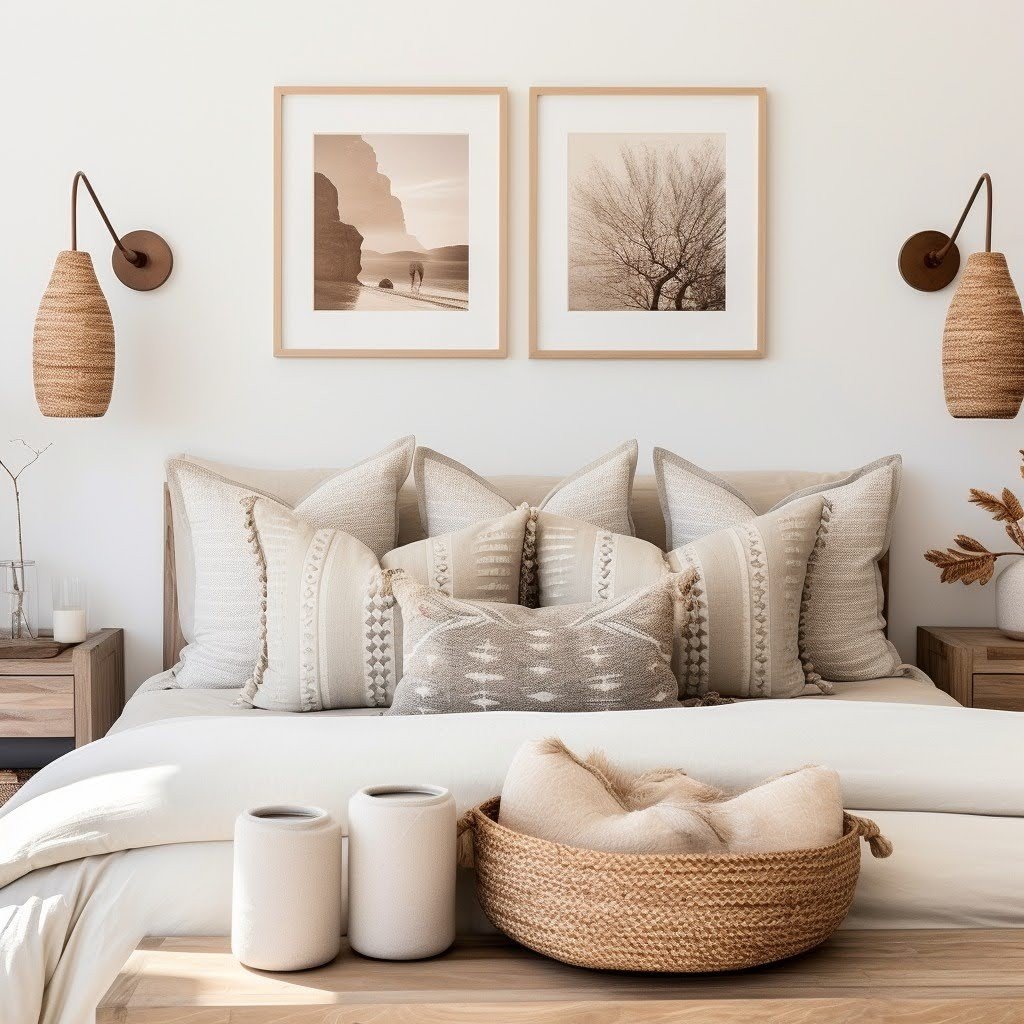
Formula: The 2 Euro shams (26″) + 2 medium squares (22-20″) + 1 small centered pillow. This is your go-to arrangement. It never fails.
Step-by-step placement:
- Place sleeping pillows flat against the headboard
- Stand Euro shams directly behind them
- Add medium squares in front of the Euros
- Center your small accent pillow at the very front
The magic happens with the graduated size effect. Each layer gets smaller as you move forward. This creates visual depth that makes your bed look expensive.
Important: This works best with headboards 24″ or taller. Shorter headboards make the layers look cramped.
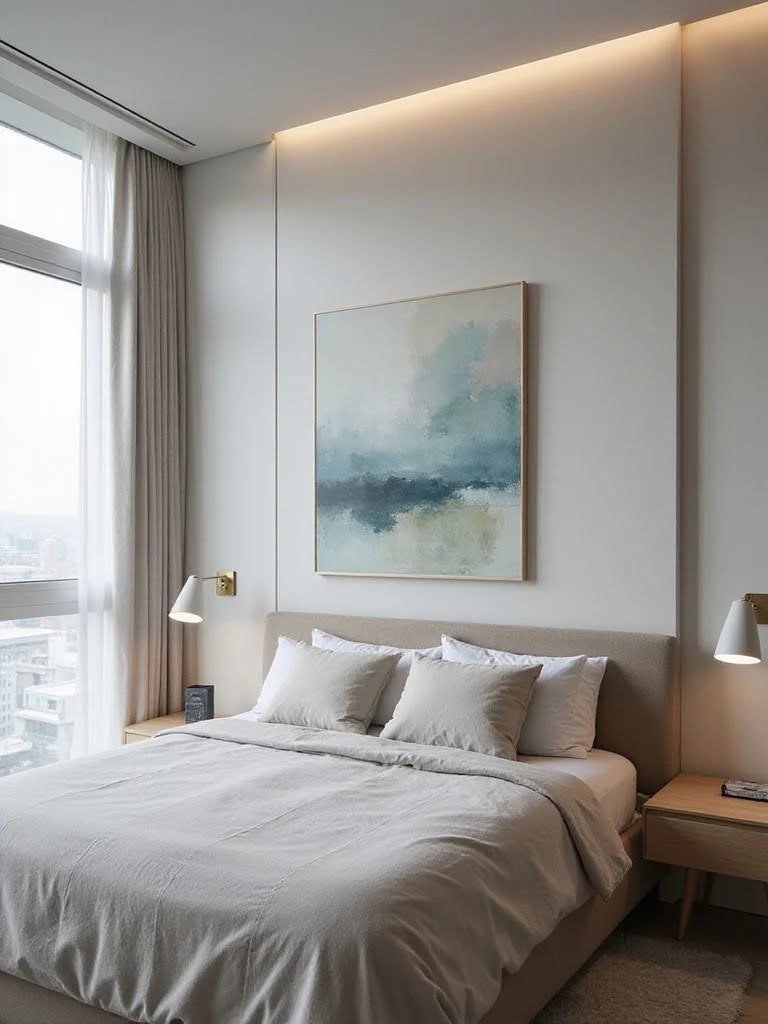
The Minimalist Three-Layer Method

Formula: 2 sleeping pillows + 2 standard shams + 1 extra-long lumbar (14″ x 36-48″)
Perfect for people who hate fussy arrangements. Five pieces total. That’s it. Here’s why I love this setup:
- Takes 30 seconds to arrange each morning
- Looks sophisticated without trying too hard
- Works in modern bedrooms
- Great for busy lifestyles
Placement is simple: Sleeping pillows in back, standard shams in front, lumbar pillow centered across the middle.
The long lumbar pillow ties everything together. It’s the secret to making three layers look complete.
The Luxurious Hotel Style
Formula: 2 sleeping pillows + 2-3 Euro shams + 2 large squares (20-24″) + optional lumbar. Want that five-star hotel look? This formula delivers.
The key is proper spacing and “chop” techniques. Chop means making crisp, clean edges on your pillows. Karate chop the center of each pillow to create that professional fold.
Pro tip: Space your Euro shams slightly apart. Don’t squish them together.
This arrangement requires taller headboards for best proportions. The more layers you have, the more height you need.
The Practical Stacked Approach
Formula: 4 sleeping pillows (2 stacks of 2) + 2 decorative squares + 1 centered accent. Perfect for couples with different pillow preferences. Everyone gets what they need.
Making stacks look intentional:
- Offset the top pillows slightly
- Don’t make perfect squares
- Let the bottom pillows peek out
The side view matters here. Walk around your bed and check how it looks from the side. Adjust the stacks until they look balanced. This works great in guest rooms, too. Visitors can easily remove what they don’t need.,
The Eclectic Overlapping Style
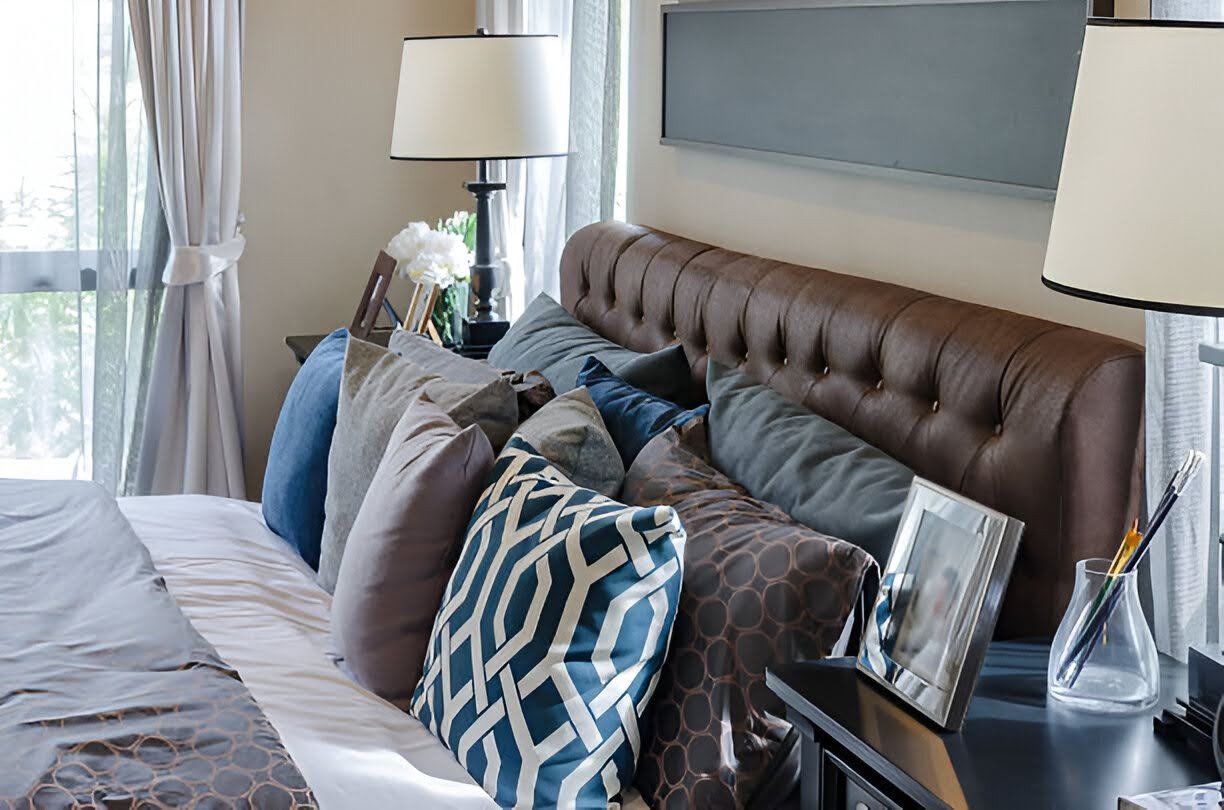
Formula: 2 sleeping pillows + 2 base pillows (26″) + 3 overlapping mixed-size accents. This is for people who want something different. Overlapping creates movement and interest.
Overlapping technique:
- Start with your largest pillows in the back
- Place medium pillows overlapping about 1/3 of the base
- Add the smallest pillows overlapping the medium ones
The rule is simple: largest in back, medium overlapping, smallest in front.
Don’t overlap too much. About one-third coverage looks natural. More than that gets messy fast. Each formula serves a different purpose. Pick the one that fits your lifestyle and bedroom style.
Color, Pattern, and Texture Coordination
Here’s where most people mess up. They think more is better. It’s not. Less is always more when it comes to coordinating pillows.
The Pattern Mixing Rule
Follow this simple formula: “Large pattern, small pattern, solid.” That’s it. Three types maximum.
Here’s how it works:
- One pillow with a large pattern (big florals, bold stripes)
- One pillow with a small pattern (tiny dots, mini checks)
- The rest should be solid colors
Tying colors together is easier than you think. Pull accent colors directly from your existing bedding. See a hint of blue in your duvet? Use that blue for your accent pillows.
Stick to 3-4 colors maximum for your entire bed. More colors create chaos, not style.
Real example: White bedding with gray trim. Add one large navy stripe pillow, one small white dot pillow, and solid gray pillows. Done.
Texture Layering Techniques
Texture is your secret weapon. It adds interest without adding visual noise. Smart fabric combinations:
- Linen for that relaxed, lived-in feel
- Cotton for crisp, clean lines
- Velvet for luxury and warmth
- Boucle for modern texture
But here’s the trick. Don’t use all four at once. Mix two, maybe three textures maximum. Smooth cotton with nubby boucle. Crisp linen with soft velvet.
Adding details without going overboard:
- Fringe on one pillow only
- Tassels as small accents
- Embroidered details for subtle interest
The key is balance. If you have a heavily textured pillow, pair it with smooth ones. Think of it like seasoning food. A little goes a long way. One textured statement pillow can transform your entire arrangement. But five textured pillows? That’s overkill. Start simple. Add texture gradually until it feels right.
Arrangement Techniques and Troubleshooting
The difference between amateur and pro? It’s all in the details. Let me show you the techniques that make everything look effortless.
Proper Pillow Placement Methods
The pillow chop is your best friend. This one move transforms sloppy pillows into crisp, professional-looking ones.
Here’s how to do it right:
- Grab the pillow on both sides
- Karate chop the center with the side of your hand
- Adjust the fold until it looks natural
Don’t make it too perfect. A slight imperfection looks more natural than robot-precise folds.
Spacing for symmetrical arrangements:
- Leave 2-3 inches between Euro shams
- Keep 1-2 inches between medium pillows
- Center accent pillows with equal space on both sides
But symmetry isn’t always the answer.
Creating intentional asymmetry works when:
- You have an odd number of accent pillows
- Your headboard is off-center
- You want a more relaxed, casual look
Asymmetry rule: Keep the visual weight balanced. One large pillow on the left? Balance it with two smaller ones on the right.
Adapting to Different Headboard Heights
Your headboard height changes everything. One size doesn’t fit all.
High headboards (30″+): Use those Euro shams to your advantage. They should be fully visible above your sleeping pillows. This is where you can go big with your arrangement.
Stack more layers. The height gives you room to play.
Medium headboards (24-30″): Scale down your pillow sizes. Skip the giant Euro shams. Use 22″ squares instead of 26″ ones.
The sweet spot: 3-4 layers maximum. It gets crowded fast.
Low or no headboards: Your pillows become the backdrop. Use larger pillows to create visual weight.
Euro shams work great here. They give you the height that your headboard can’t.
Think of large pillows as your favorite headboard. They need to do double duty.
Quick Daily Maintenance
Nobody has time for a 10-minute pillow arrangement every morning. Here’s your 30-second system.
The speed method:
- Fluff sleeping pillows and prop them up
- Grab decorative pillows from their storage spot
- Plop them in place – don’t overthink it
Simple fluffing technique: Punch the pillow in the center, then shake it. Two moves, perfect fluff.
Where to put decorative pillows at night:
This is the real question everyone asks.
Smart storage options:
- Bedroom chair – if you have one
- The floor basket is next to the bed
- Bench at the foot of the bed
- Closet shelf for once-a-week arrangements
Pro tip: Don’t use decorative pillows every single day. Save the full arrangement for weekends or when guests come over.
Some days, just sleeping pillows are enough. Your bed still looks made, and you save time.
The key is consistency. Pick a system and stick with it.
Advanced Styling Tips
Ready to take things up a notch? These tricks separate the beginners from the pros.
Small changes make huge differences.
Creating Visual Balance
Proportional guidelines matter more than you think.
Your pillows should take up about one-third of your bed’s visual space. Not half. Not a tiny sliver. One-third.
Here’s the math made simple:
- Queen bed = 60″ wide
- Your pillow arrangement should span roughly 40-45 inches
- Leave 7-10 inches of space on each side
Headboard style changes everything:
Tall, dramatic headboards can handle bigger pillow arrangements. You have the backdrop to support them.
Low-profile or platform beds need smaller, more streamlined looks. Too many pillows overwhelm the space.
Upholstered headboards work with softer arrangements. Wooden headboards pair well with crisp, structured pillows.
Now here’s something most people get wrong.
Odd vs. even numbers:
- Odd numbers (3, 5, 7 pillows) create casual, relaxed looks
- Even numbers (2, 4, 6 pillows) feel more formal and balanced
Strategic use: Formal master bedroom? Go even. Casual guest room? Try odd numbers.
But break this rule when your space calls for it. Rules are guidelines, not laws.
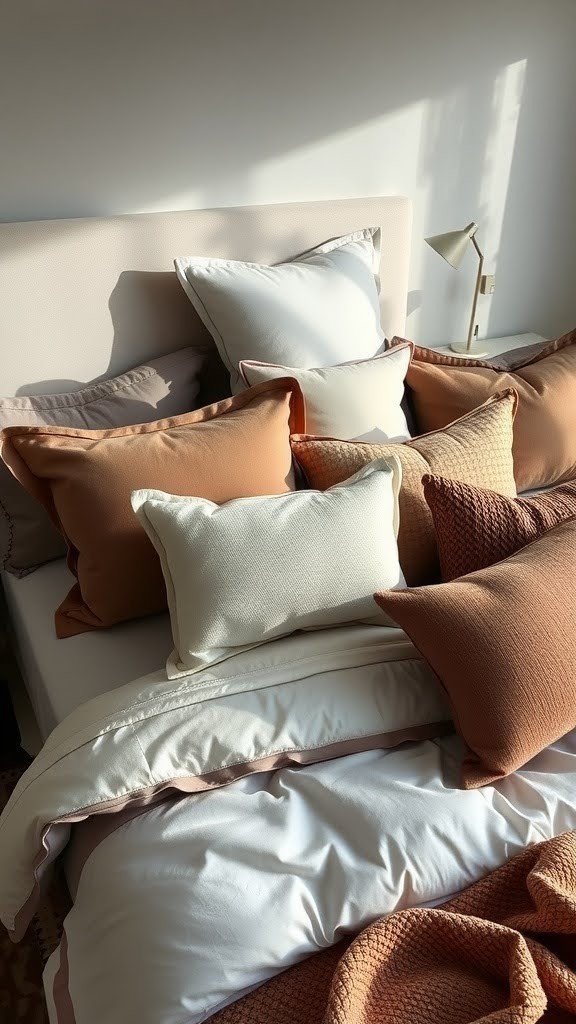
Seasonal and Occasional Updates
You don’t need to buy new pillows every season. Smart swapping is all you need.
- Spring refresh: Swap heavy velvets for light linens. Add one pillow in a fresh color.
- Summer update: White and blue combinations never fail. Remove heavy textures.
- Fall transition: Bring back the warm colors. Rust, gold, and deep green work beautifully.
- Winter comfort: Add texture back in. Faux fur, chunky knits, rich velvets.
- Holiday arrangements get special treatment:
- Christmas: Add one red or gold accent pillow. Don’t go overboard.
- Halloween: Orange and black can work if you keep it subtle.
- Valentine’s Day: Soft pink or burgundy – skip the obvious hearts.
Cost-effective change strategies:
- The pillow cover swap: Buy covers, not whole new pillows. You’ll save 60-70% of the cost.
- The rotation method: Keep 6-8 pillow covers and rotate them monthly. Your bed always looks fresh.
- The accent approach: Keep your base pillows the same. Change just one accent pillow for a big impact.
- Mix high and low: Expensive sleeping pillows, budget decorative covers. Nobody will know the difference.
Seasonal storage made simple:
- Vacuum bags for bulky winter pillows
- Under-bed boxes for easy access
- Closet bins labeled by season
The 80/20 rule applies here, too. Keep 80% of your arrangement the same. Change 20% for seasonal updates.
This approach saves money and keeps your look cohesive. Small changes, big impact.
Conclusion
You now have everything you need for a perfect queen bed pillow arrangement. No more guessing games.
Start with one of the five proven formulas I shared. Pick the one that fits your lifestyle and bedroom style. Remember the key rules: stick to 3-4 colors, use the “large pattern, small pattern, solid” approach, and don’t overthink it.
Your bed can look professionally styled every single day. It just takes the right technique and a little practice.
Try one arrangement this week and see how it transforms your space. You’ll be amazed at the difference.
What’s your biggest pillow arrangement challenge? Drop a comment below – I’d love to help you troubleshoot specific issues with your setup.
Frequently Asked Questions
How many pillows should I use for a queen bed pillow arrangement?
Use 5-7 pillows total for a balanced look. Start with 2 sleeping pillows, add 2 Euro shams or decorative squares, then 1-3 accent pillows. More than 7 pillows can look cluttered on a queen bed.
What pillow sizes work best for queen beds?
Queen sleeping pillows (20″ x 30″), Euro shams (26″ x 26″), and medium squares (20″-22″) are ideal. Avoid oversized pillows that overwhelm the bed or tiny pillows that look out of proportion.
How do I arrange pillows to look like a hotel bed?
Use the graduated method: 2 sleeping pillows flat against the headboard, 2-3 Euro shams standing behind them, 2 large squares in front, and an optional lumbar pillow. “Chop” pillows for crisp edges.
Where should I put decorative pillows when sleeping?
Store them in a bedroom chair, a floor basket next to the bed, or a bench at the foot of the bed. For daily convenience, consider using fewer decorative pillows or saving full arrangements for weekends.
How do I mix patterns and colors in my pillow arrangement?
Follow the “large pattern, small pattern, solid” rule. Stick to 3-4 colors maximum, pulling accent colors from your existing bedding. Balance is key – don’t use more than one bold pattern.