

There’s something magical about a fireplace that draws people together, but without the right mantel, even the most beautiful fireplace can feel incomplete.
A well-crafted DIY fireplace mantel transforms your entire room, creating a focal point that reflects your style while adding significant value to your home.
Building your mantel might seem intimidating at first, but it’s one of the most achievable woodworking projects for beginners and experienced DIYers alike.
With basic tools, quality materials, and a solid plan, you can create a custom piece that perfectly fits your space and vision.
This comprehensive guide walks you through every step of the process, from initial planning and material selection to final installation and finishing touches.
You’ll learn professional techniques, avoid common mistakes, and gain the confidence to tackle this rewarding project that will become a source of satisfaction for years to come.
Planning Your DIY Fireplace Mantel
Assess Your Fireplace Setup
Before starting construction, examine your current fireplace configuration carefully. Identify whether you have a gas, wood-burning, or electric unit, as this affects design considerations and safety requirements.
Measure the fireplace opening’s width, height, and depth precisely. Standard recommendations suggest extending your mantel 3-4 inches beyond each side of the opening, with typical shelf depths ranging from 6-8 inches for optimal proportions.
Choose the Right Style
Consider three main mantel styles: floating shelves offer a clean, minimalist appeal; full surrounds provide traditional framing; and mantel shelves balance both approaches.
Your selection should complement existing room design elements and personal preferences. Contemporary spaces often benefit from simple floating designs, while traditional homes may call for detailed surrounds.
Think about how you plan to decorate the finished piece when making your choice.
Select the Wood and Materials
Poplar stands out as an excellent choice due to its affordability, workability, and paint acceptance. Oak and maple offer durability with beautiful natural grain patterns, while pine provides budget-friendly options.
Essential materials include ½” plywood, 2×4 lumber, wood glue, screws, stain or paint, and finishing supplies.
Required tools: miter saw, drill, nail gun, measuring tape, level, and safety equipment like gloves and eye protection.
Step-by-Step Construction Process
Step 1 – Measure and Design Your Mantel

Start by determining your mantel’s ideal proportions: extend 3-4 inches beyond fireplace sides, maintain 6-8 inches depth for adequate display space.
Create a floating box design using five plywood pieces: two identical top/bottom panels, one back panel, and two end caps.
The box structure (missing front panel) slides over an internal 2×4 frame. Precise measurements ensure proper fit and professional appearance.
Step 2 – Cut the Wood
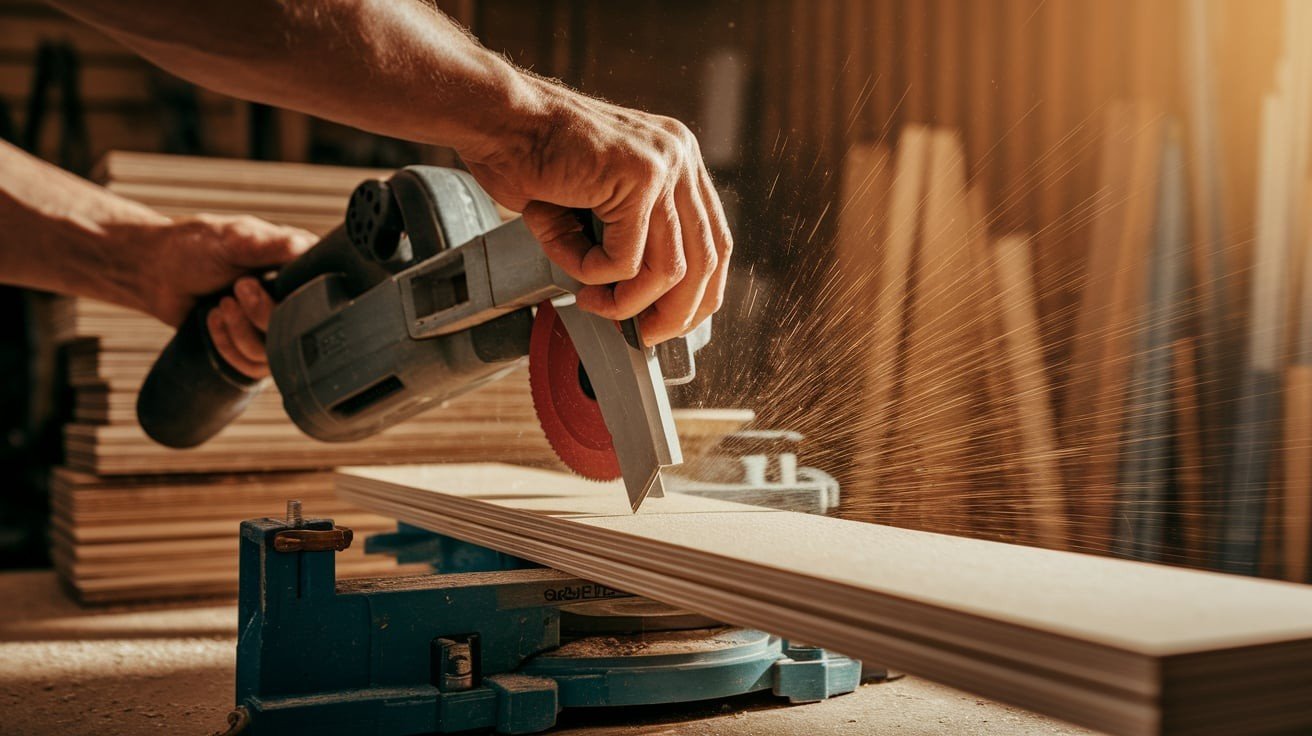
Use a Kreg Rip-Cut or quality miter saw for precise, clean cuts on your plywood pieces. Cut all five components at 45-degree angles where they’ll connect – this creates seamless joints that appear professionally crafted.
Take time measuring twice before cutting, as accurate angles are crucial for proper assembly. Sharp blades and steady hands prevent tear-out and ensure smooth edges ready for gluing.
Step 3 – Assemble the Mantel Box
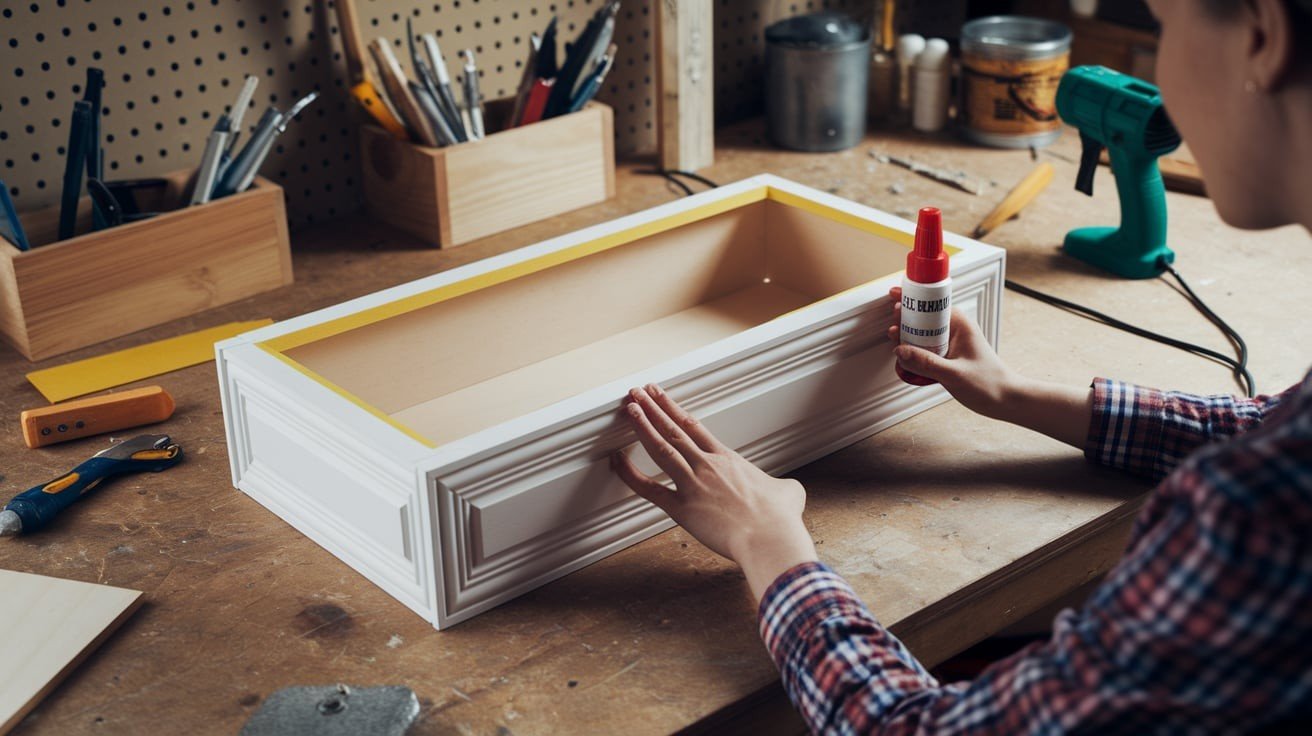
Apply wood glue to all connecting edges, then use painter’s tape on outside seams to maintain perfect alignment during assembly. Position pieces carefully and secure joints with an 18-gauge nail gun for strong connections.
Work systematically around the box, checking square measurements as you progress. Remove tape immediately after nailing to prevent adhesive residue. Allow glue to cure completely before proceeding.
Step 4 – Fix Cosmetic Imperfections
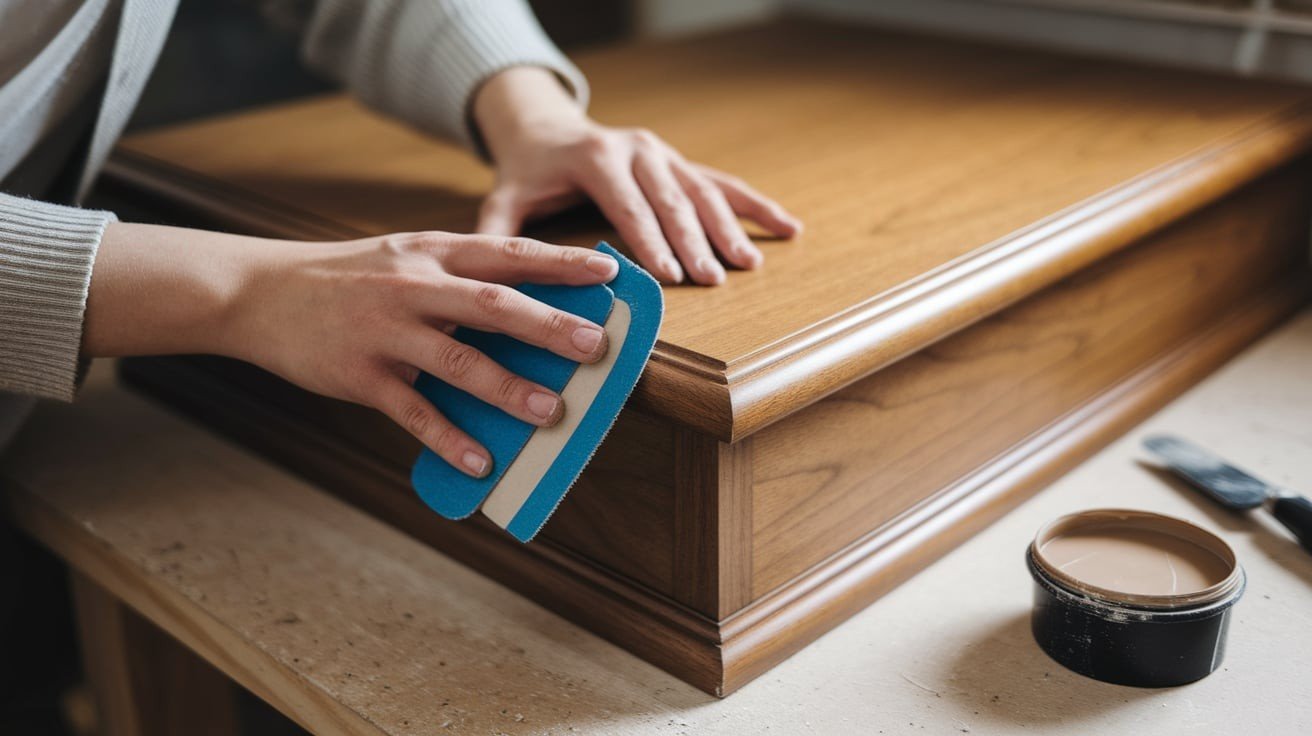
Small gaps are normal and easily corrected. Run a screwdriver sideways along seams with light pressure to close minor openings.
For larger gaps, apply stainable wood filler, let dry completely, then sand smooth with fine-grit paper. Work progressively through finer sandpaper grits for best results.
Remember that most projects look rough initially but improve dramatically with proper finishing techniques.
Step 5 – Stain or Paint the Mantel
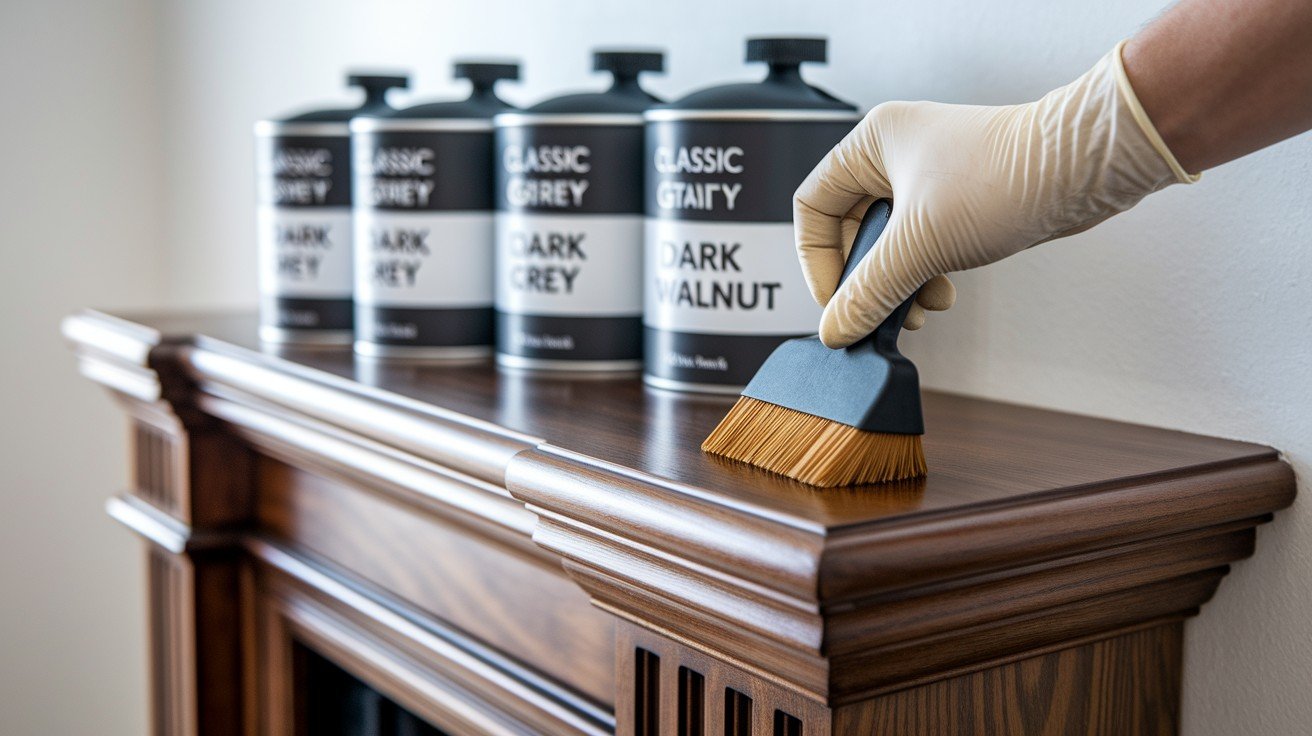
Begin with pre-stain conditioner applied with a foam brush, wiping excess after 5-10 minutes for even absorption. Layer multiple stain colors if desired, start with lighter base coats, building to darker tones.
Use quality staining pads and shop rags rather than paper towels for better control. Apply thin, even coats and maintain wet edges. Protect hands with nitrile gloves throughout the process.
Customization and Decorative Additions
Add Trim, Molding, or Corbels
Transform your basic mantel into a sophisticated focal point by adding decorative elements. Install crown molding along the top edge, attach corbels beneath the shelf for classical appeal, or add fluted details to vertical sections.
Use a router with appropriate bits to create custom profiles, or purchase pre-made trim pieces for easier installation.
These additions provide depth, visual interest, and architectural character that complement your home’s existing style and create a truly custom appearance.
Integrate Technology (Optional)
Modern mantels can accommodate today’s technology needs seamlessly. Plan for concealed wiring by routing channels in the back panel before assembly, allowing clean cable management for mounted TVs or lighting.
Install discrete outlets within the mantel structure for convenient device charging. Create recessed niches for media components or smart home controls.
Consider built-in LED strip lighting to highlight artwork or seasonal decorations. These tech-forward features maintain clean lines while providing practical functionality for contemporary living.
Conclusion
Building a DIY fireplace mantel transforms your living space while providing immense personal satisfaction.
This rewarding project combines practical woodworking skills with creative design, resulting in a custom piece that perfectly fits your home’s style and proportions.
From initial planning and precise measurements to final finishing touches, each step builds your confidence and craftsmanship abilities.
The floating mantel design offers versatility for any skill level, using accessible materials like plywood and basic 2x4s. With proper tools, patience, and attention to detail, you’ll create a professional-quality focal point that rivals expensive store-bought alternatives.
Whether you choose simple, clean lines or add decorative corbels and molding, your finished mantel becomes a lasting testament to your DIY capabilities.
Remember that most projects improve dramatically through the finishing process. Take time with sanding, staining, and final details; these steps separate amateur work from professional results.
Your custom fireplace mantel will provide years of enjoyment and become a cherished centerpiece.
Frequently Asked Questions
What’s the best wood type for beginners building their first mantel?
Poplar is ideal for beginners due to its affordability, easy workability, excellent paint acceptance, and forgiving nature during cutting and assembly.
How much does it typically cost to build a DIY fireplace mantel?
Material costs range from $50 to $ 150, depending on wood choice and size, significantly less than store-bought alternatives costing $300-800.
Can I install a mantel on any type of fireplace safely?
Yes, but maintain proper clearances from heat sources and follow local building codes for safe installation on all fireplace types.