

You know that awkward space when you walk into your home? That bare wall in your hallway that feels like it’s missing something? An entryway table could be the perfect solution.
But here’s the thing – decent console tables cost $300 to $500 at furniture stores. That’s a lot of money for something you can build yourself for under $150.
I’ve been there. I wanted a custom table that fit my exact space and style. After building three different entryway tables over the years, I learned what works and what doesn’t.
In this guide, you’ll get two beginner-friendly project plans, complete shopping lists and costs, and step-by-step instructions with no confusing jargon. I’ll also share common mistakes to avoid and simple finishing techniques that work.
No fancy tools are required. No woodworking experience is needed. These projects use basic cuts and simple assembly methods.
If you can use a drill and follow directions, you can build these tables. Let’s save you some money and create something perfect for your home.
Planning Your Project
Getting started on your entryway console table is easier than you think. I’ll walk you through the key decisions that matter most.
Measuring Your Space
First things first – grab your measuring tape. You need to know exactly what you’re working with. Your entryway dictates everything else about this project.
Start by measuring the width of your available wall space. Leave at least 6 inches on each side for the walking room. Check the height from the floor to any hanging items. Don’t forget about depth. Measure how far you can extend into the walkway without creating a traffic jam.
Standard proportions work well for most homes: 35 inches tall, 48 inches wide, and 10 inches deep. But your space might be different. Always prioritize your actual measurements over standard ones. For narrow hallways under 4 feet wide, keep depth to 8 inches maximum and consider a floating design. Pro tip: Test your planned dimensions using cardboard boxes first.
Choosing Your Style
Your style choice affects both looks and build complexity. Let me break down three popular approaches.
Simple modern console design focuses on clean lines and minimal details. It’s easier to build for beginners, fits most home styles, and leaves less room for visible mistakes. You’ll use basic joints and simple hardware with no fancy curves or complicated angles.
Rustic wood finish options embrace the natural character of wood. Small mistakes often add to the charm. Popular finishes include natural oil, light stain with distressed edges, and weathered gray wash. Consider exposed black iron hardware and slightly uneven edges.
Color-blocking uses two or more distinct colors in your design. Simple ideas include a natural wood top with a painted base or two-tone paint schemes. Start with neutral colors if you’re unsure. Remember: Paint is forgiving, but the wood stain is permanent. Choose colors that complement your existing entryway.
Tools, Materials, and Budget
Let’s talk about money and materials. I’ll show you exactly what you need and what it costs.
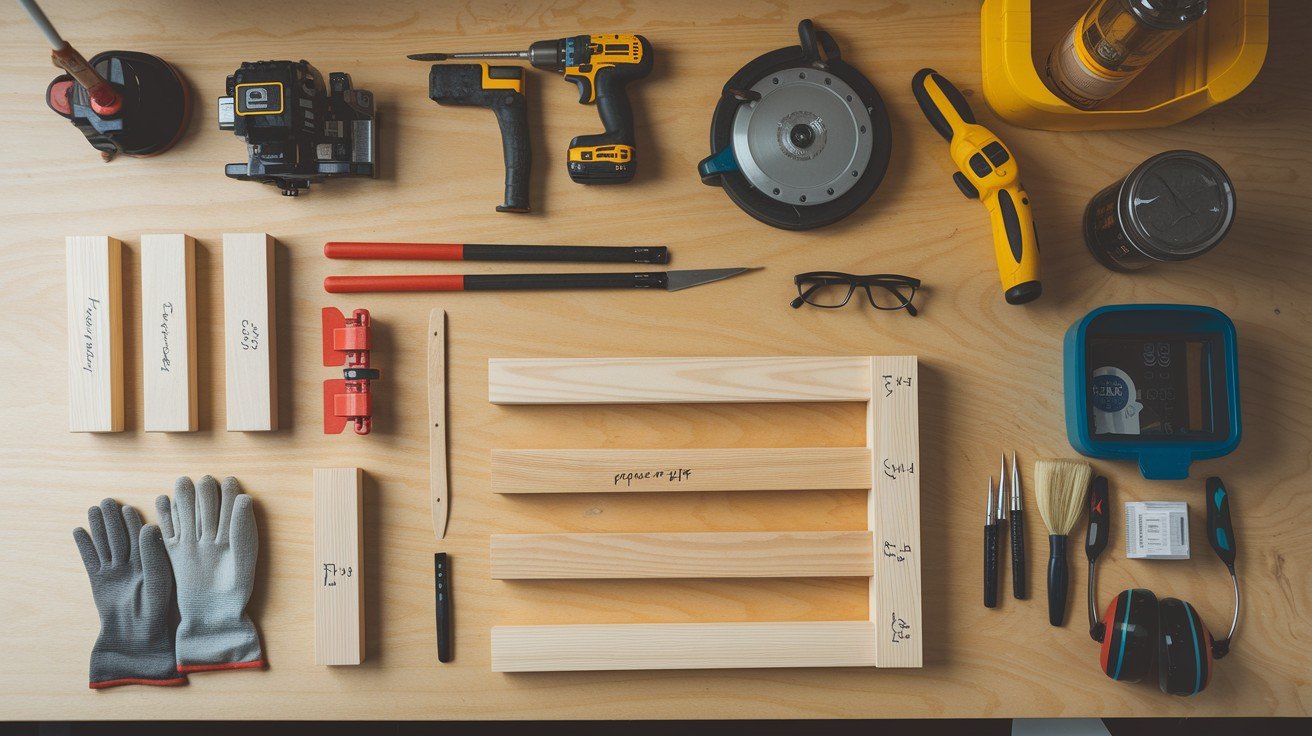
Essential Tools for Beginners
You don’t need a fancy workshop to build this console table. Most beginners already own some of these tools.
Must-have tools include a drill, sander, and circular saw. Your drill handles screws and pilot holes. The sander smooths rough edges. A circular saw makes straight cuts. Can’t afford all three? Many home improvement stores rent tools by the day.
Optional tools make the job easier but aren’t required. Clamps hold pieces while the glue dries. A miter saw creates perfect cuts. Here’s the truth: Good technique beats expensive tools every time.
Safety equipment basics protect you during the build. Safety glasses, hearing protection, and work gloves are essential. Never skip safety gear. Medical bills cost more than protective equipment.
Complete Shopping List
Wood options depend on your budget and finish goals. Pine 2x4s cost around $50 total and work great for painted finishes. Poplar boards cost $100-150 but take stain beautifully and resist dents better.
Hardware holds everything together securely. You need 3-inch wood screws, wood glue, and finish nails. Buy 25% more screws than you think you need. You’ll drop some and use the extras for mistakes.
Finishing supplies protect your wood and add beauty. Wood conditioner prevents blotchy stains on softwood. Stain adds color. Clear coat protects from water rings and scratches. Skip the cheap brushes – they leave streaks.
Total Project Costs
The budget runs $50-75 total using pine lumber and basic finishes. You get a functional console table that looks good and lasts for years.
Premium build costs $150-200 total with poplar lumber and high-quality finishes. The extra money buys better wood grain and more durable construction.
Cost comparison with store alternatives shows real savings. Similar console tables cost $200-500 at furniture stores. Even basic particleboard versions start around $150. Building your means you control the quality and get solid wood over particleboard. Plus, you get the satisfaction of building something with your own hands.
Project – Budget Pine Table
Time to build your first console table. I’ll guide you through each step using affordable pine lumber.
Preparing Pine Boards
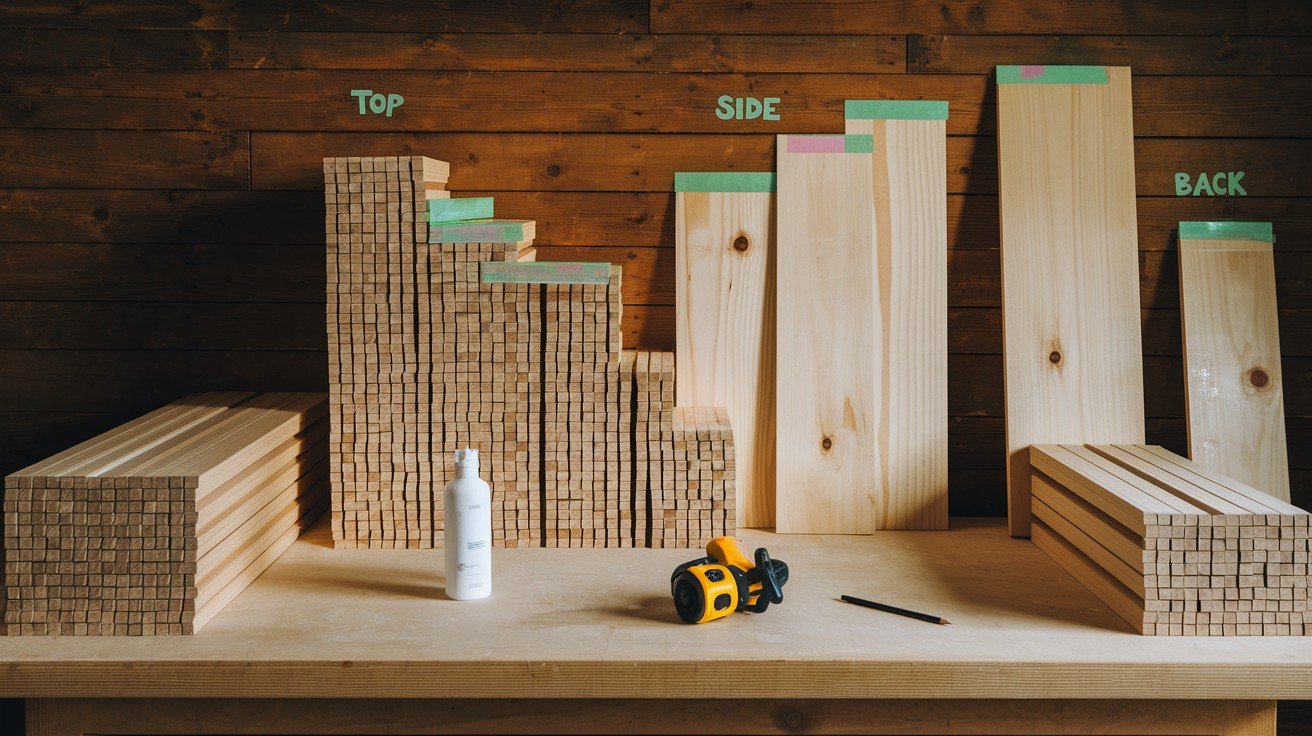
You’ll need fifteen 2×4 pine boards for this project. That’s enough wood for the top, sides, and back panel. Pine is forgiving for beginners and easy to work with.
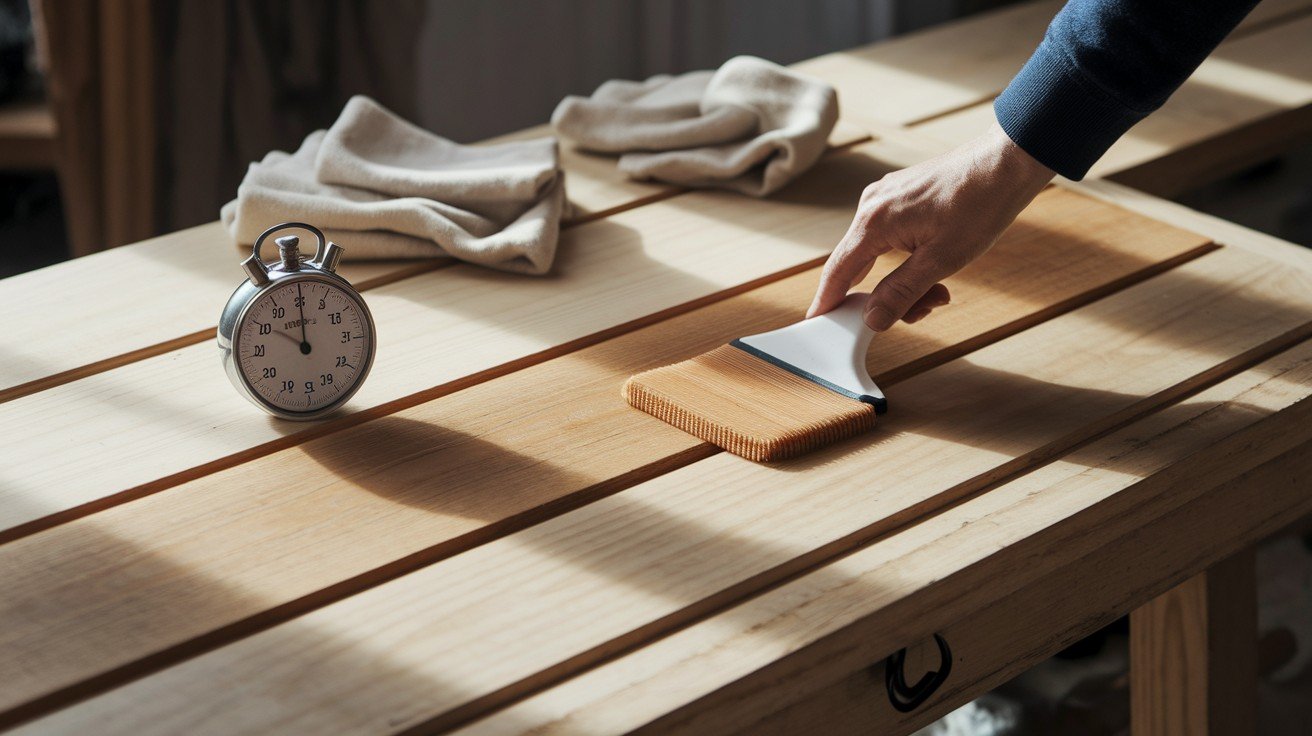
Creating thick panels by joining boards gives you the width you need. Single 2x4s are only 3.5 inches wide. You glue boards edge-to-edge to create wider panels. Start by selecting your best boards for the top panel. Look for straight boards without large knots. Save boards with character for the sides where imperfections add charm.
Basic cutting and sizing come next. Cut boards about 2 inches longer than the final measurements. This gives you room to trim square ends later. Sort cut boards by location and label each pile with masking tape.
Building the Frame
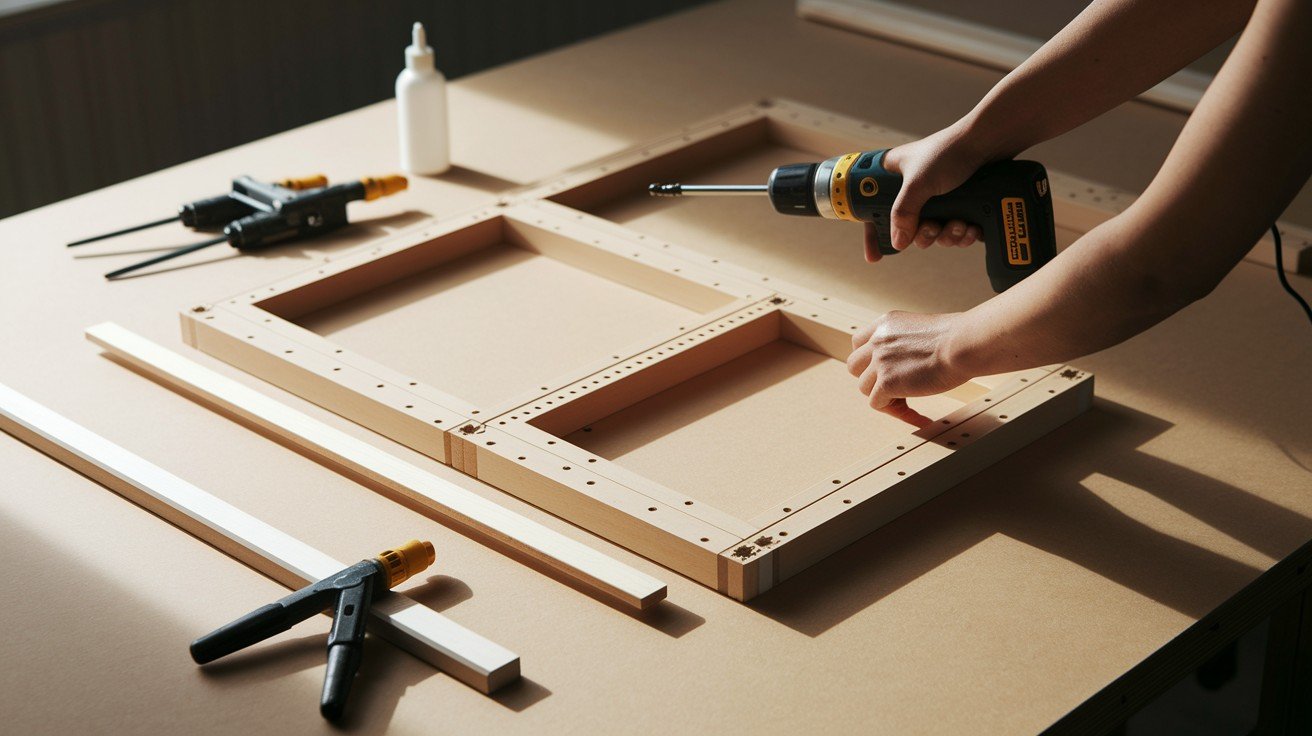
Assembling sides and top separately makes the job easier. You’ll work on flat surfaces instead of holding everything at once.
Start with side panels. Apply wood glue to the board edges and press them together firmly. Clamps help, but aren’t required – use heavy books or weights. Let each panel dry for at least 2 hours.
Connecting with screws and wood glue creates strong joints. Pre-drill holes to prevent splitting. Use 3-inch screws for main connections. Attach the top to the sides first, then add the back panel. Work on a flat surface to keep everything square.
Adding support for stability prevents wobbling. Install a support rail between the sides, about 6 inches from the bottom. Trust me on this one. Skipping support creates a wobbly table that drives you crazy.
Creating a Professional Finish
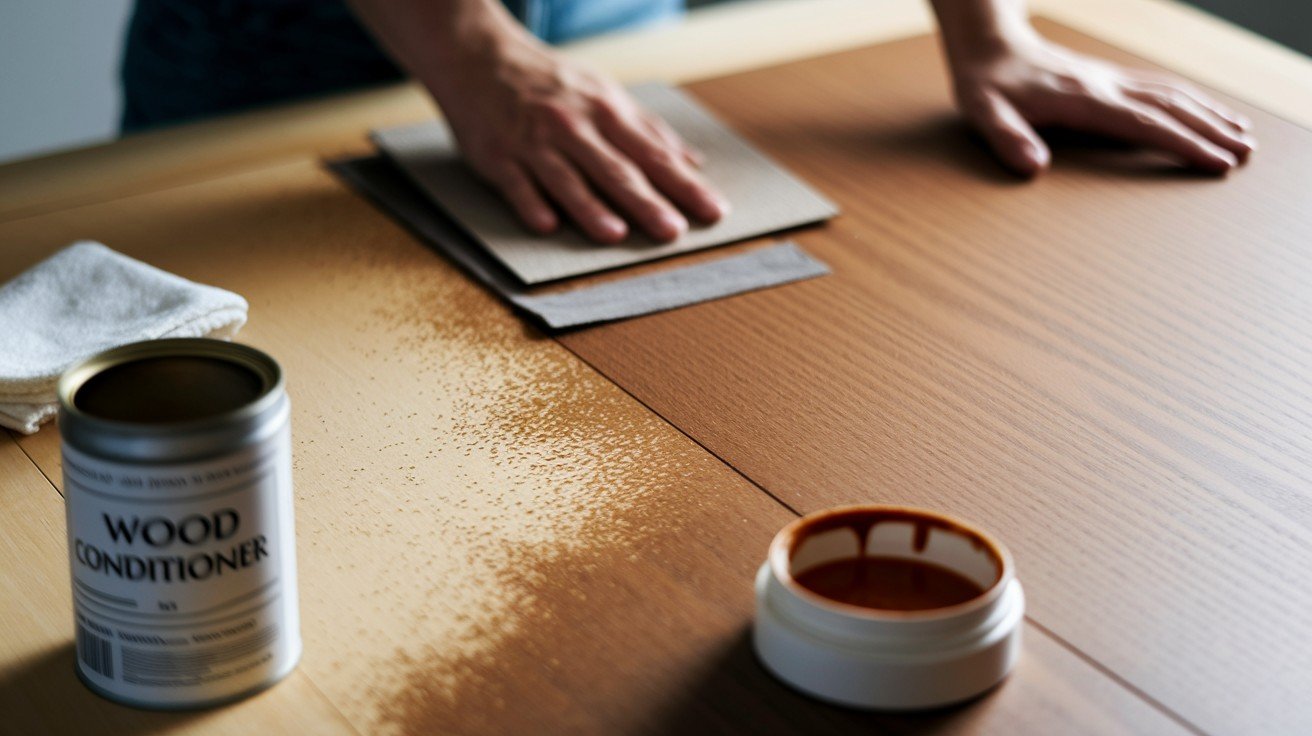
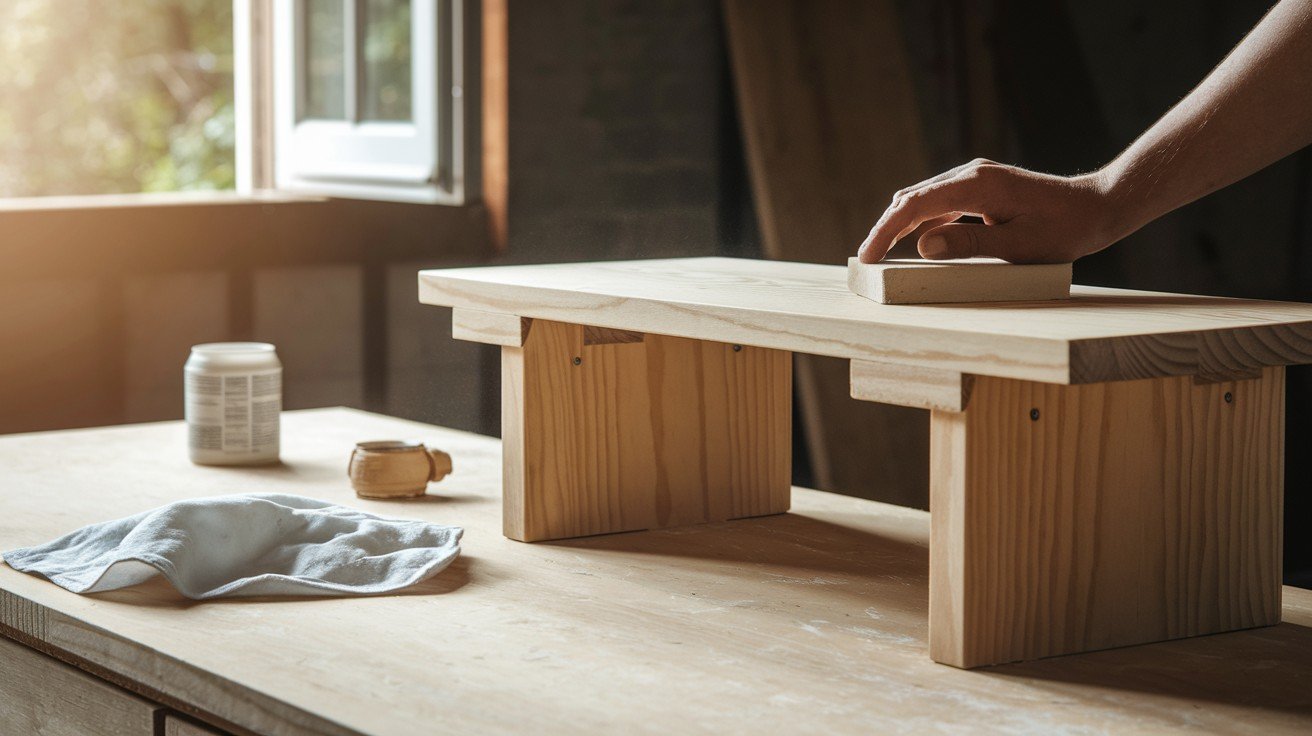
Sanding all surfaces smoothly is where good projects become great ones. Start with 120-grit sandpaper, then move to 220-grit for final smoothing. Sand with the grain, not against it. Pay extra attention to joints and glue lines.
Applying wood conditioner before staining prevents blotchy results. Pine absorbs stains unevenly without conditioner. Apply with a clean cloth, let penetrate for 15 minutes, then wipe excess. Don’t skip this step – it separates good finishes from great ones.
Single stain application works best for beginners. Apply with a clean cloth in long strokes with the grain. Work quickly but don’t rush. Wipe off excess after 10 minutes to prevent dark spots. Let dry completely before clearing the coat. The result? A console table that looks store-bought but costs less than $75.
Staining and Finishing Made Simple
The finish makes or breaks your console table. I’ll show you how to get professional results without professional experience.
Preparation Steps
Final sanding with 220 grit creates the smooth surface you need. Sand every surface, including corners and joint lines. Remove all dust with a tack cloth before moving forward.
Applying wood conditioner prevents blotching on pine. Apply with a clean cloth, let soak for 15 minutes, then wipe off excess. This seals the wood for even stain absorption.
Setting up proper ventilation protects your health. Open windows, set up a fan, and work outside if possible. Stain fumes are harmful.
Stain Application
Choose beginner-friendly stains like Weathered Oak or Provincial. They’re forgiving and hide small mistakes naturally. Avoid dark stains until you gain experience.
Use staining pads for even application. Pads distribute color evenly without streaks. Start in a corner, working systematically across each surface. Don’t go back over covered areas. Work with the grain, not against it. Wipe off excess after 8-10 minutes.
Protective Finish
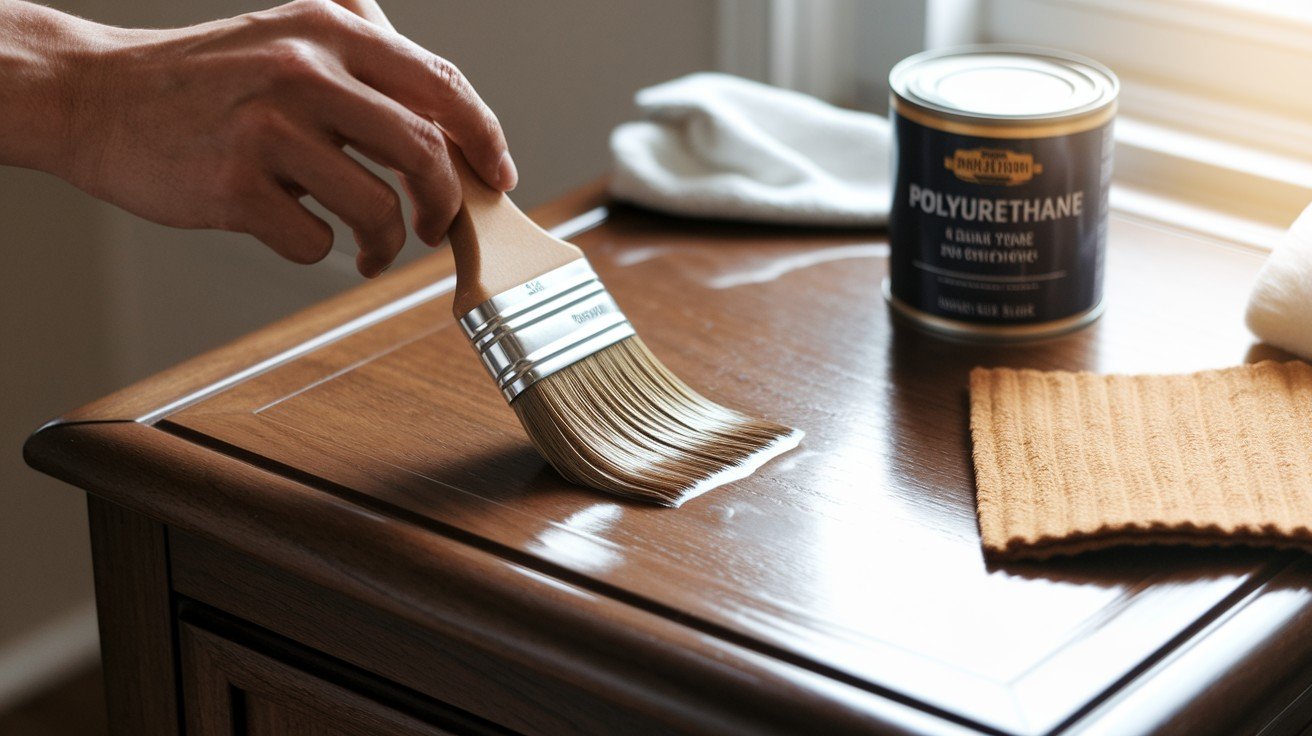
Choose polyurethane for durability or polyacrylic for easier application. Use synthetic brushes and apply thin, even coats in long strokes. Thick coats create drips.
Respect drying times between coats. Polyurethane needs 4-6 hours, and polyacrylic needs 2-3 hours. Don’t rush – applying too soon creates cloudy finishes. Light sanding between coats with 320-grit improves adhesion.
Three coats give maximum protection. The first soaks in, the second builds protection, and the third creates that smooth, furniture-store finish.
Styling Your Finished Table

Your console table is built and finished. Now let’s make it work beautifully in your space.
Placement Guidelines
Your console should take up about two-thirds of the wall width. Leave 6-8 inches between your table and doorways for comfortable movement. Position it at light switch height – about 36 inches – for natural alignment.
Think about daily use when placing your table. Can you easily reach items? Does it block switches or thermostats? Consider your morning routine – grabbing keys, checking mail, and setting down packages.
Match your existing decor formality. Dark walls work with lighter tables. Light walls suit darker wood. Rustic tables need casual settings, and sleek consoles fit modern homes.
Decorating Ideas
Change 2-3 small items seasonally to keep your entryway fresh. Summer needs bright colors and flowers. Fall works with warm tones and natural elements. Winter can include evergreen sprigs or battery lights.
Add functional storage that looks good. Decorative baskets hold mail and gloves. Small trays corral keys and change. Pretty storage beats ugly storage.
Follow the rule of three for accessories:
- One larger item for height (lamp or tall vase)
- One medium item for interest (photo or plant)
- One small functional item (decorative bowl)
Lighting transforms your console into a focal point. Table lamps add warmth. LED strips underneath create floating effects. Low-light plants like pothos bring life to the space. Personal touches like family photos make it uniquely yours. Remember: Three well-chosen items beat seven random ones.
Conclusion
Building your entryway table isn’t just about saving money, though saving $200 to $350 feels good. It’s about creating something that fits your space perfectly.
You now have two solid project options. The simple one-day build gets you a functional table fast. The budget pine version gives you more customization for just $50 in materials.
Start with whichever project feels right for your skill level. Remember, every expert was once a beginner. Your first table might not be perfect, and that’s okay.
The best part? Once you finish, you’ll have the confidence to tackle bigger projects. You’ll also have a beautiful, custom piece that friends will assume costs hundreds at a store.
Grab your tools and get started. Your entryway is waiting for that perfect finishing touch you’re about to create.
Frequently Asked Questions
Can I build this without woodworking experience?
Yes! These projects use basic cuts and simple assembly techniques, perfect for complete beginners with basic tools.
How long does it take to complete?
A simple version takes one day; more detailed builds require 2-3 days, including drying time for finishes.
What if I don’t have all the tools?
You can rent tools from hardware stores or ask them to make cuts. Only drill required.
Can I modify the dimensions for my space?
Absolutely! All measurements are easily adjustable. Just maintain proportional relationships for structural stability and visual appeal.
What’s the difference between pine and poplar wood?
Pine is cheaper but softer; poplar costs more but stains evenly and resists dents better.