

Small bedrooms can feel cramped when you’re trying to fit everything you need. Storage becomes a real challenge when floor space is limited. You end up with clothes piled on chairs or stuffed into overfilled drawers.
Built-in dressers offer an innovative solution. They use wall space instead of taking up precious floor area. You get more storage without making your room feel smaller.
In this article, you’ll find seven practical built-in dresser ideas that work perfectly in tight spaces. Each solution maximizes your storage while keeping your bedroom organized and comfortable.
We’ve researched real homes and talked to interior designers who specialize in small spaces. These aren’t just pretty pictures – they’re proven solutions that actual people use every day.
Whether you rent or own, have basic DIY skills, or need professional help, you’ll find options that fit your situation and budget. Let’s explore these space-saving ideas.
Smart Built-In Dresser Ideas
1. IKEA Hack Built-In Dresser for Narrow Hallways

This works perfectly in tight spots. I’m talking about those awkward hallway spaces in master bedrooms or walk-through closets.
You need at least 13 inches of depth for people to walk by comfortably. Any less, and it feels too cramped.
Here’s what I recommend: Three Billy bookcases from IKEA. Put the 31½-inch unit in the center. Add two 15¼-inch units on each side.
Total cost? Around $300-500, depending on your finishing touches.
Start by removing your baseboards. This lets the units sit flush against the wall. It looks way more professional.
Install the center unit first. Always secure it to wall studs – this isn’t optional for safety.
Next comes the tricky part. Clamp the side uClapto the center ones. Use cabinet screws to connect them. This prevents wobbling and gaps.
But here’s what separates amateur from pro work:
The finishing touches make all the difference. Add crown molding on top. Install matching baseboards around the bottom. Fill any gaps with trim work.
The result? Built-in storage that looks like it came with your house.
2. Converting Existing Dressers into Built-In Storage
Is a dresser sitting around? You can turn it into built-in storage without buying anything new.
First, measure your space. Then, measure your dresser. They need to fit together properly – no forcing it into a spot that’s too small.
Check if your dresser is solid. Wobbly furniture won’t work here. You’re making this permanent, so it needs to be sturdy.
Here’s a pro tip: Build a 2×4 frame base. This lifts your dresser off the floor. Why? So you can add baseboards underneath later. It makes it look like real built-in furniture.
Now comes the magic part. You’ll frame around the dresser with trim work. This hides the fact that it’s just a regular dresser.
Do you have gaps between the dresser and the walls? Fill them with filler strips or trim pieces. No one will know the difference.
Don’t forget the hardware. Swap out old handles for new ones that match your room. This small change makes a huge difference.
The secret? Good trim work. It transforms any dresser into custom-looking storage that appears built for your exact space.
3. Corner Built-In Dresser Solutions
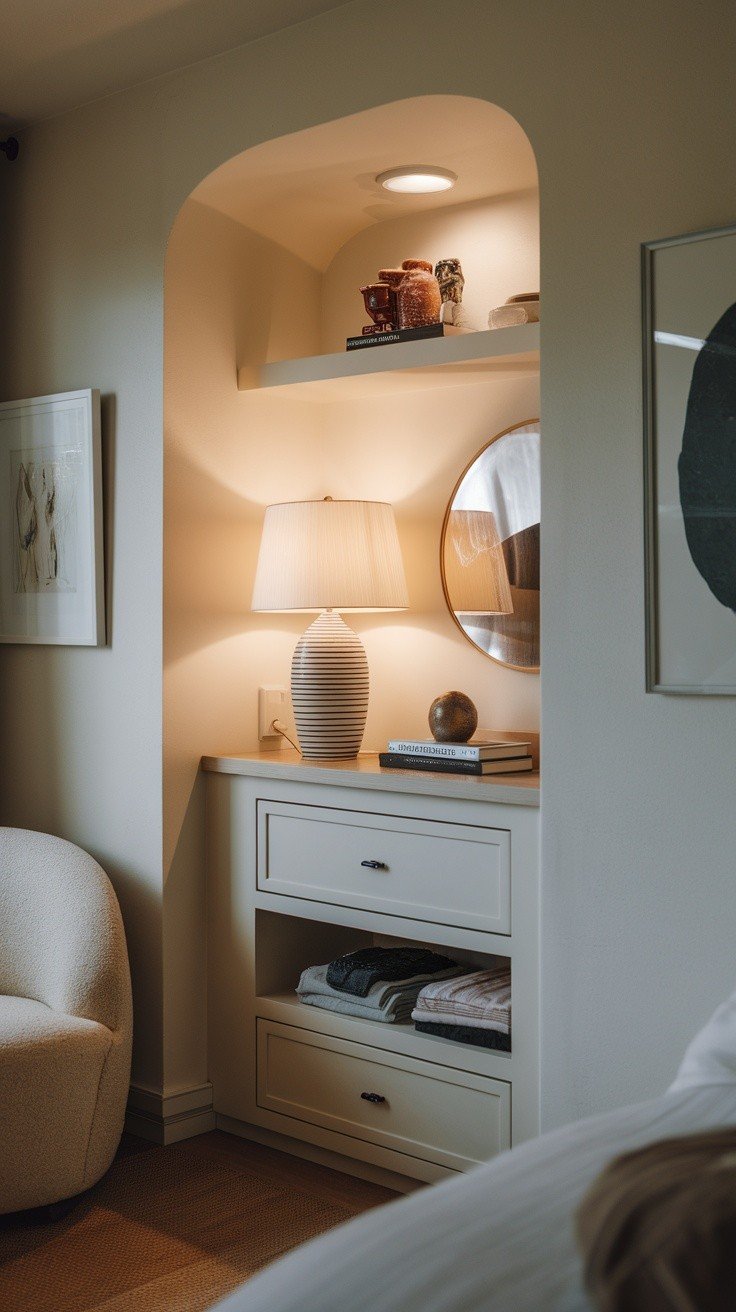
Corners are the forgotten spaces in most bedrooms. They sit there, collecting dust or maybe a random chair.
on
But here’s what I’ve learned: Corners can hold way more than you think. A well-designed corner dresser uses space that would otherwise go to waste.
The best part? You can build custom shapes. Do you have a weird angle or slanted ceiling? No problem. Corner units adapt to your room’s quirks.
Small corners need innovative solutions. Think compact units that don’t overwhelm the space. Even a small corner dresser beats no storage at all.
Large corners are goldmines. I’m talking about floor-to-ceiling storage that transforms your entire room organization.
But wait – there’s more you can do.
Why not add a seat? Combine your corner dresser with a reading nook. Put a cushion on top of a lower section. Now you have storage AND a cozy spot to sit.
The result? That dead corner becomes the most functional part of your bedroom. You get clothes storage, maybe book storage, and even a place to put on shoes.
4. Your Window Area Built-In Dresser
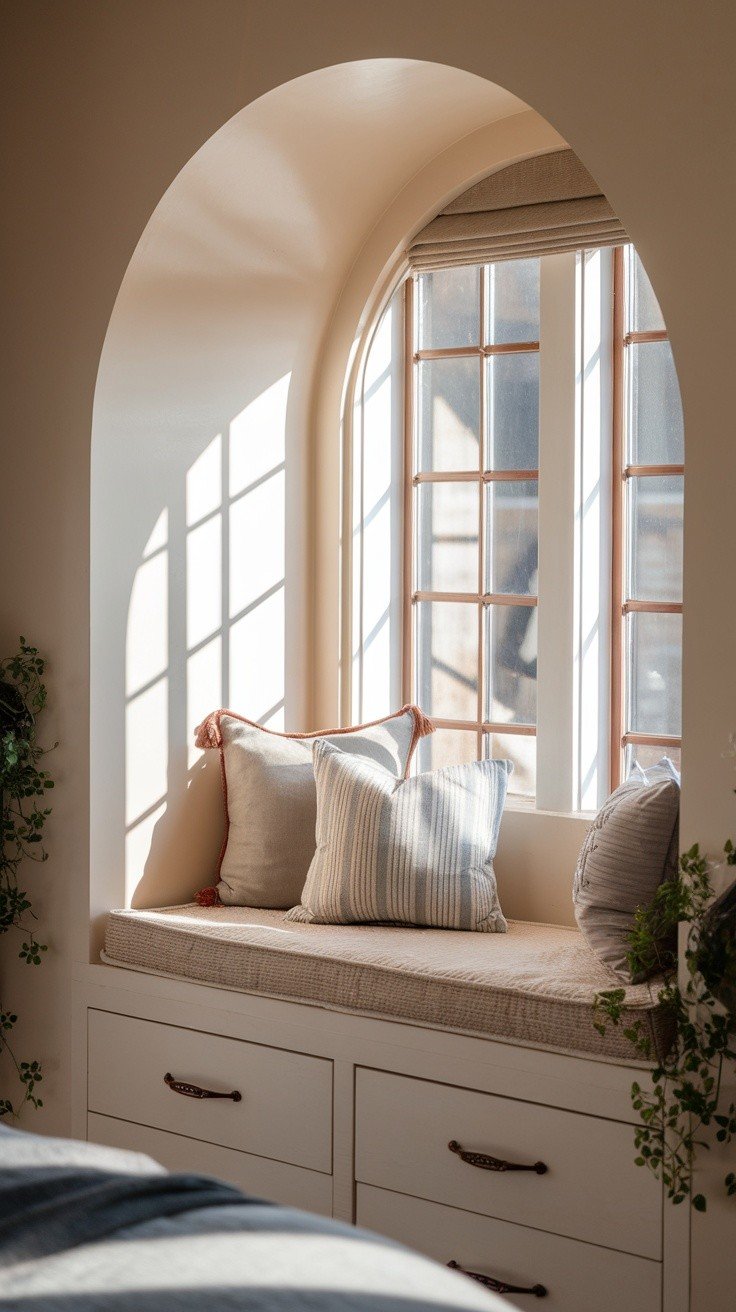
That space under your window is probably doing nothing right now. You may have a radiator there, or it’s just empty floor space.
High windows work best for this idea. You need enough clearance to build storage underneath without blocking light.
Think about depth carefully. You want storage, but people still need to walk by. I usually go 18-20 inches deep – enough for clothes but not too much for the room.
Got heating vents or radiators? Work around them; don’t fight them. Leave space for airflow, or you’ll have problems later.
Window seats look nice, but aren’t very practical. You lift the top, and everything falls to the bottom in a messy pile.
Drawers change everything. You can organize different types of clothes in separate compartments-socks in one drawer, shirts in another.
Access is so much easier. Instead of digging through a deep box, you pull out exactly what you need.
Here’s the bonus: You still get seating if you want it. Add a cushion on top. Now you have storage, organization, AND a place to sit by the window.
5. Under-Bed Platform Built-In Dresser
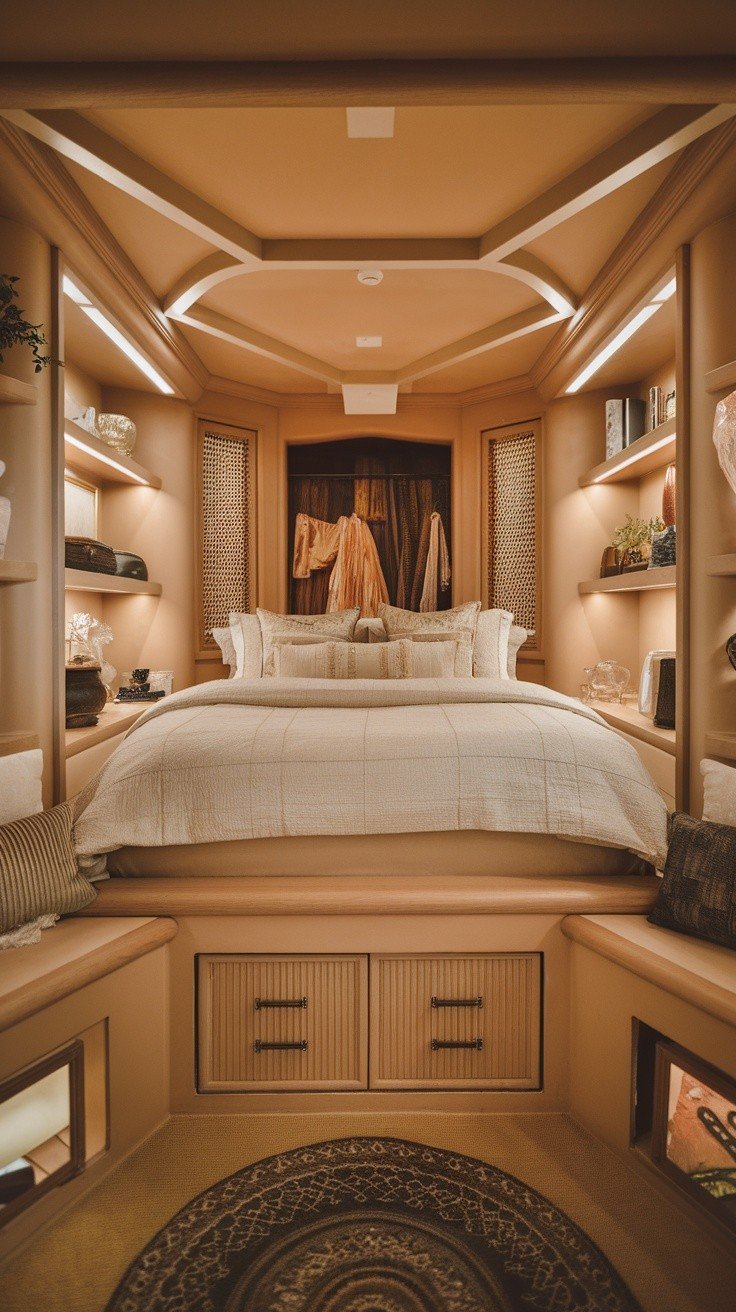
Your bed takes up the most floor space in your room. What if that same space could store your clothes, too?
Platform beds make this possible. You raise your mattress higher and build storage underneath. It’s like getting a whole dresser for free.
But here’s the key: Make sure drawers slide out easily. You don’t want to wrestle with stuck drawers when you’re getting dressed.
Weight matters, too. Your platform needs solid support. A mattress plus a person is heavy. Add proper framing, or it won’t last.
Deep drawers work great for winter coats and blankets. Stuff you don’t need every day can go in the back sections.
Front drawers should hold daily items. Think underwear, socks, and pajamas-things you grab every morning.
But wait – there’s a secret benefit.
Hidden compartments. Build small sections for jewelry or important documents. No one thinks to look under your bed for valuables.
The result? Your bed becomes a storage powerhouse. You sleep on top and store everything below. It’s like doubling your bedroom’s usefulness without using any extra floor space.
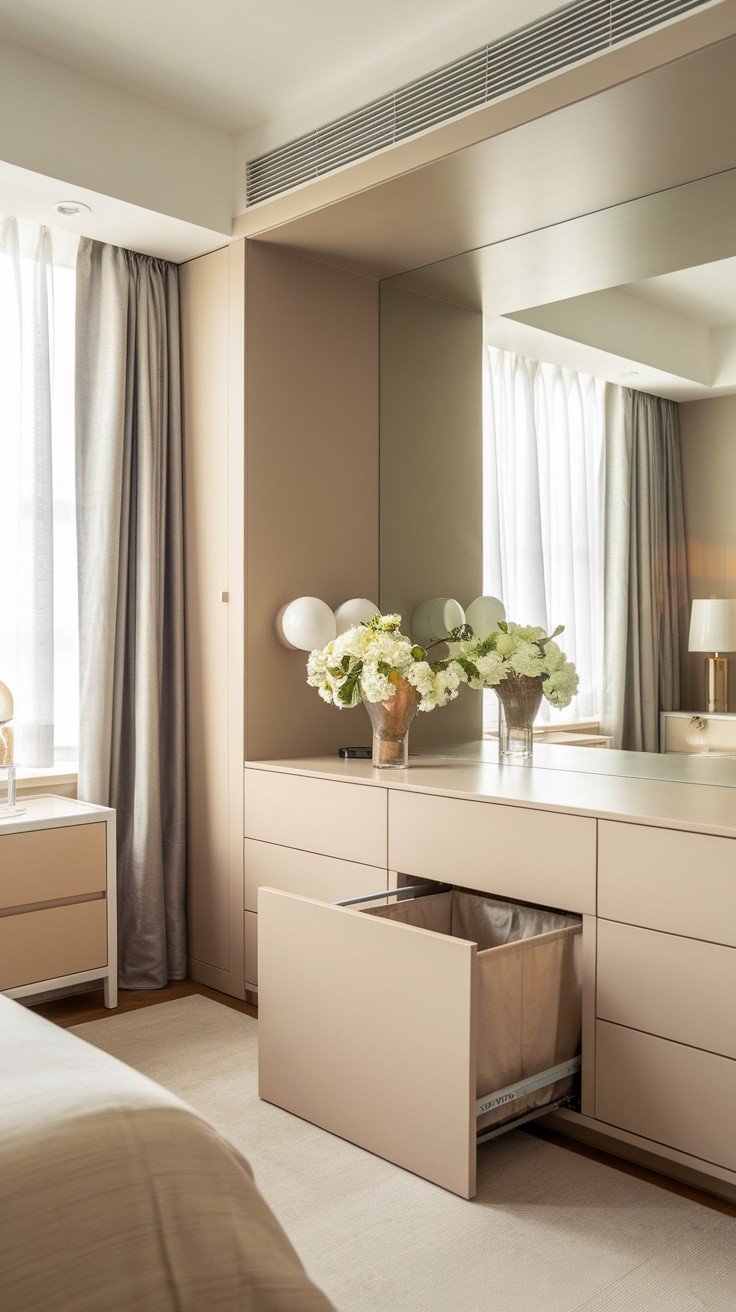
6. Glass Door Display Dresser for Small Spaces

Glass doors change everything about storage. Instead of hiding your clothes, you get to show off your favorite pieces.
Here’s what happens: You start keeping things more organized because people can see inside. It’s like having a mini boutique in your bedroom.
Small rooms benefit the most. Glass reflects light and makes spaces feel bigger. Your room looks less cramped, even with more storage.
Safety first – use tempered glass only. Regular glass breaks into dangerous pieces. Tempered glass crumbles safely if it ever breaks.
Make shelves adjustable. Your storage needs change over time. Boots need a different space from folded shirts.
But here’s where it gets interesting.
Create special spots for specific things. Build a narrow section for ties. Add hooks for belts. Make a jewelry display area.
Magic happens when everything has its place. You can see where things go, so you put them back. Your room stays organized without extra effort.
Bottom line: Glassdoor dressers work like display cases. They store your clothes and make your room look more spacious at the same time.
7. Sliding Door Built-In for Space-Constrained Areas
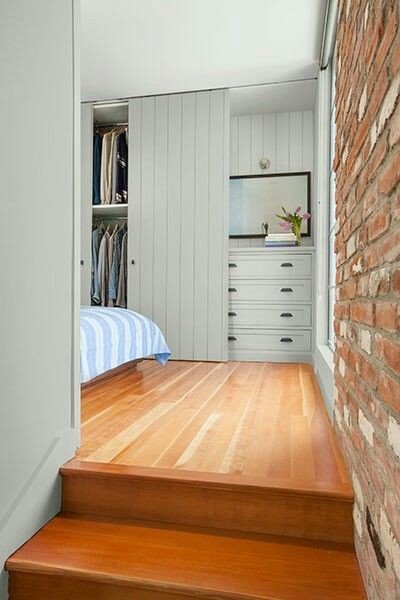
Regular doors need swing space. In tiny bedrooms, that’s space you don’t have.
Sliding doors solve this problem. They move sideways instead of opening out. You get full access to your storage without losing floor space.
Good hardware makes all the difference. Cheap tracks stick and jam. Invest in quality rollers that slide smoothly every time.
Here’s a smart upgrade: Add mirrors to your sliding doors. Now you have storage AND a full-length mirror-two functions in one space.
Just remember: Doors need room to slide. Make sure there’s clear wall space for the door to move into.
Wood doors feel warm and traditional. Glass doors keep things light and airy. Composite materials offer durability without the cost.
Match your room’s style. Dark wood for cozy spaces. Light colors for modern looks. The doors should blend with your existing furniture.
Handles matter more than you think. You’ll use these every day. Choose ones that feel good in your hand.
The result? Storage that doesn’t steal your walking space. Perfect for bedrooms where every square foot counts.
Essential Planning and Installation Guidelines
Measuring and Space Assessment
Measure twice and cut once. This old saying will save you money and headaches.
Get a good tape measure and a level. Write down every measurement. Don’t trust your memory on numbers.
Look for obstacles before you start building. Electrical outlets, light switches, and heating vents all affect your design. Mark them on your plan.
Walk through the space. You need at least 36 inches for comfortable walking. Less than that, and your room feels cramped.
Material Selection and Budgeting
IKEA hacks cost $300-500. Custom-built-ins run $1,000-3,000 depending on size and materials.
Don’t go cheap on hardware. Drawer slides and hinges are used every day. Spend more here and save on headaches later.
Here’s what you’ll need for most projects: a drill, a level, a stud finder, and basic hand tools. Nothing fancy is required.
Conclusion
These seven built-in dresser solutions prove that small bedrooms don’t have to mean limited storage. From IKEA hacks to corner installations, you now have practical options that fit your space and budget.
Your storage problems are solved. Whether you choose sliding doors for tight spaces or under-bed platforms for maximum capacity, each idea maximizes your room’s potential without sacrificing style.
The best part? Most of these projects use basic tools and skills. You don’t need to be a carpenter to create professional-looking results.
Ready to get started? Pick the built-in dresser idea that fits your room best. Share your favorite solution in the comments below – I’d love to hear which one speaks to your space.
Your organized, clutter-free bedroom is closer than you think.
Frequently Asked Questions
How much does a built-in dresser cost for a small bedroom?
Built-in dresser costs range from $300-500 for IKEA hacks to $1,000-3,000 for custom installations. Your final price depends on materials, size, and whether you DIY or hire professionals. Simple conversions of existing furniture cost the least.
Do built-in dressers add value to your home?
Yes, built-in dressers typically add home value, especially in small bedrooms where storage is premium. They’re considered permanent fixtures that appeal to buyers looking for organized, functional spaces.
Can you install a built-in dresser without professional help?
Many built-in dresser projects are DIY-friendly, especially IKEA hacks and existing furniture conversions. You’ll need basic tools and skills for measuring, drilling, and assembly. Complex electrical or structural work requires professionals.
What’s the minimum space needed for a built-in dresser?
You need at least 13 inches of depth for comfortable passage and 36 inches of walking space around the unit. Corner installations can work in tighter spaces by utilizing typically unused areas.
How do you make a built-in dresser look professional?
Key elements include proper wall anchoring, level installation, quality trim work, and matching paint or finishes. Remove existing baseboards for flush mounting and add crown molding for a custom appearance.