

Ready to transform your kitchen without breaking the bank?
Building your cabinet doors is one of the most rewarding home improvement projects you can tackle.
Not only will you save hundreds (or even thousands) of dollars compared to buying pre-made doors, but you’ll also gain the satisfaction of creating something with your own hands.
Creating DIY cabinet doors might seem intimidating at first, but with the right guidance and basic woodworking skills, it’s achievable for most homeowners.
You don’t need a professional workshop or expensive machinery, just some essential tools, quality materials, and patience.
In this comprehensive guide, we’ll walk you through each step of the process, from measuring your existing cabinets to installing the finished doors.
By the end, you’ll have beautiful, custom cabinet doors that perfectly match your style and budget.
Let’s get started on this exciting project!
Materials and Tools You’ll Need
Getting the right materials and tools from the start will make your project much smoother and help you achieve professional results.
Essential Materials
|
Material |
Purpose |
Notes |
|
1×3 Poplar lumber |
Rails and stiles (door frame) |
Measures 2.5″ wide – great for sturdy frames |
|
¼” Birch Plywood or MDF |
Center panel |
Birch plywood offers natural grain; MDF provides a smooth finish |
|
Wood glue |
Joining frame pieces |
Choose high-quality wood glue for strong bonds |
|
Wood screws |
Pocket hole connections |
Size depends on your jig specifications |
|
Wood filler |
Filling holes and gaps |
Helps achieve a smooth, professional finish |
|
Primer |
Base coat preparation |
Essential for paint adhesion |
|
Paint |
Final finish |
Choose quality paint for durability |
Recommended Tools
|
Tool |
Function |
Why You Need It |
|
Miter saw |
Cross-cutting lumber to length |
Ensures precise, square cuts |
|
Table saw |
Ripping lumber and cutting grooves |
Essential for straight cuts and panel grooves |
|
Clamps |
Holding pieces during assembly |
Multiple clamps ensure tight joints |
|
Drill |
Making holes and driving screws |
Cordless models offer convenience |
|
Pocket hole jig (Kreg Jig) |
Creating strong rail-to-stile joints |
Simplifies traditional joinery methods |
|
Orbital sander |
Smoothing surfaces |
Creates a professional finish quality |
|
Speed square |
Checking angles and marking |
Ensures accurate measurements |
|
Tape measure |
Taking precise measurements |
Critical for proper door sizing |
|
Pencil |
Marking cut lines |
Simple but essential for accuracy |
Optional Tools
|
Tool |
Benefit |
Alternative |
|
Concealed hinge jig |
Precise hinge placement |
Mark and drill by hand |
|
Paint sprayer |
Professional finish quality |
Foam roller works well too |
|
Dado blade |
Faster groove cutting |
Multiple passes with a regular blade |
Having quality tools makes the process easier, but don’t feel you need everything at once. Many of these can be borrowed or rented if you’re just starting.
Step-by-Step Guide to Build DIY Cabinet Doors
Step 1: Measure and Plan

Take Accurate Measurements. Measure your cabinet openings carefully, accounting for any overlays or reveals you want. For inset doors, leave about 1/8″ reveal on all sides.
Sketch your door layout with measurements. This visual reference helps verify your math and prevents costly mistakes.
Determine Cut List: Calculate exact dimensions for stiles (vertical pieces), rails (horizontal pieces), and center panels. Remember that 1×3 lumber measures 2.5″ wide, not 3″. Write down all measurements clearly before making any cuts.
Step 2: Cut the Wood Pieces
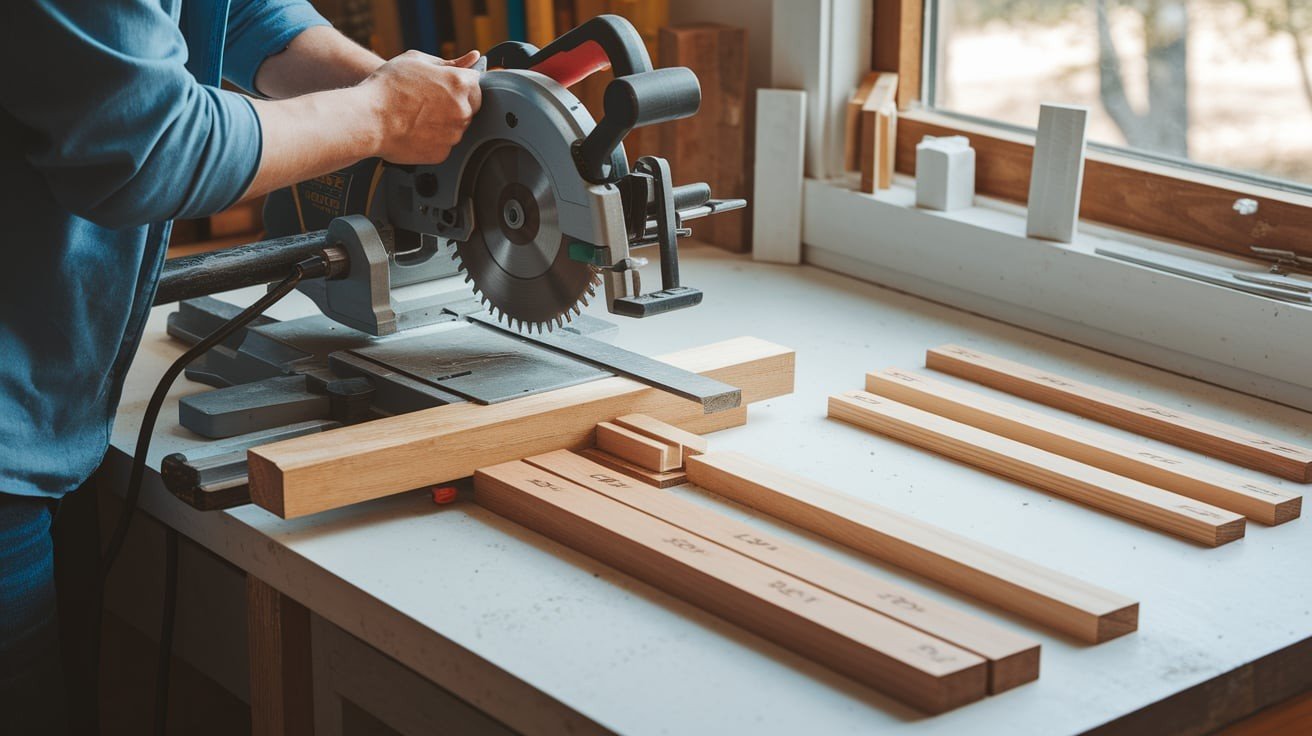
Cut Rails and Stiles. Cut your 1×3 poplar boards to the calculated lengths using a miter saw. Set up a stop block for repeated cuts to ensure all same-length pieces are identical. This consistency is crucial for square, professional-looking doors.
Dry Fit and Label: Assemble all pieces without glue to check fit and alignment. Number each piece clockwise (1-4) with pencil marks so you’ll use the same placement during final assembly. This step catches measurement errors before permanent joining.
Step 3: Join the Frame
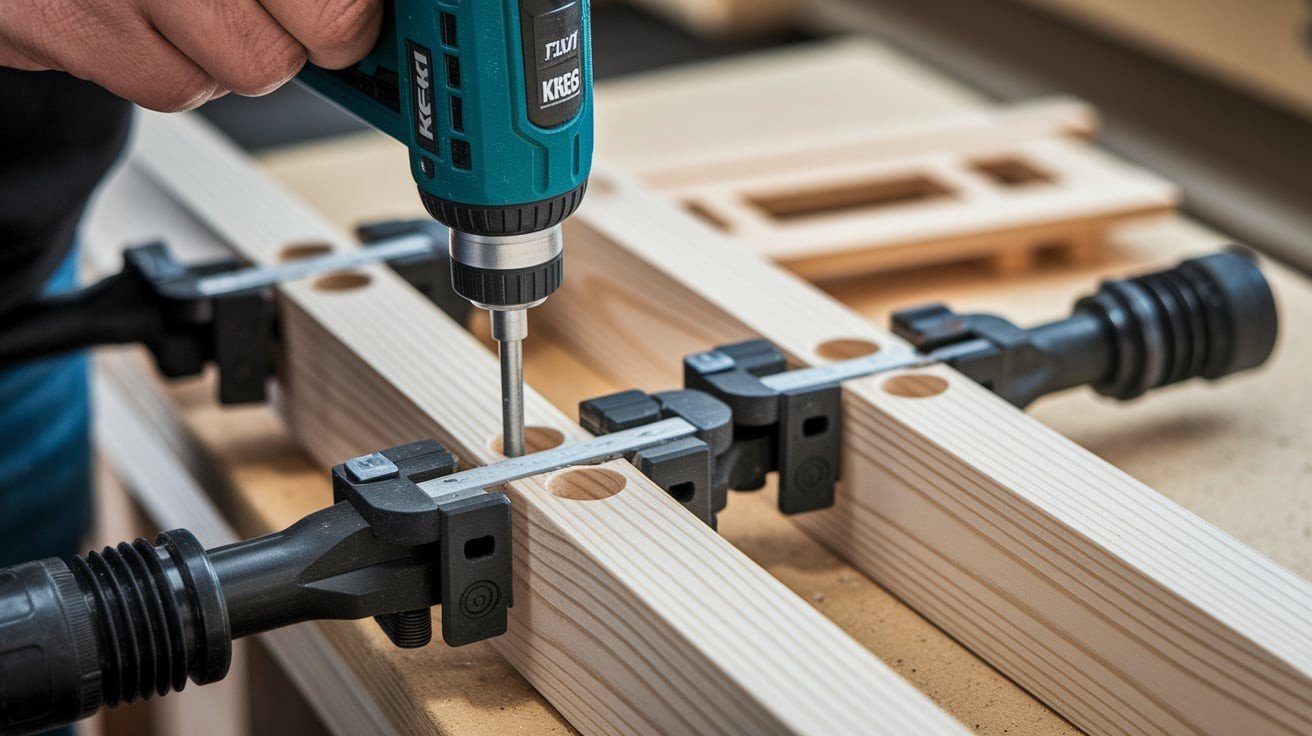
Drill Pocket Holes (Shaker Style) Using your Kreg Jig, drill two pocket holes into each end of every rail. Practice on scrap wood first to get comfortable with the process. Use a strong clamp to prevent wood movement while drilling.
Or Cut Tenons (Inset Style) For traditional joinery, cut ¾” long tenons on rail ends using a dado blade or multiple passes with a regular blade. This creates stronger joints than pocket holes but requires more skill and setup time.
Step 4: Create Panel Groove
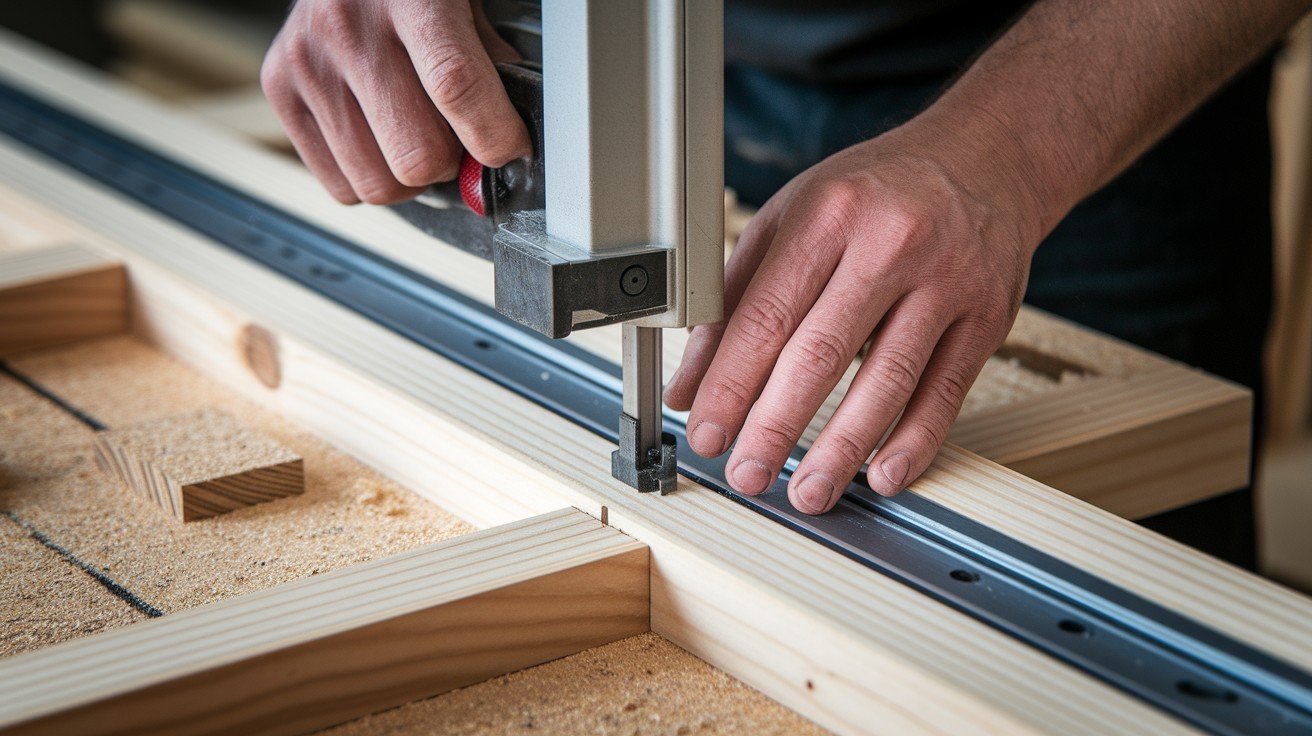
Cut Notch or Groove Set your table saw blade to ¼” depth and cut a groove down the center of all rails and stiles. This groove will hold your center panel. Test the groove width on scrap wood to ensure your panel fits properly.
Step 5: Cut the Center Panel
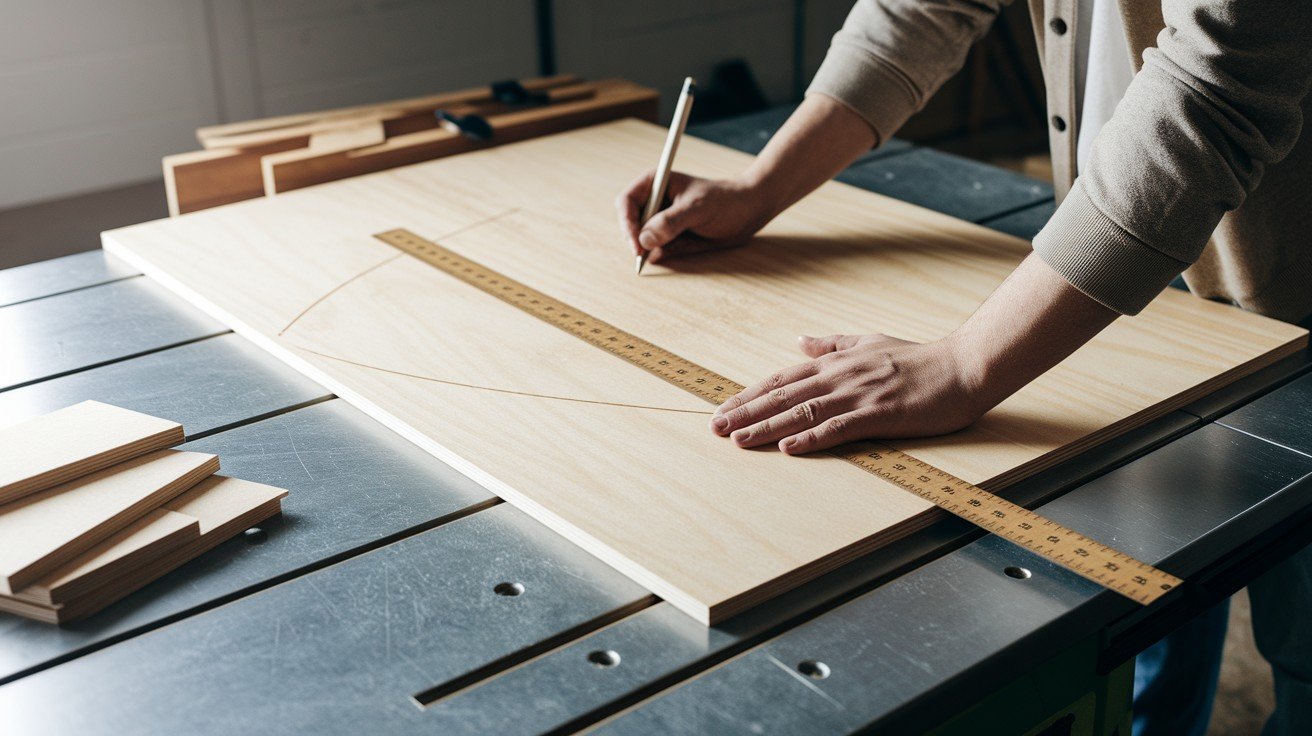
Measure and Cut Plywood or MDF Measure the space between rails and stiles, then add about 5/8″ total (for groove insertion). Cut your plywood or MDF panel slightly oversized – you can always trim it smaller until it fits perfectly in the grooves.
Step 6: Assemble the Cabinet Door
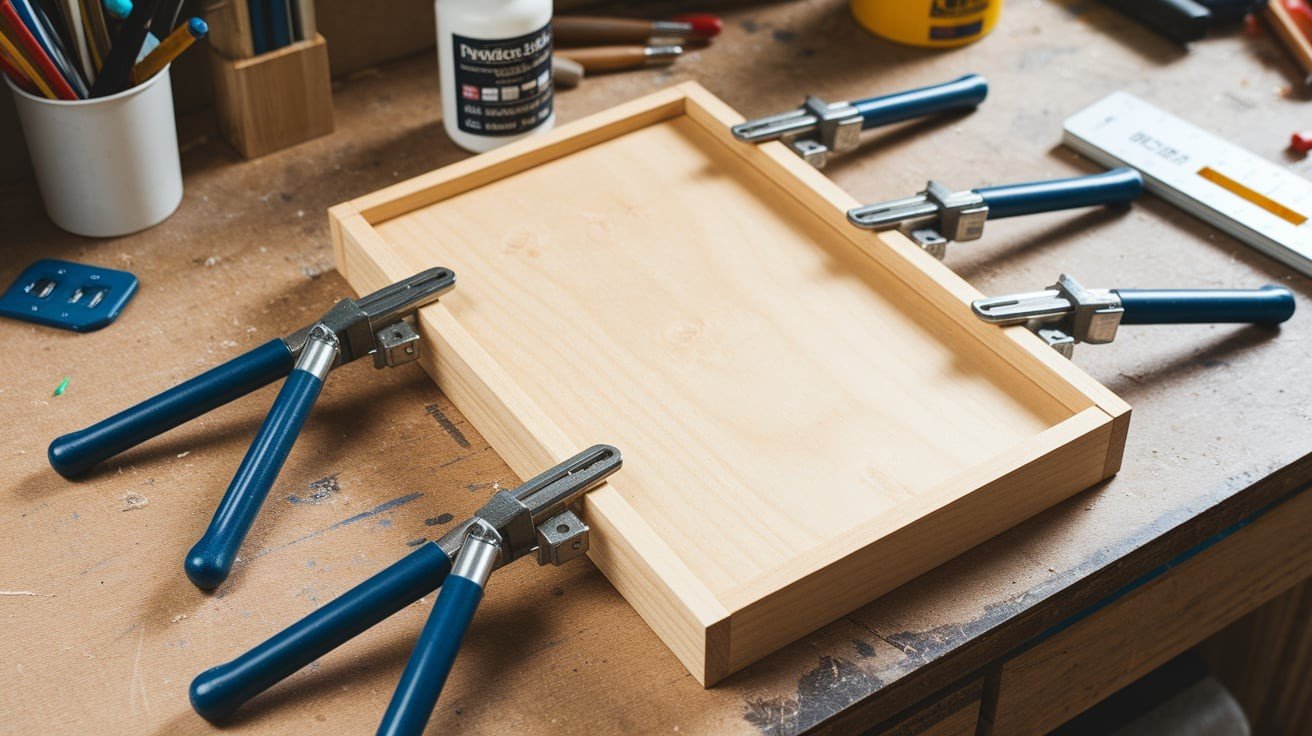
Glue and Clamp: Apply wood glue to pocket holes or tenons. Attach one stile and both rails first, slide in the center panel, then add the final stile. Clap everything tightly and let dry completely – usually 24 hours for full strength.
Step 7: Fill, Sand, and Prep
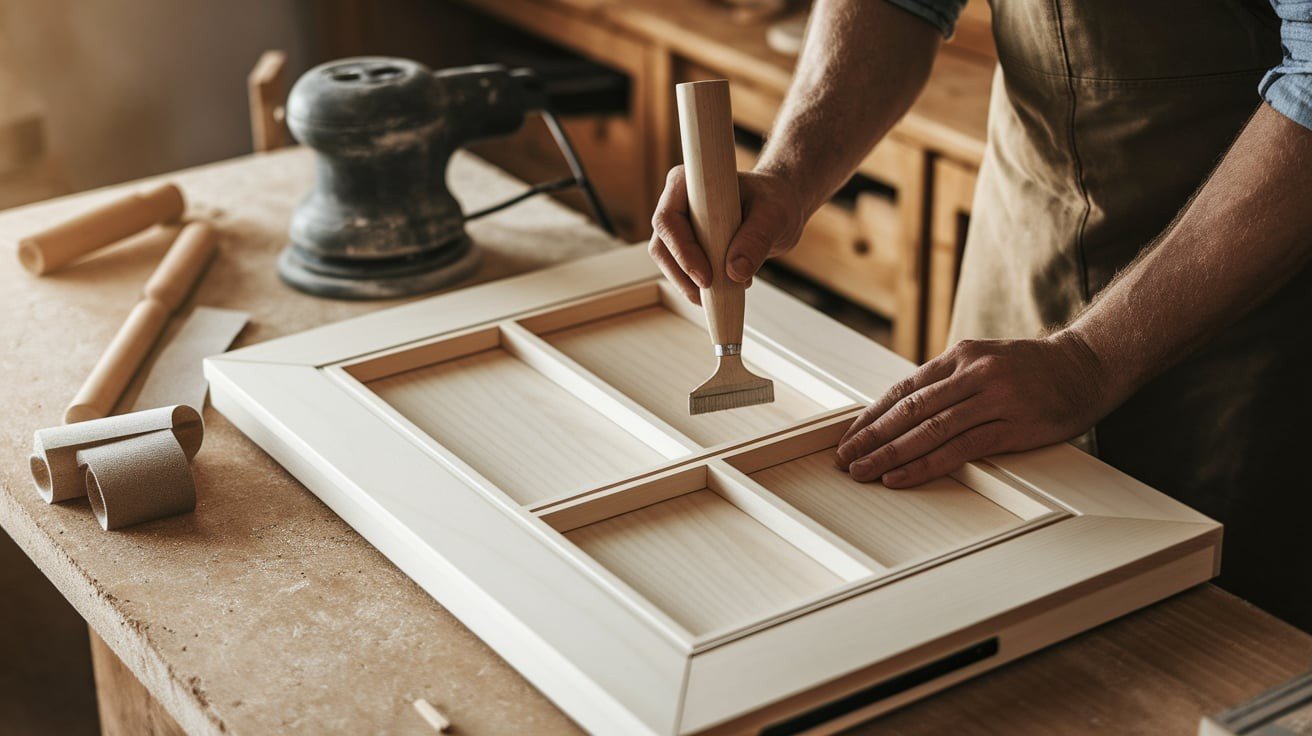
Finish the Surface Fill all pocket holes, gaps, and imperfections with wood filler or Bondo. Once dry, sand progressively from 80-grit to 220-grit sandpaper. This creates the smooth surface needed for a professional paint finish.
Step 8: Prime and Paint
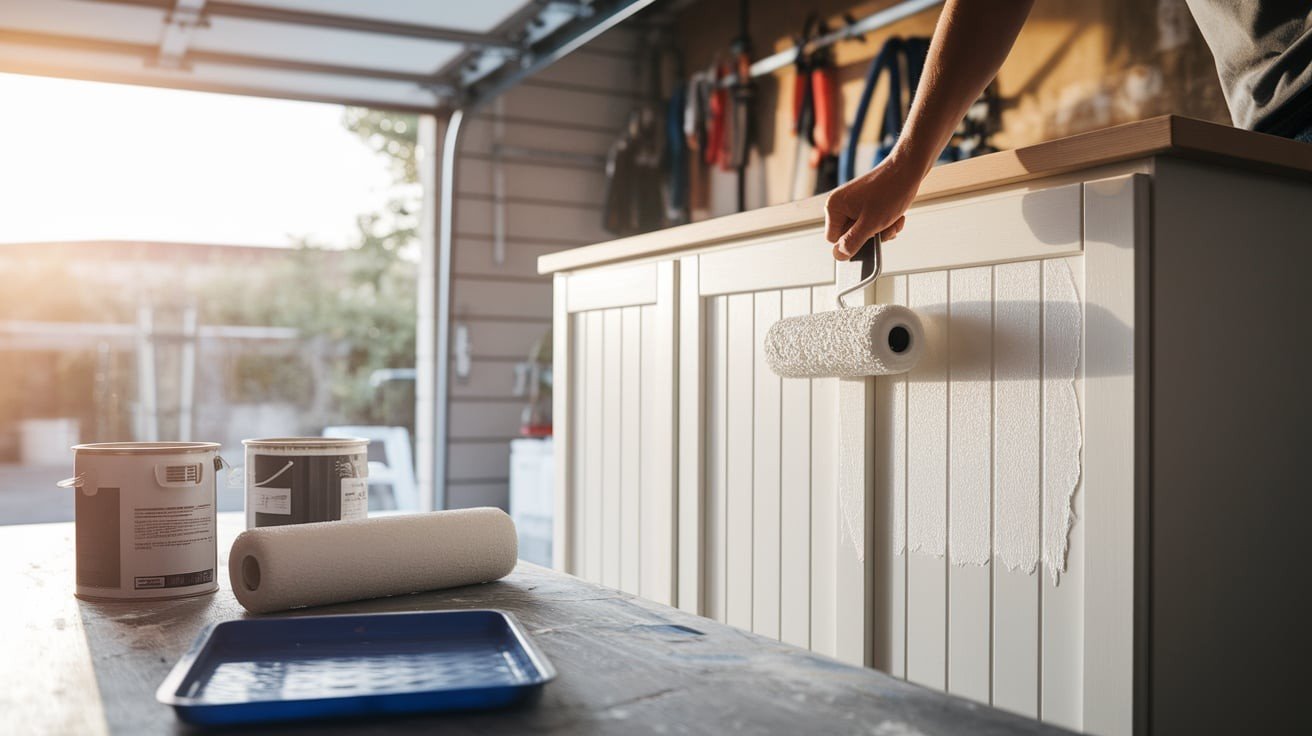
Apply Finish Prime all surfaces with quality primer for better paint adhesion. Apply paint using a foam roller or sprayer for smooth, even coverage. Multiple thin coats look better than one thick coat. Allow proper drying time between coats.
Step 9: Add Hinges and Install
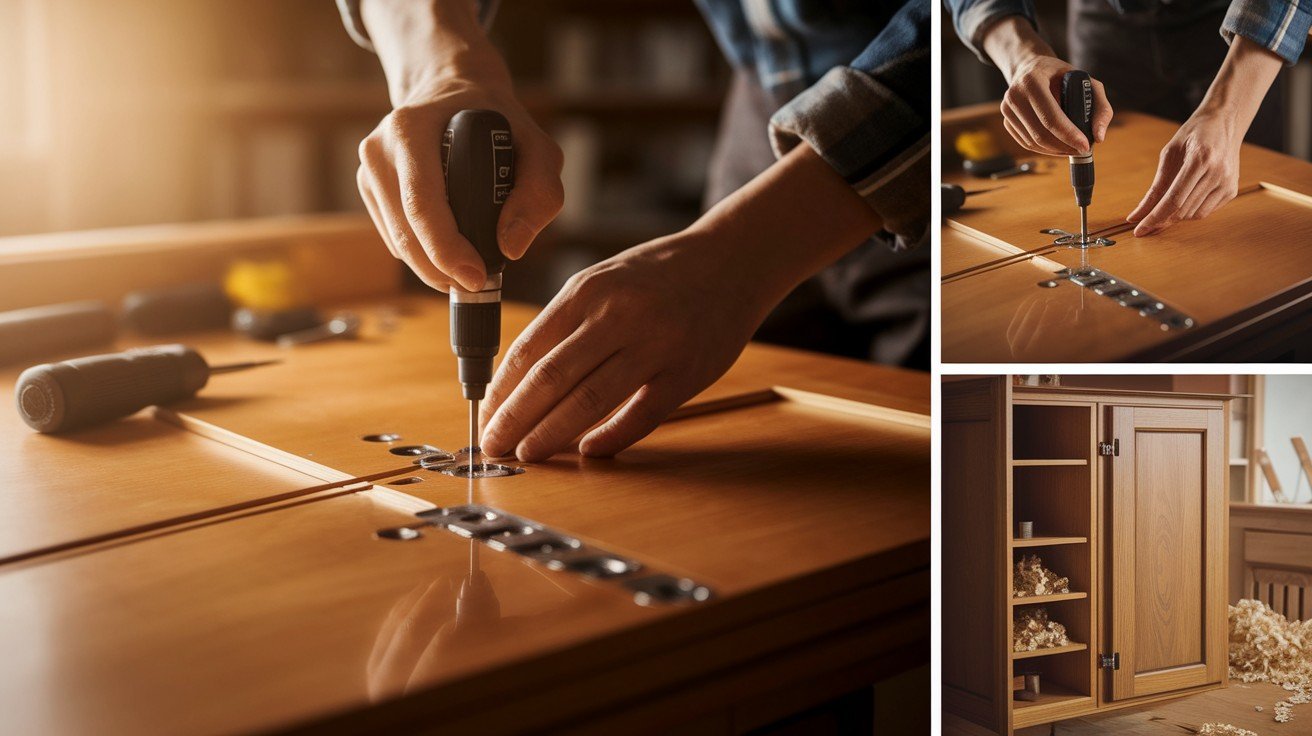
Drill Hinge Holes Use a concealed hinge jig for precise placement, or mark and drill carefully by hand. Pre-drill all screw holes to prevent wood splitting. Test fit hinges before final installation.
Install Doors Mark hinge positions on cabinet boxes and pre-drill holes. Attach hinges to cabinets and test door alignment. Make adjustments as needed for proper fit and smooth operation.
Step 10: Add Hardware
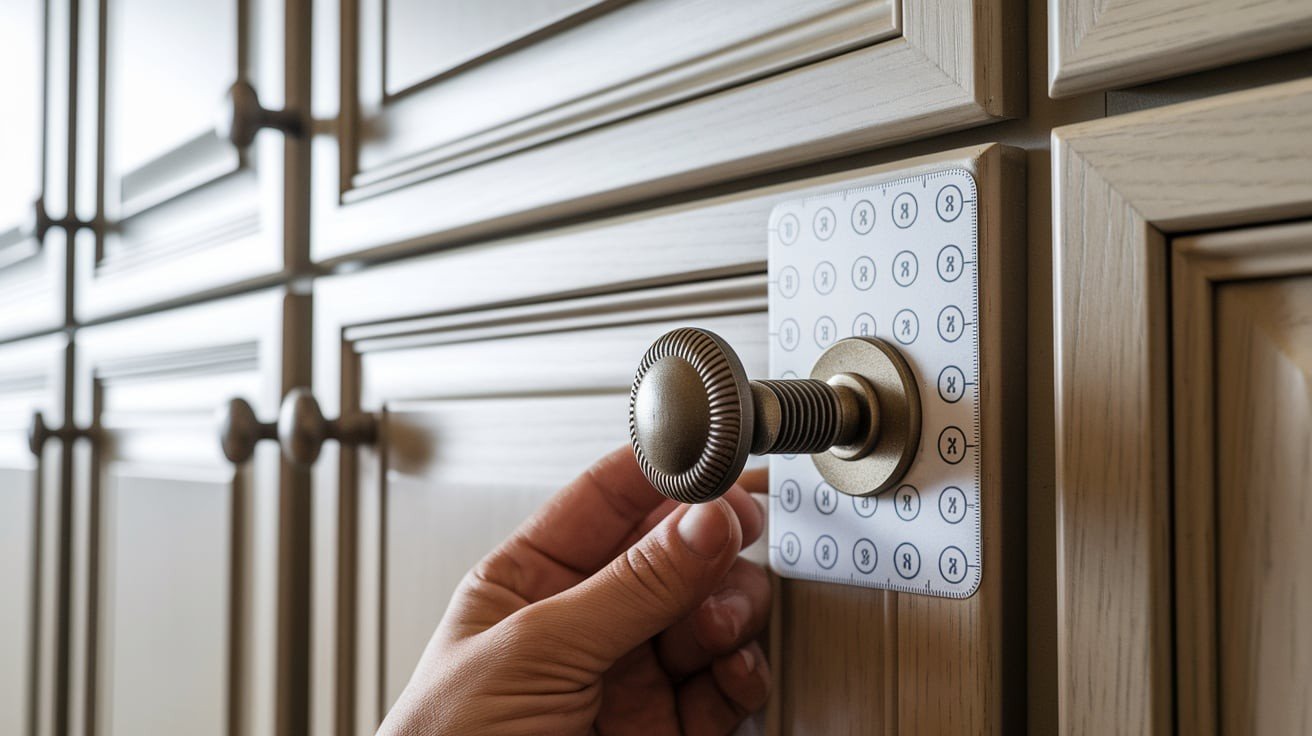
Mark knob or pull locations using a template for consistency across all doors. Pre-drill holes to prevent cracking. Install hardware with appropriate screws, ensuring all pieces are aligned and secure for daily use.
Conclusion
Congratulations! You’ve just completed your first set of DIY cabinet doors, and that’s something to be genuinely excited about.
What started as a potentially intimidating project has turned into a real accomplishment that you can see and touch every day in your kitchen.
Building these doors yourself probably saved you hundreds of dollars compared to buying pre-made ones, but the real reward goes beyond money.
You’ve gained new skills, boosted your confidence, and proven to yourself that with patience and the right guidance, you can tackle projects you might have thought were out of reach.
Every time you open these doors, you’ll remember the satisfaction of creating something functional and beautiful with your own hands.
Plus, you now have the knowledge and experience to take on even more ambitious woodworking projects in the future.
Take a moment to step back and admire your work; you’ve earned it!
Frequently Asked Questions
Can I build cabinet doors without a table saw?
Yes, you can use a circular saw with a guide for most cuts, though a table saw makes the process easier and more precise.
How long does it take to build one cabinet door?
Plan on 2-3 hours per door for beginners, including drying time. Experienced builders can complete doors in about 1 hour each.
What’s the difference between overlay and inset cabinet doors?
Overlay doors sit on top of the cabinet frame, while inset doors fit inside the frame opening with small reveals around the edges.