

Are you tired of doing your makeup in poor lighting or cramped bathroom spaces?
Creating your DIY makeup vanity might be the perfect solution you’ve been searching for! Instead of spending hundreds on store-bought options, you can build a beautiful, functional space that fits your exact needs and budget.
Most of us struggle with inadequate makeup spaces – often characterized by poor lighting, insufficient storage, or a lack of a dedicated area altogether.
Rushing through your morning routine because you can’t see properly, or digging through cluttered drawers to find your favorite lipstick, makes getting ready a stressful rather than an enjoyable experience.
With some creativity and basic DIY skills, you can transform any corner of your room into a stunning makeup station that’s both practical and Instagram-worthy.
Let’s explore some amazing DIY makeup vanity ideas that will completely transform your daily beauty routine!
Essential Elements of a DIY Vanity Setup
- The Right Table or Desk forms your foundation. Consider repurposing an old desk, console table, or installing a wall-mounted shelf for smaller spaces.
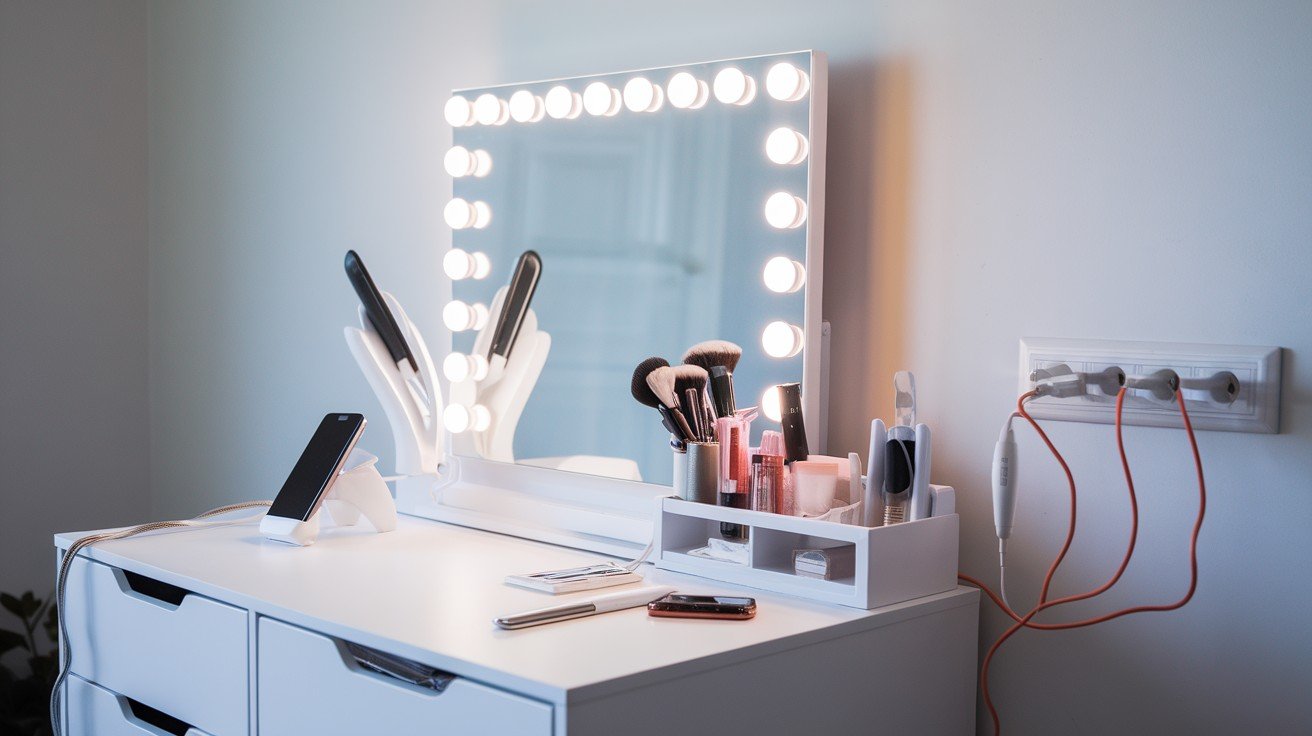
- Mirror Options are crucial for functionality and style. Choose from wall-mounted mirrors for permanence, tabletop versions for flexibility, or create Hollywood-style glamour with bulb-framed designs. You can even craft custom DIY mirror frames to match your room’s vibe.
- Proper Lighting makes all the difference between a professional finish and makeup mishaps. Balance natural light with artificial options by installing LED strips or vanity bulbs around your mirror.
- Comfortable Seating completes your setup – transform old chairs with fresh upholstery, build simple DIY stools, or add plush cushions to existing seating. These four elements work together to create a functional, comfortable makeup space that rivals any store-bought vanity.
Creative DIY Vanity Ideas to Try
Floating Vanity Shelf for Small Spaces
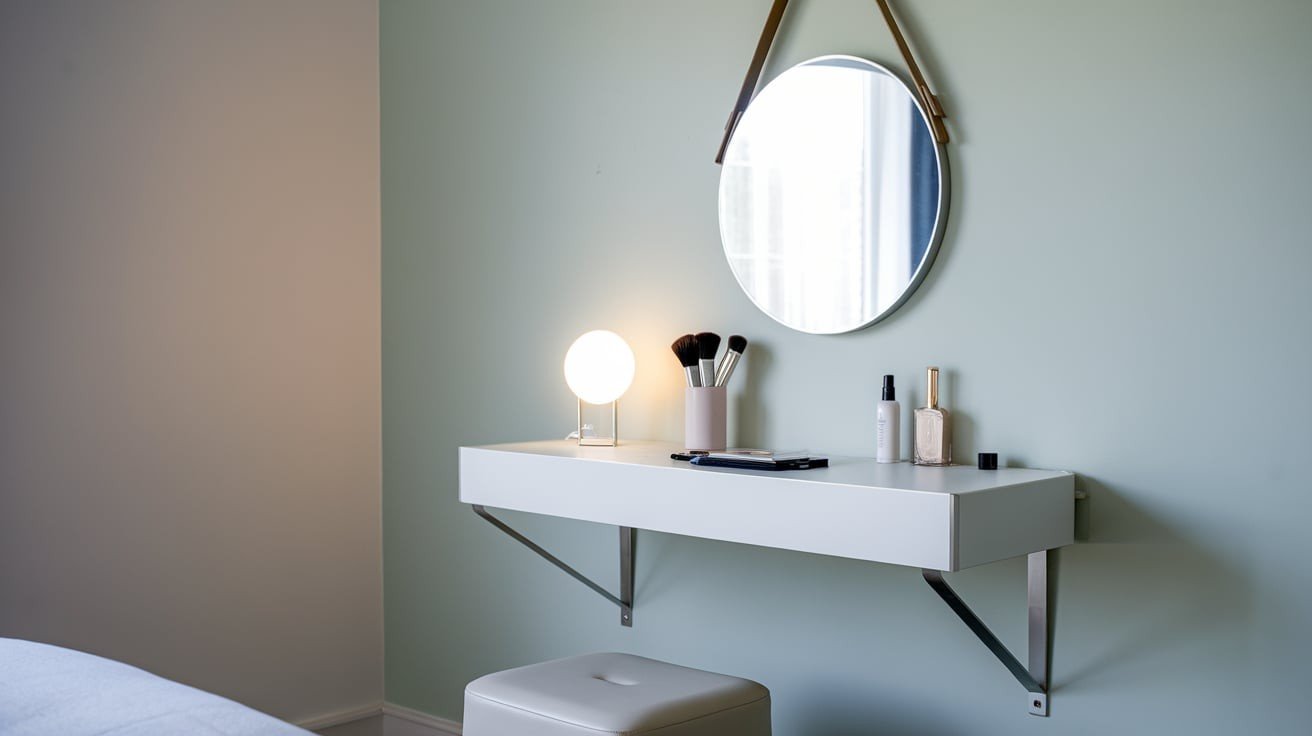
Perfect for tight quarters, this minimalist design requires just a sturdy shelf, wall brackets, and basic mounting hardware.
Secure it at a comfortable height, add a small mirror above, and you’ve created a sleek, modern vanity that doesn’t consume floor space while maintaining a clean line.
How to Achieve: Mount wall brackets into studs, attach a 24-36 inch shelf at sitting height (28-30 inches). Install a compact mirror directly above. Use cable management for any lighting. Total project time: 2-3 hours with basic tools.
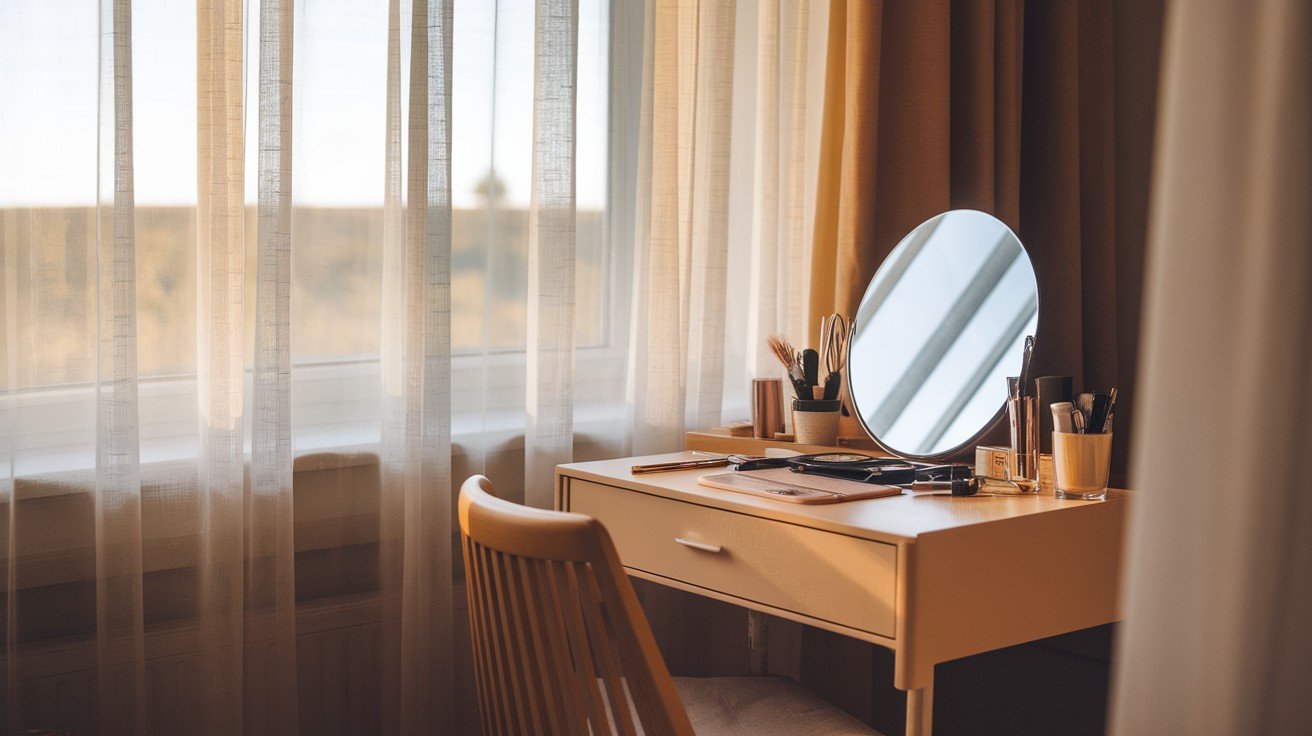
Vintage Dresser Turned Makeup Vanity
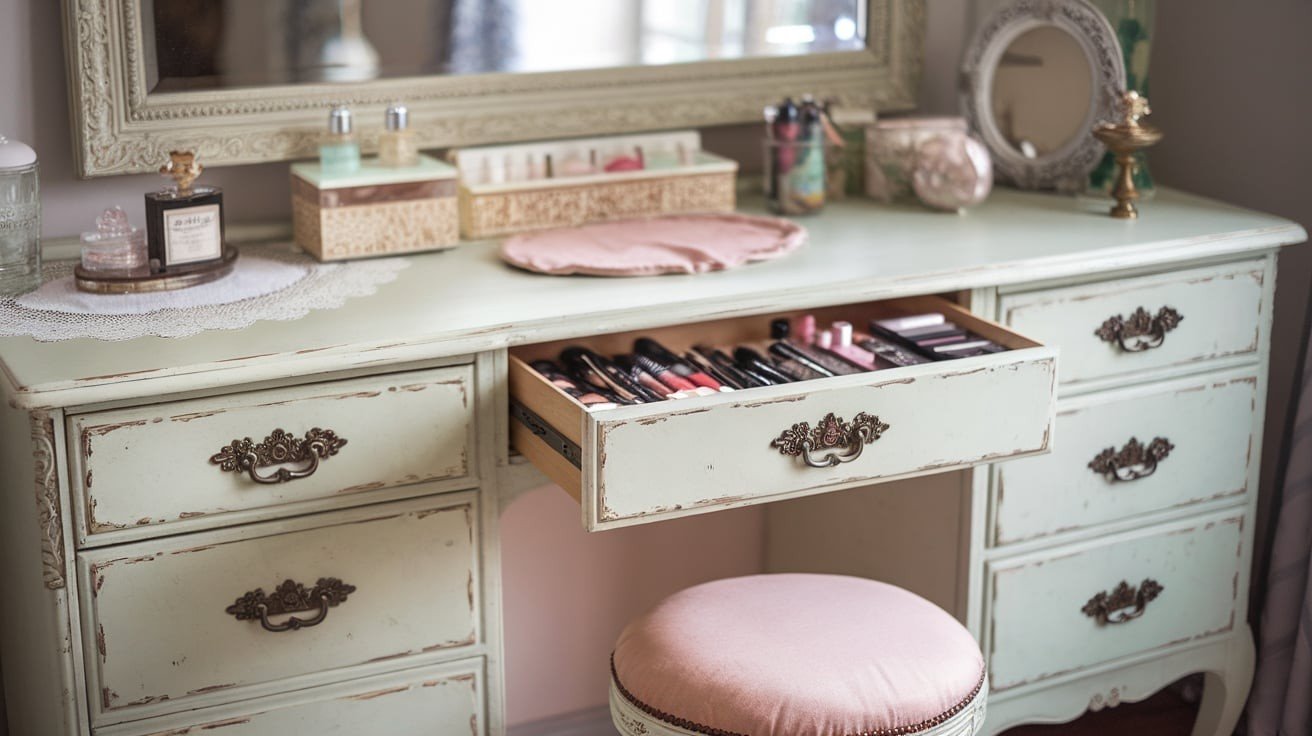
Transform thrift store treasures into beauty stations by sanding down old finishes, applying fresh paint in your preferred color, and integrating a mirror on top.
This upcycling approach gives you built-in storage drawers while adding character and charm to your room at a fraction of retail costs.
How to Achieve: Sand existing finish, apply primer, and paint in chosen color. Remove or modify the top drawer for leg room. Mount the mirror using brackets or lean it against the wall. Add organizers inside the remaining drawers. Budget 1-2 weekends for completion.
Vanity with Built-in Storage Drawers
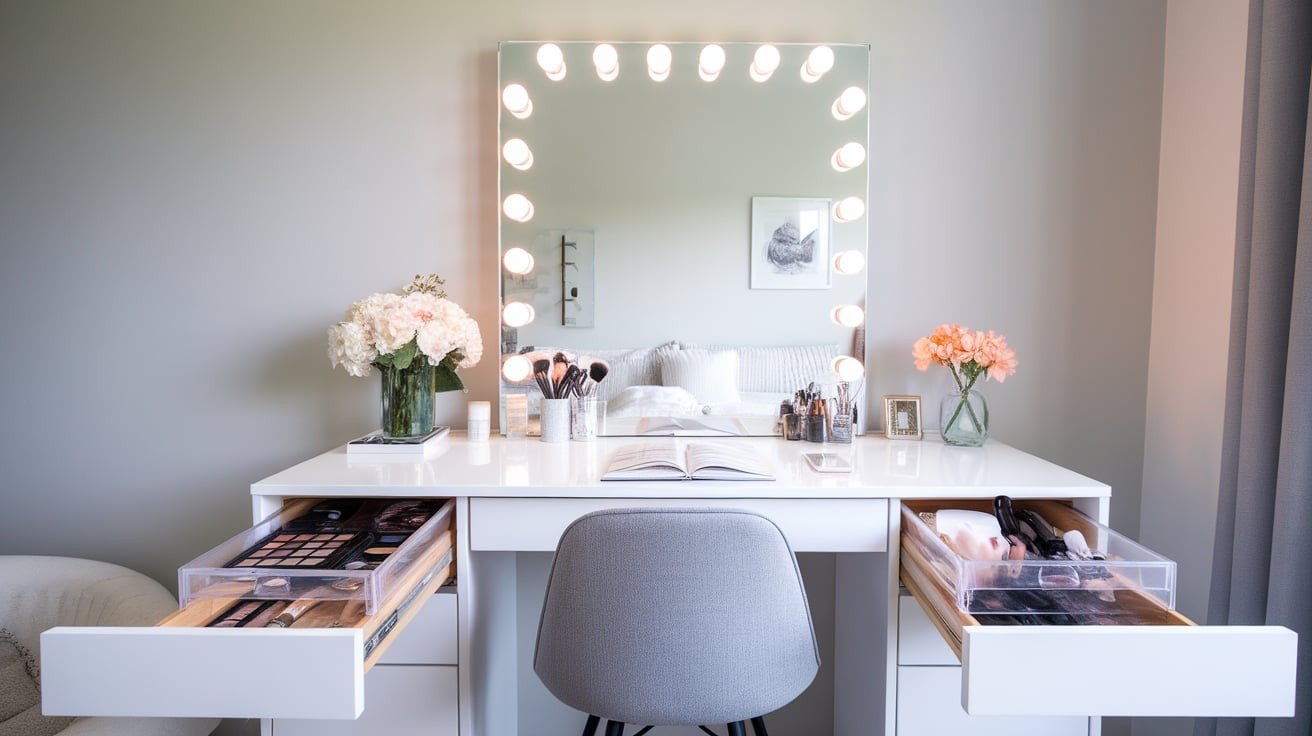
Maximize organization by adding drawer units beneath your vanity surface or repurposing existing furniture with multiple compartments. Create designated spaces for brushes, palettes, skincare products, and accessories.
This design keeps everything within reach while maintaining a clutter-free, professional appearance for your daily routine.
How to Achieve: Purchase drawer units from furniture stores and position them under the desk surface. Alternatively, modify existing furniture by adding slide-out organizers. Install drawer pulls and dividers. Measure carefully to ensure proper fit and accessibility.
Corner Vanity Design
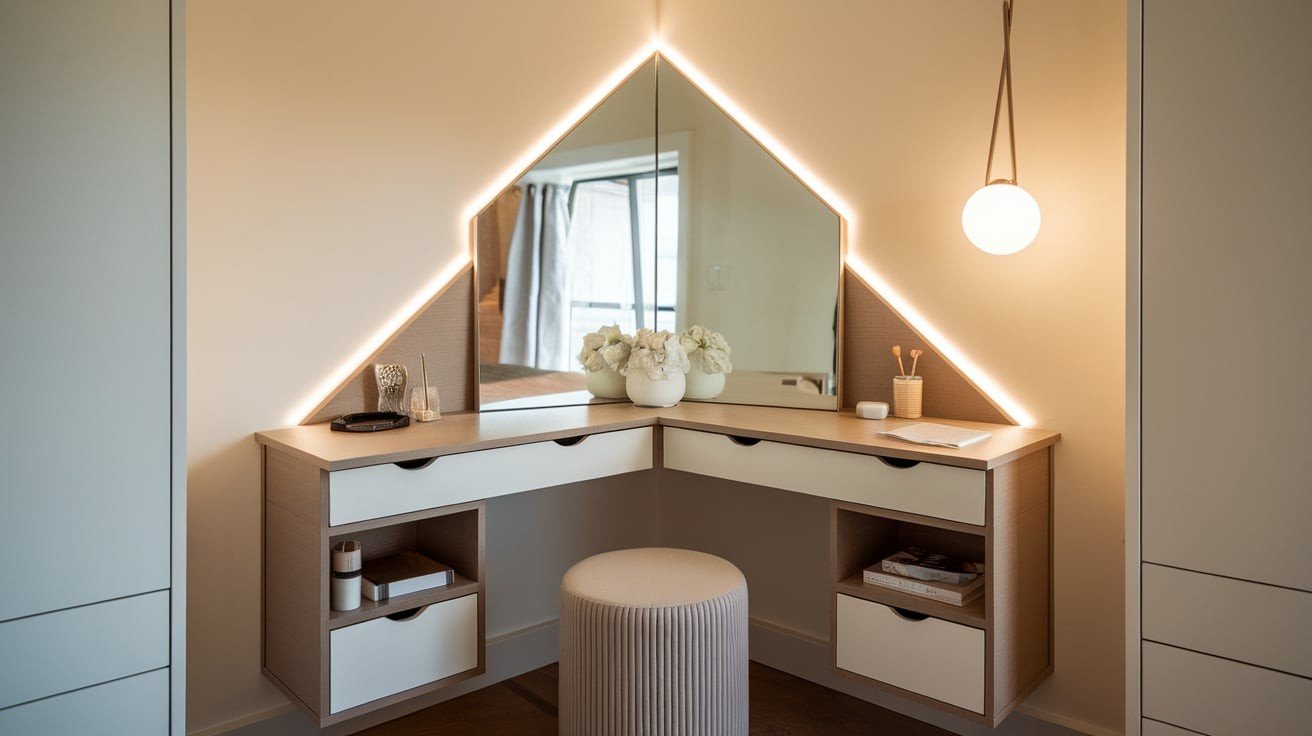
Upgrade unused corner space into a functional beauty area with L-shaped configurations or folding designs that tuck away when not needed.
These space-saving solutions work perfectly in bedrooms or bathrooms where traditional vanities won’t fit, making efficient use of every square inch available.
How to Achieve: Build an L-shaped surface using two pieces joined at 90 degrees, or purchase a corner desk. Mount the triangular mirror in the corner angle. Add under-surface storage cubes. Use corner space efficiently with rotating organizers for maximum functionality.
Storage & Organization Tips
- DIY Drawer Dividers – Create custom compartments using cardboard boxes, acrylic containers, or bamboo organizers cut to fit your drawer dimensions perfectly. Sort brushes by size, separate lipsticks by color, and give each palette its own designated space for easy access.
- Acrylic Tray Systems – Invest in clear acrylic trays that stack and nest together, allowing you to see everything at a glance while keeping items secure. These versatile organizers work for both drawer and countertop storage, adapting to your changing collection needs.
- Wall-Mounted Shelves – Install floating shelves above your vanity to display frequently used products while freeing up valuable surface space below. Choose coordinating brackets and shelf materials that complement your vanity design for a cohesive, polished look.
- Pegboard Organization – Mount a pegboard beside your vanity and use hooks, small baskets, and magnetic containers to create vertical storage for tools and accessories. This customizable system lets you rearrange items as needed while keeping everything visible and accessible.
- Smart Labeling System – Use attractive labels with consistent fonts and colors to categorize products by type, frequency of use, or color family. Choose labels that match your room’s style – from minimalist clear labels to decorative chalkboard tags for a personalized touch.
Choosing the Perfect Location for Your Vanity
Natural Lighting Considerations
Position your vanity perpendicular to windows rather than directly facing them to avoid harsh shadows on your face.
East-facing windows provide the most flattering morning light, while south-facing windows offer consistent brightness throughout the day.
Consider adding sheer curtains or light filters when direct sunlight becomes too intense, as overly bright light can wash out your makeup application and make color matching difficult.
Power Outlet Accessibility
Plan your vanity location around existing electrical outlets to power LED lights, hair tools, and charging stations for devices.
If outlets aren’t conveniently placed, use high-quality extension cords with surge protection, but route them safely along baseboards or behind furniture to maintain a clean appearance.
Avoid overloading circuits with multiple high-wattage styling tools running simultaneously.
Privacy and Noise Levels
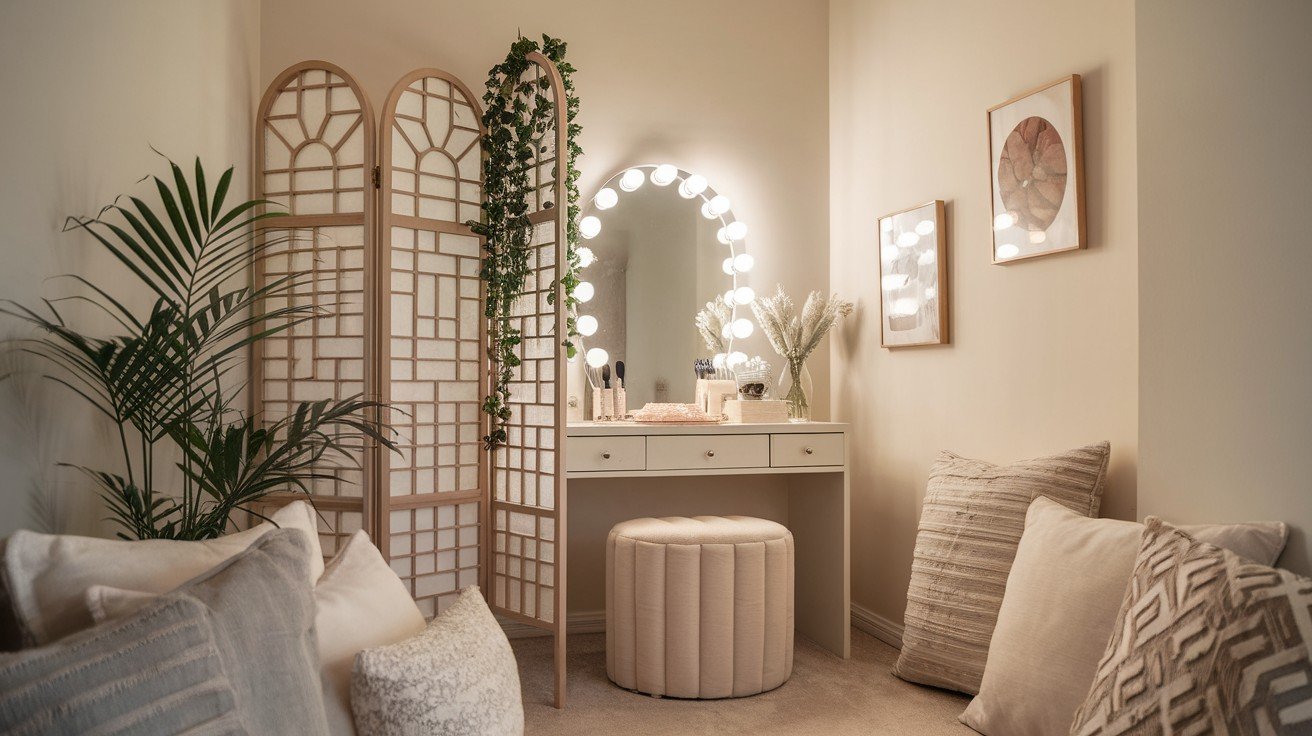
Choose a quiet corner of your bedroom, walk-in closet, or spare room where you can focus on your routine without interruptions.
In shared living spaces, consider adding a decorative room divider or folding screen to create a private beauty zone.
Position your vanity away from high-traffic areas and noisy appliances to maintain a peaceful, relaxing atmosphere during your self-care time.
How to Achieve Your DIY Vanity?
Start by selecting your foundation – repurpose existing furniture or install floating shelves. Focus on four core elements: sturdy surface, quality mirror, adequate lighting, and comfortable seating.
Plan your location considering natural light and power access. Organize with drawer dividers and clear containers.
Begin with a basic setup, then gradually add improvements like LED lighting or extra storage. Choose materials that withstand daily use.
Budget $50-300, depending on your approach. Most importantly, customize the space to match your specific needs and room style.
Conclusion
Creating your DIY makeup vanity is one of the most rewarding home projects you can tackle.
Not only do you save money compared to expensive store-bought options, but you also get a completely customized space that reflects your style and meets your specific needs.
From floating shelves perfect for small apartments to vintage dresser transformations that add character to any room, the possibilities are truly limitless.
Remember that the key to success lies in planning your space carefully, considering lighting and storage needs, and choosing materials that will stand up to daily use.
Start small with basic organization solutions, then gradually add features like better lighting or additional storage as your skills and confidence grow.
Your morning routine will become so much more enjoyable when you have a dedicated, well-organized space that makes you feel pampered and prepared for the day ahead. Happy building!
Frequently Asked Questions
How much does it cost to build a DIY makeup vanity?
Costs range from $50 to $ 300, depending on the materials chosen. Repurposing existing furniture significantly reduces expenses compared to buying new pieces.
What’s the ideal height for a makeup vanity?
Standard vanity height is 28-30 inches, but adjust based on your chair height to ensure comfortable arm positioning during application.
Can I create a vanity in a small bedroom?
Absolutely! Floating shelves, corner designs, and fold-down surfaces maximize functionality while minimizing space requirements in compact rooms.
What type of lighting works best for makeup application?
LED bulbs with daylight color temperature (5000-6500K) provide the most accurate color representation for flawless makeup application results.
How do I organize makeup in a DIY vanity?
Use drawer dividers, clear containers, and vertical storage solutions. Group similar items together and keep daily essentials easily accessible.