

Transform Your Space with a Custom DIY Ottoman
Looking to add both style and function to your home without breaking the bank? A DIY ottoman might be exactly what you need.
This versatile piece of furniture serves as extra seating, a footrest, or even hidden storage, all while reflecting your taste.
Creating your ottoman is surprisingly straightforward, even for beginners. With basic tools and materials you can find at any home improvement store, you’ll have a custom piece that perfectly fits your space and decor.
Plus, you’ll save money compared to buying a similar piece retail.
Ready to roll up your sleeves? This guide walks you through every step, from selecting materials to adding those finishing touches that make your DIY ottoman look professionally made. Let’s get started on this rewarding weekend project.
Tools and Materials
|
Essential Tools |
Materials List |
|
Staple gun |
Plywood or MDF board |
|
Drill |
Foam cushion or padding |
|
Saw (circular or hand saw) |
Batting |
|
Measuring tape |
Fabric (upholstery or decorative) |
|
Screwdriver |
Legs or casters |
|
Screws, nails, and wood glue |
Planning Your DIY Ottoman Design
Choose the Right Size and Shape
Before cutting any wood, think about your ottoman’s final home. A living room piece can be larger and serve as a coffee table alternative, while a bedroom ottoman should stay compact to avoid crowding the space.
Standard dimensions work well as starting points: 18×18 inches for square designs, 16-20 inch diameter for round ottomans, or 24×16 inches for rectangular styles. The height typically ranges from 14-18 inches, depending on your seating.
Pick a Style That Matches Your Decor
Your ottoman should complement your existing furniture. Mid-century modern calls for clean lines and tapered wooden legs.
Rustic farmhouse styles work beautifully with distressed finishes and chunky, painted legs. Boho chic embraces rich textures and bold patterns, while minimalist designs focus on simple shapes with neutral tones and sleek metal legs.
Select Your Fabric
Balance looks with practicality when choosing upholstery. High-traffic areas need durable fabrics like canvas, denim, or performance blends that resist stains and wear.
For low-use spaces, you can prioritize visual appeal with softer materials. Consider maintenance too, darker colors and busy patterns hide dirt better than light, solid fabrics. Current trends favor warm earth tones, vintage florals, and textured weaves.
Step-by-Step Guide: How to Build Your DIY Ottoman
Step 1: Cut and Prepare the Wood Base
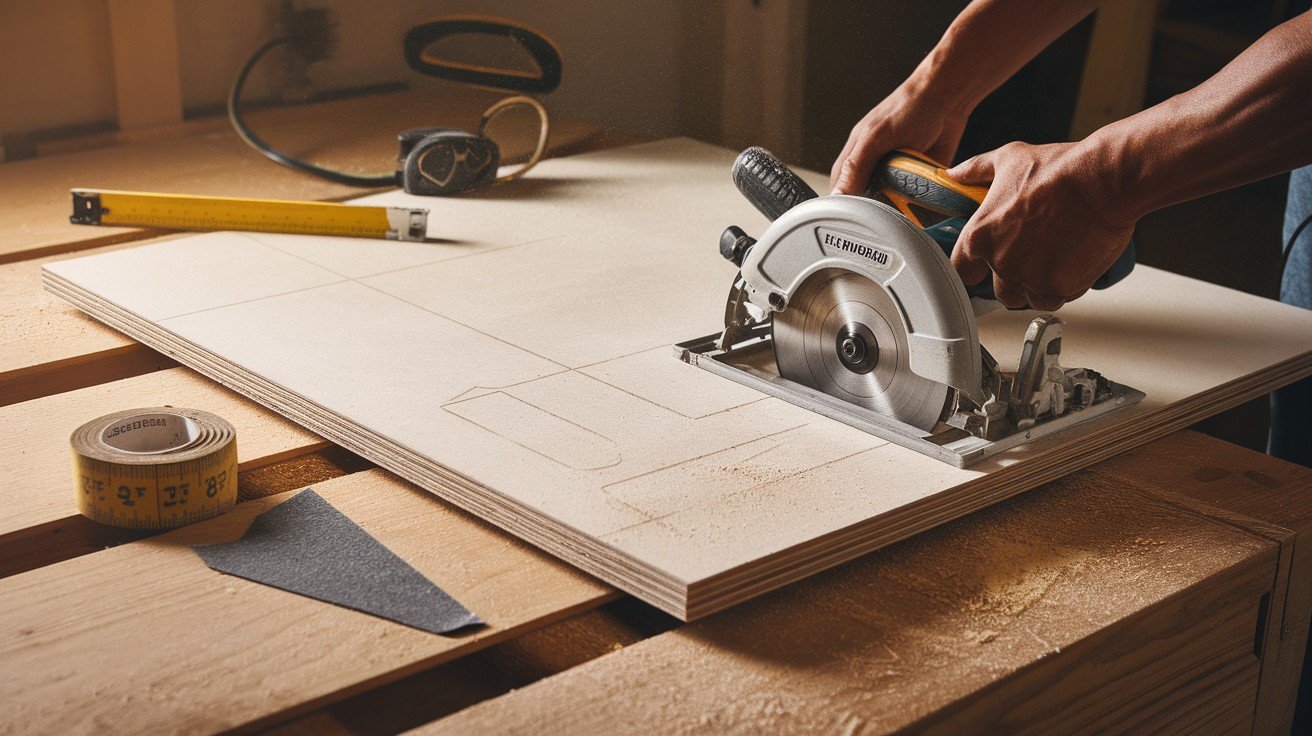
Measure twice, cut once. Mark your dimensions on plywood or MDF, then use a circular saw for straight cuts.
Sand all edges with 120-grit sandpaper to remove splinters and rough spots. Pay special attention to corners where fabric will wrap. A smooth base prevents fabric snags and ensures professional results.
Step 2: Add Foam and Batting
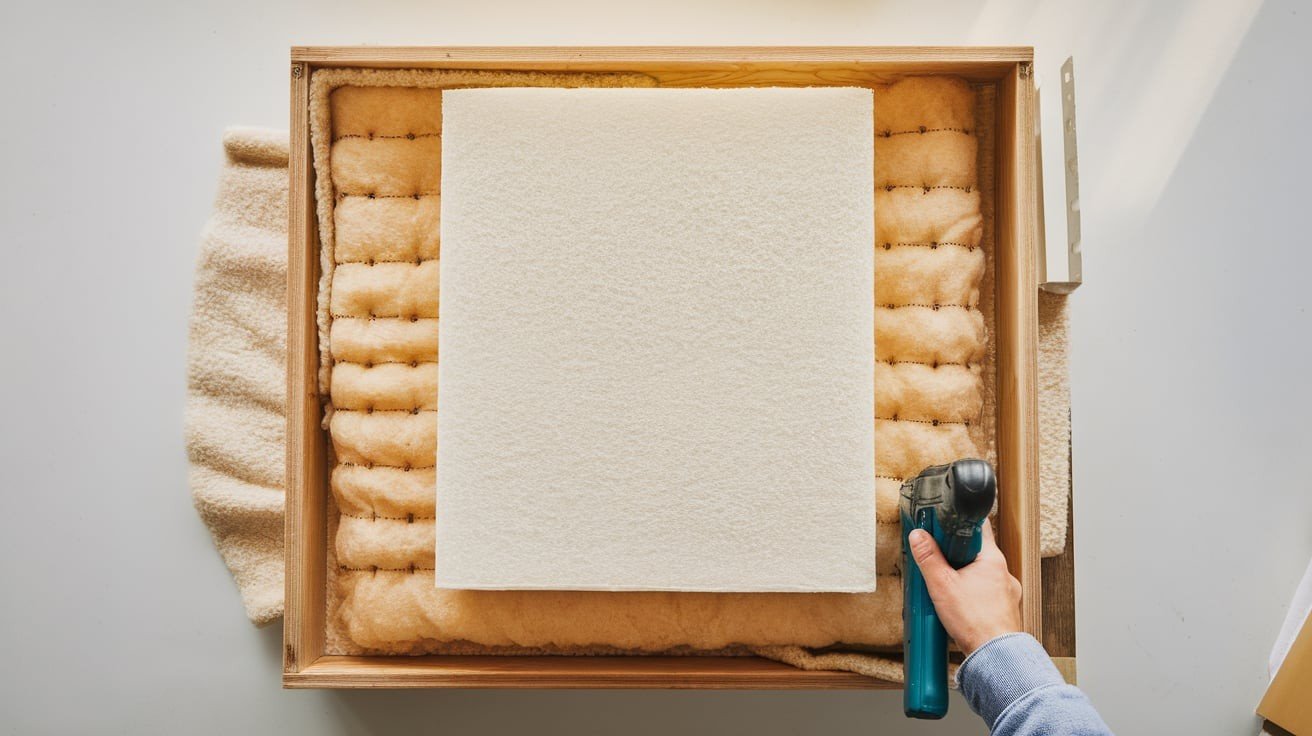
Center foam padding on your wood base and secure with spray adhesive or staples around edges. Wrap batting over the foam, pulling tightly to eliminate wrinkles. Staple batting to the underside, stretching evenly.
This layer creates softness and prevents foam from showing through fabric while providing a smooth upholstery surface.
Step 3: Upholster with Fabric
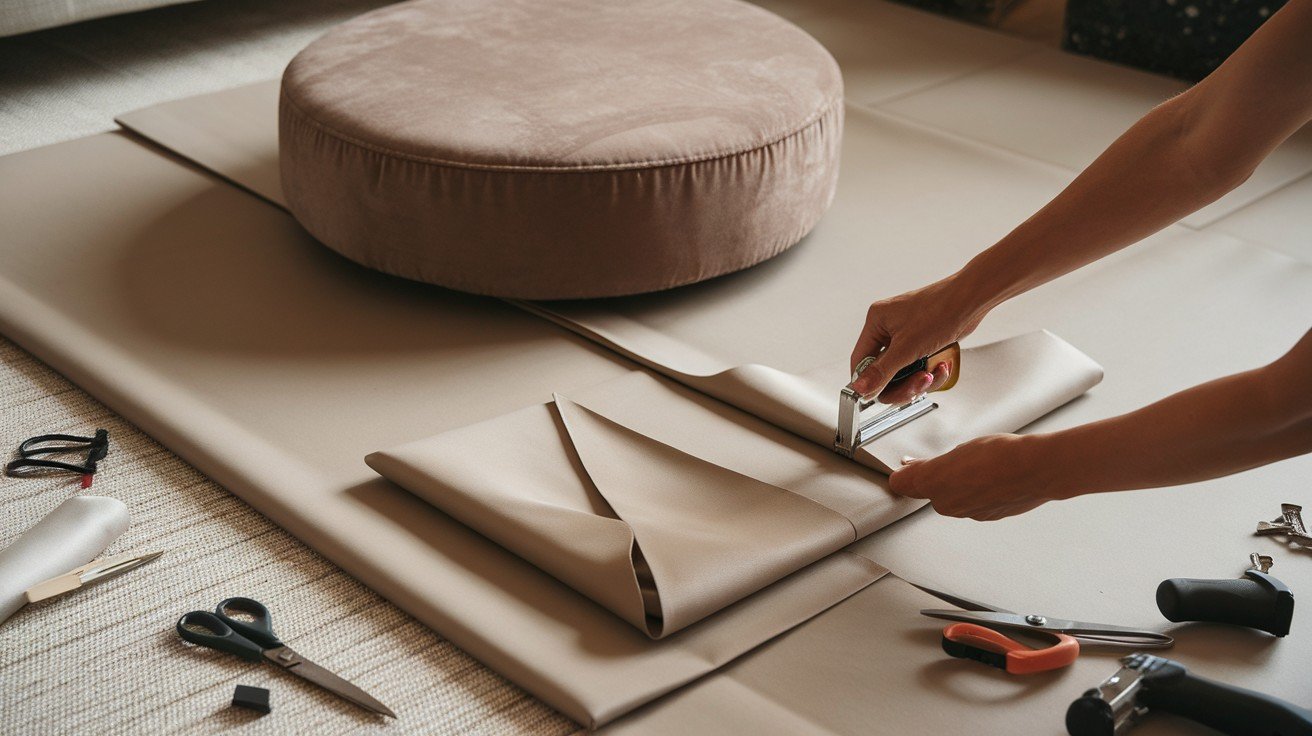
Place the fabric face down, and center the padded base on top. Pull fabric taut and staple to the underside, starting with opposite sides.
Work around systematically, maintaining even tension. For corners, fold fabric like wrapping a gift, trim excess, and staple securely. Avoid puckering by keeping consistent pressure throughout the process.
Step 4: Attach the Legs or Casters
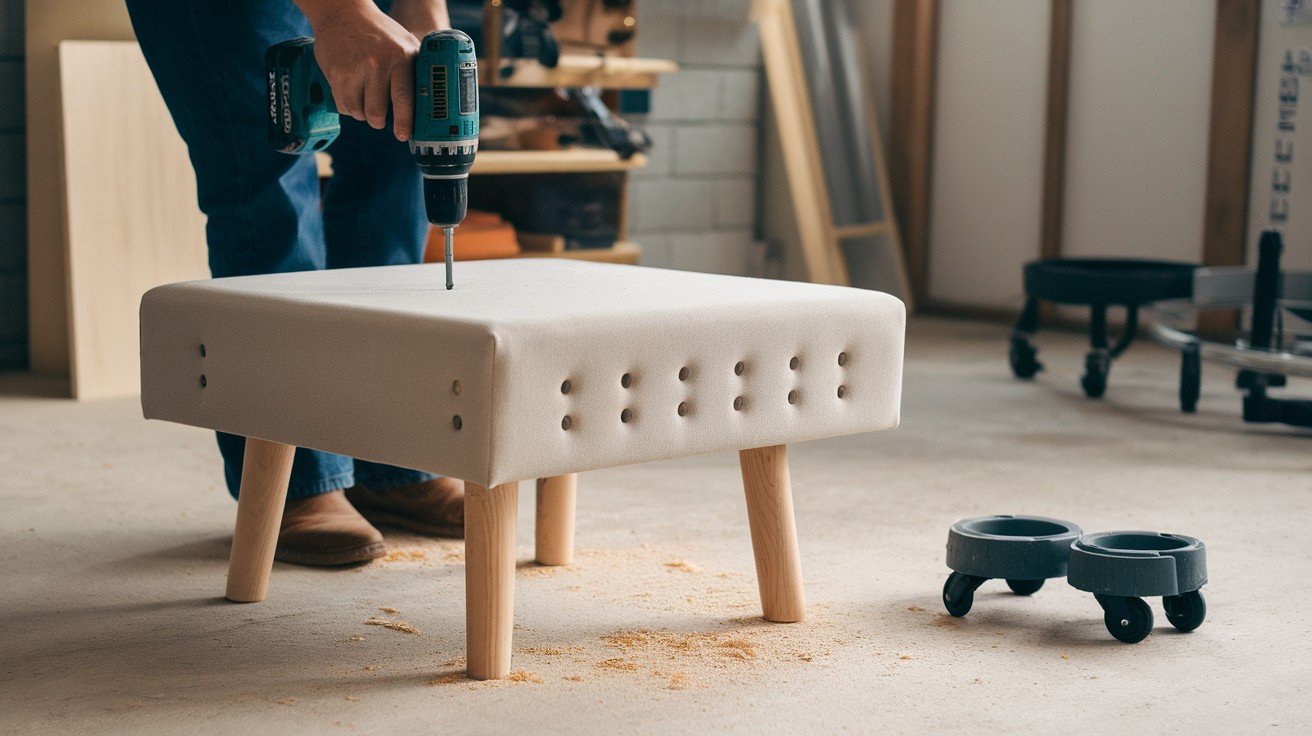
Mark leg positions evenly on the base underside, typically 2-3 inches from each corner. Pre-drill holes slightly smaller than your screws to prevent wood splitting.
Attach legs with provided screws, ensuring they’re level and tight. For casters, use mounting plates and longer screws for secure attachment that can handle movement.
Step 5: Final Touches and Detailing
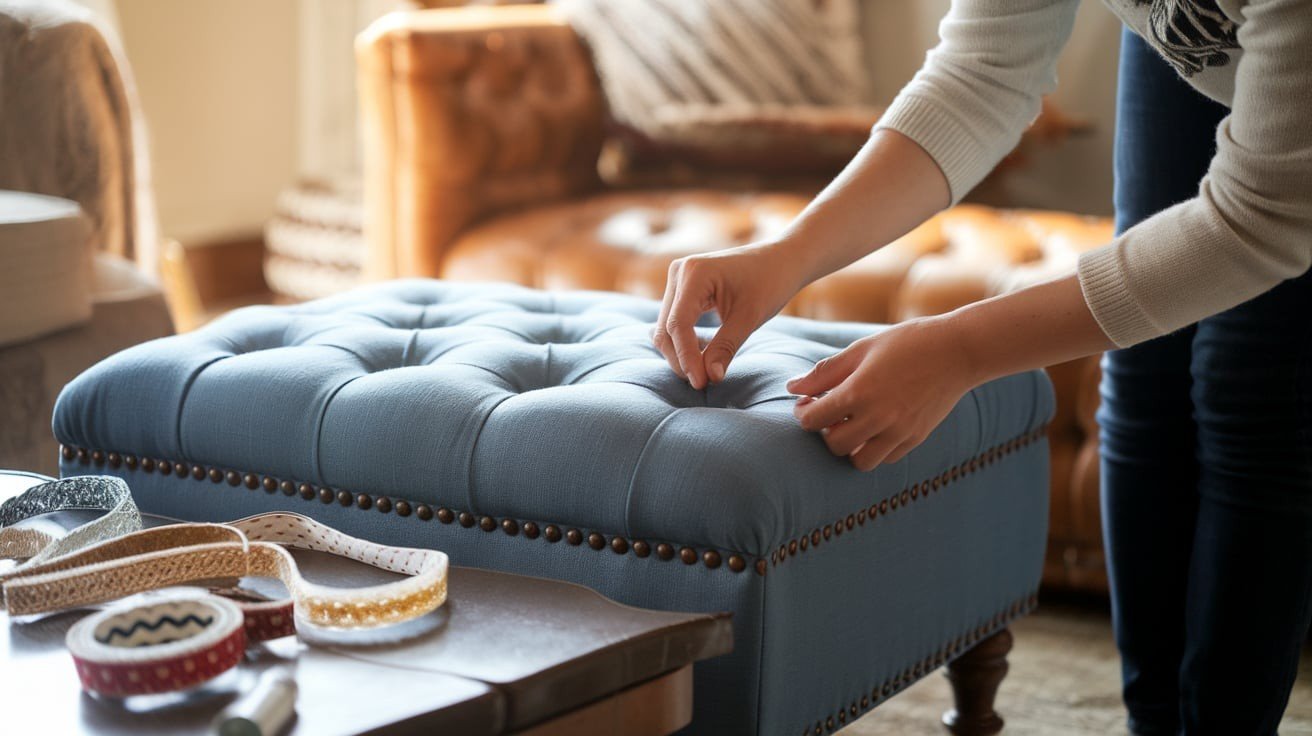
Inspect all staples and trim loose threads. Add decorative trim with fabric glue or small tacks if desired. Tufted buttons can be added by drilling small holes and securing with long upholstery needles.
Check that the fabric tension is consistent and the legs are stable. Your completed ottoman should feel solid and look professionally finished.
Creative Variations and Upgrades
Storage Ottoman Design
Transform your basic ottoman into a functional storage solution by creating a hollow base. Build a rectangular frame instead of solid wood, leaving the top removable.
Install piano hinges along one edge so the cushioned top lifts like a lid. Add safety hinges to prevent slamming and finger injuries.
Inside, create compartments with thin plywood dividers for organizing blankets, magazines, or seasonal items.
Consider adding a soft-close mechanism for smooth operation and reduced noise.
No-Sew Ottoman Hacks
Skip traditional upholstery by using a pre-made round or square cushion as your top. Simply attach it to your wooden base with heavy-duty adhesive or screws from underneath. For temporary solutions, wrap your ottoman in a fitted furniture cover or use large fabric pieces secured with safety pins underneath.
Stretchy slipcovers work particularly well and can be easily removed for washing or seasonal changes.
Care and Maintenance Tips
- Regular Vacuuming: Use an upholstery attachment to remove dust and debris weekly, preventing dirt from settling deep into fabric fibers. Pay attention to seams and crevices where pet hair and crumbs tend to accumulate.
- Spot-Cleaning Techniques: Blot spills immediately with a clean cloth, working from outside edges toward the center to prevent spreading. Use mild soap and water for most stains, testing cleaning solutions on a hidden area first.
- Stain Treatment: For stubborn marks, create a paste with baking soda and water, let sit for 15 minutes, then gently scrub with a soft brush. Oil-based stains respond well to cornstarch applied overnight before vacuuming away.
- Fabric Protection: Apply upholstery protector spray every 6-12 months to repel spills and extend fabric life. Reapply after any deep cleaning to maintain the protective barrier against future accidents.
- Refresh or Reupholster: Consider reupholstering when fabric shows permanent stains, excessive wear, or outdated patterns after 3-5 years. Sometimes, simply adding new decorative trim or buttons can give your ottoman a fresh look without full replacement.
Conclusion
Building your DIY ottoman is a rewarding project that combines creativity with practicality.
You’ve learned how to plan your design, gather the right materials, and execute each construction step with confidence.
From selecting the perfect fabric to adding those finishing touches, every decision reflects your style while creating a functional piece for your home.
The best part? This project opens doors to future furniture-making adventures. The skills you’ve developed, measuring, cutting, upholstering, and assembly, transfer to countless other DIY projects.
Your handcrafted ottoman will serve your family for years, whether as extra seating, a footrest, or a storage solution.
Take pride in your accomplishment. You’ve saved money, gained valuable skills, and created something uniquely yours.
Now sit back, put your feet up on your new ottoman, and enjoy the satisfaction of a job well done.
Frequently Asked Questions
What’s the best fabric for a beginner’s first ottoman?
Canvas or denim works well – durable, forgiving, and easy to work with while hiding minor imperfections.
Can I make an ottoman without a staple gun?
Yes, use upholstery tacks and a hammer, or strong fabric glue for lightweight materials.
How much weight can a homemade ottoman support?
With proper construction and quality legs, most DIY ottomans safely hold 200-250 pounds.
What if my fabric corners look bunched or uneven?
Trim excess fabric, fold like gift-wrapping, and use more staples for smoother corners.
How long does this project typically take?
Most beginners complete their ottoman in 4-6 hours over a weekend, with drying time.