

Picture this: your drain line breaks under your foundation. You call a plumber. They fix it for $3,000. Six months later, it breaks again.
Sound familiar? You’re not alone. Most homeowners don’t know the difference between a quick fix and a lasting repair. That’s exactly what contractors count on. They use cheap materials and skip crucial steps because most people can’t see the work once it’s buried.
This stops today. We’ve spent 40 years watching plumbers work under homes. We’ve seen the good, the bad, and the downright ugly. More importantly, we know what separates repairs that last decades from those that fail in months.
In this guide, you’ll learn the 4 materials that guarantee failure, why hydrostatic testing matters (and why contractors avoid it), questions that reveal true expertise, and red flags that predict future problems.
No more getting fooled. No more paying twice for the same repair.
The Hidden Truth About Drain Line Repair Quality
Licensed plumbers aren’t equal in under-slab expertise. Substandard work uses wrong materials, skips testing, and fails within months instead of lasting decades.
Why Not All Licensed Plumbers Are Equal?
Here’s something that might shock you: A plumbing license doesn’t mean expertise in under-slab work.
The apprenticeship system teaches general plumbing. Sink repairs. Toilet installations. Basic pipe work. But under-slab drain lines? That’s specialist territory.
I’ve watched hundreds of plumbers work under homes for over 40 years. Some know exactly what they’re doing. Others? They’re learning on your dime. The difference shows immediately.
Experienced under-slab professionals bring specific tools. They know which couplings work in clay soil. They understand soil pressure. Most importantly, they test their work before burial. General plumbers often wing it. They use whatever couplings they have in the truck. Skip the testing. Rush to the next job.
You pay the same price for both. That’s the problem.
Warning Signs of Substandard Repair Work
Watch for these red flags before they bury the work: Flexible rubber couplings with only two bands. Instant failure in clay soil. I’ve seen these stretched and pulled apart countless times.
No metal hangers supporting the pipe. Your drain line will sag. Water pools. Backups happen. Skipping the primer on PVC joints. The glue won’t hold properly. Leaks develop within months.
But here’s the biggest warning sign: refusing to pressure test before burial. Why would a contractor avoid testing? Because they know it might fail.
Good repairs last 50+ years. Bad repairs fail in 6-24 months. The difference? Proper materials and techniques.
Professional Repair Method Secrets
Traditional excavation handles severe damage through a proper 7-step process. Trenchless technology works for minor issues, but contractors oversell it for higher profits unnecessarily.
Traditional Excavation: When It’s Necessary
Forget what contractors tell you. Sometimes you need to dig.
Tree roots wrapped around pipes? You need excavation. Trenchless methods can’t remove thick root masses. Completely collapsed sections? Dig it up. No pipe liner can fix a crushed pipe.
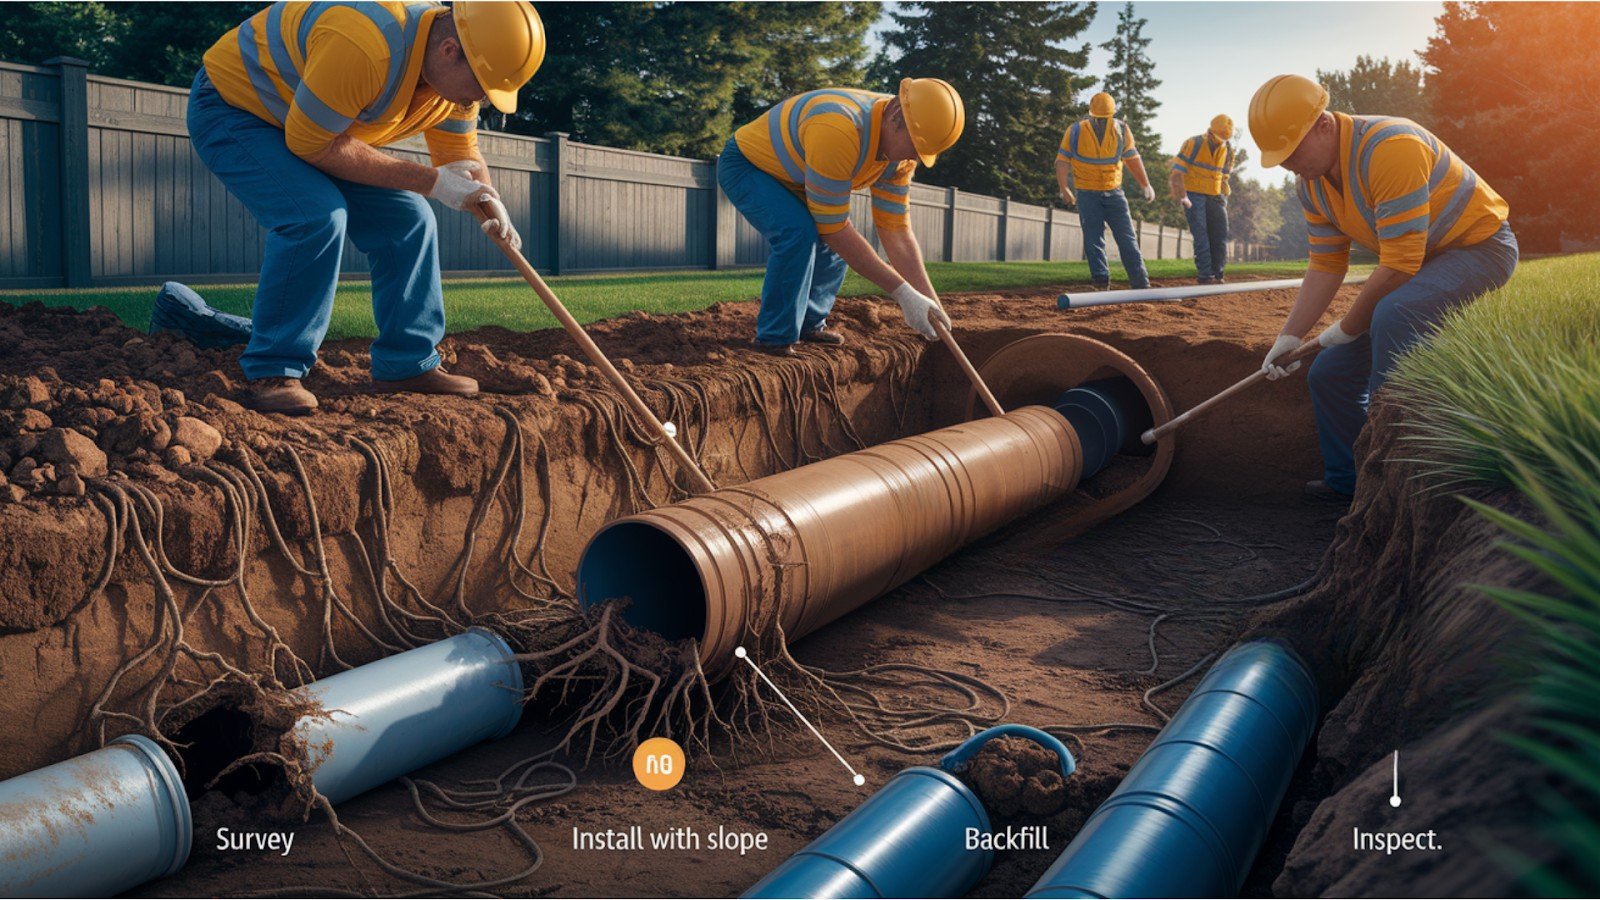
Here’s the 7-step process that works: Survey and mark utilities. Excavate with proper safety. Remove damaged sections. Install a new pipe with the correct slope. Reconnect lateral lines. Backfill and compact properly. Video inspect the entire system.
Most contractors skip steps 4, 6, and 7. That’s why repairs fail. Proper sloping means 1/4 inch drop per foot. Too flat and waste sit in the pipe. Too steep and water outruns solids.
Trenchless Technology: Not Always the Best Choice
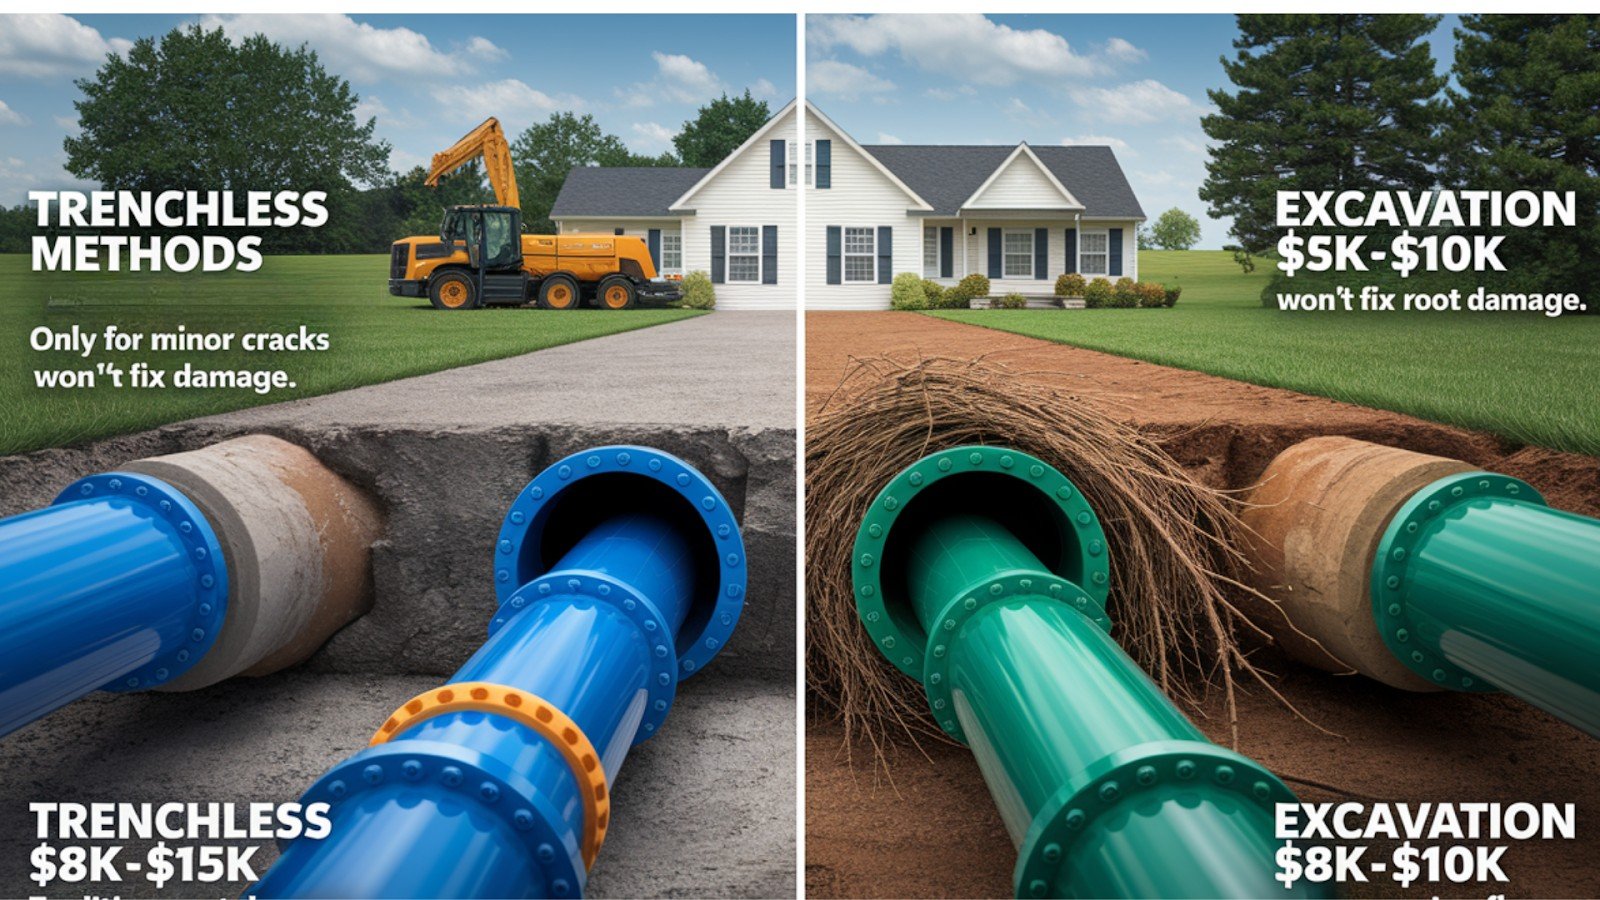
Contractors love selling trenchless repairs. Higher profit margins. Less work. But trenchless isn’t always better.
Pipe bursting works great when the old pipe is structurally sound. A cone-shaped head breaks the old pipe. New HDPE pipe gets pulled behind it. One day completion.
CIPP lining sounds amazing. 50-year warranty! But here’s what they don’t tell you: it only works on minor cracks. Major breaks? The liner won’t hold. Root damage? You need excavation first.
Cost vs. longevity is crucial. Trenchless costs $8,000-$15,000. Traditional excavation costs $5,000-$10,000. But excavation fixes the actual problem.
Critical Component Secrets for Under-Slab Success
Flexible 2-band couplings fail in clay soil. Use shielded 4-band or PVC with glue. Require hangers every 8-10 feet. Demand hydrostatic pressure testing.
The Coupling Material Truth
This is where most repairs fail. Flexible 2-band couplings are death sentences underground. Here’s why: Clay soil expands and contracts. It’s incredibly powerful. Flexible couplings get stretched apart.
I’ve personally pulled these couplings off pipes. Completely separated. The homeowner paid for a repair that lasted eight months.
Shielded 4-band couplings are different. They have a metal shield that doesn’t flex. Four bands instead of two. They resist soil movement. But the best choice? PVC with primer and glue. Two-step process. Primer cleans and softens the pipe. Glue creates a chemical weld. It’s not coming apart.
Support System Requirements They Don’t Tell You
Your drain line needs support every 8-10 feet. Period. Clevis hangers attach to your foundation. They hold the pipe at the correct angle. No hangers? Your pipe sags.
Sagging creates low spots. Water pools instead of flowing. Waste builds up. You get backups. Proper pitch is 1/4 inch per foot. Most contractors eyeball it. That’s not accurate enough.
Soil movement is constant. Especially clay soil. It shrinks when dry. Swells when wet. Your pipe moves with it. Proper hangers and spacing prevent movement problems. It’s the difference between 5-year and 50-year repairs.
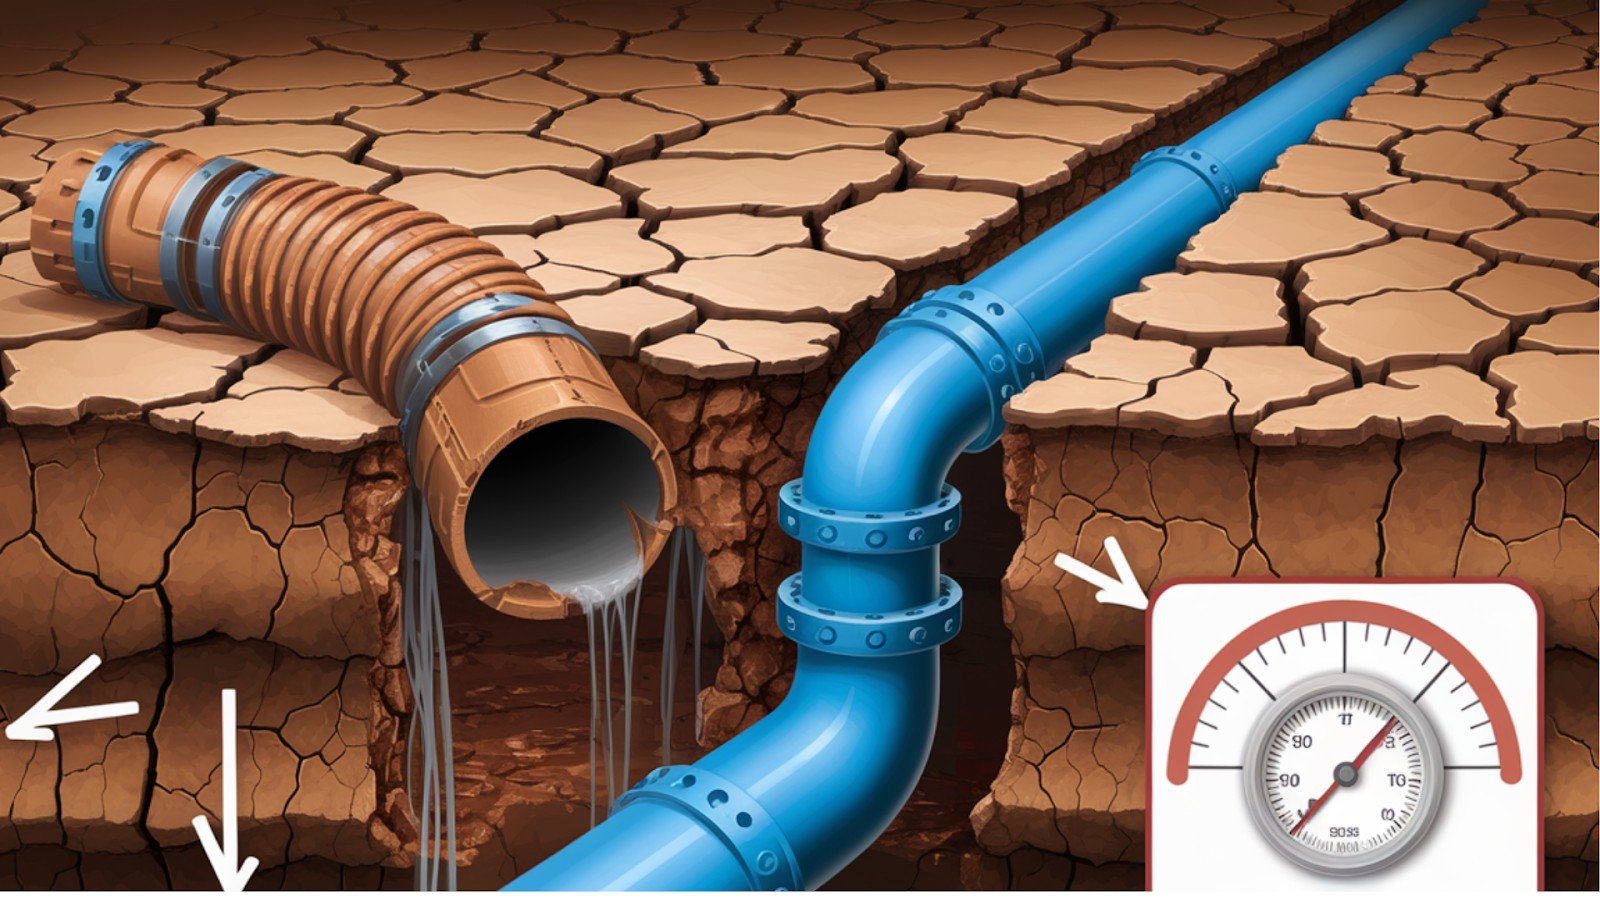
The Testing Secret That Saves Thousands
Here’s the secret contractors don’t want you to know: Hydrostatic pressure testing proves their work. They fill the repaired section with water. Apply pressure. If it holds pressure for 30 minutes, no leaks exist.
Why do contractors avoid this? Because their work might fail the test. Think about it. Would you buy a car without test driving it? Why accept drain line repairs without testing?
I insist on pressure testing for every repair I oversee. About 30% fail the first test. That means leaks. Demand pressure testing. If they refuse, find another contractor.
Cost and Timeline Reality Check
The national average $5,000 includes all costs. Pricing ranges $50-$250 per foot based on access difficulty. Expect 1-5 days of completion, plan for water/sewer downtime.
True Pricing Breakdown
Let’s talk real numbers. The national average of $5,000 includes everything. Permits. Excavation. Backfill. Surface restoration.
Per linear foot costs range from $50-$250. Why such a big range? Access difficulty. Easy access under a crawl space? $50-$75 per foot. Digging through a concrete driveway? $200-$250 per foot.
Realistic ranges by length: 25-35 feet: $1,250-$8,750. 45-55 feet: $2,250-$13,750. 65-75 feet: $3,250-$18,750. 100+ feet: $5,000-$31,250.
Realistic Timeline Expectations
Don’t believe the “same day” promises. Minor repairs using trenchless methods? 1-2 days is realistic. Partial pipe replacement with excavation? 2-3 days minimum. Full replacement from house to street? 3-5 days.
Plan for 1-2 days without water and sewer. That means no showers. No laundry. No toilet use.
Contractor Selection Secrets
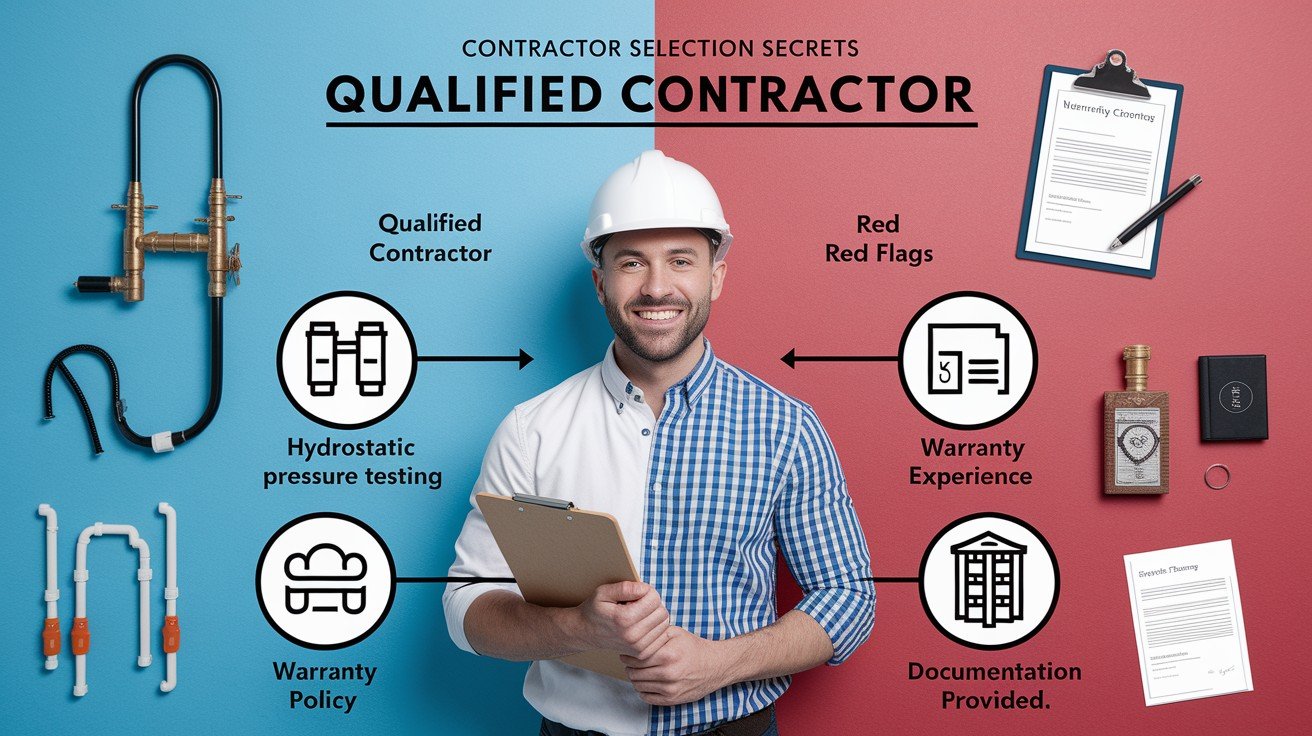
Ask about pressure testing, under-slab experience, and warranties. Avoid contractors who refuse testing or price significantly below market averages. Demand proper documentation.
Questions That Reveal True Expertise
Ask these questions before hiring anyone: “Do you perform hydrostatic pressure testing on every repair?” If they say no, keep looking. “How many under-slab repairs do you complete monthly?” You want someone who does this regularly. “What’s your warranty policy?” Confident contractors offer real warranties.
Watch their reaction. Good contractors welcome these questions. They prove expertise. Bad contractors get defensive. They change the subject. They make excuses.
Red Flags That Predict Future Problems
Run if they say any of these: “Pressure testing isn’t necessary.” Yes, it is. “We use whatever couplings work.” They should specify exact materials. “We can fix it cheaper than anyone else.” Quality costs money.
Pricing significantly below market averages is suspicious. They’re either cutting corners or planning to add charges later.
What to Demand Before Burial?
Don’t let them bury anything until you verify: Visual inspection of all coupling materials. See the shielded couplings yourself. Hanger spacing measurement. Count them. It should be every 8-10 feet. Most importantly, passing the hydrostatic pressure test results. Get it in writing.
Take photos yourself. Document everything before backfill. This is your last chance to verify quality work. Once it’s buried, you’re stuck with whatever they did.
Documentation That Protects Your Investment
Demand these documents: Video inspection reports from before and after the repair. Proof of the original problem and the fix. Material specifications and warranty information. Pressure test results with timestamp photos. Proof that the repair doesn’t leak.
Keep everything. Insurance companies require documentation. Future buyers want proof of quality repairs. Good contractors provide thorough documentation. They’re proud of their work. Bad contractors avoid paperwork. They know their shortcuts won’t stand up to scrutiny.
Conclusion
Here’s the bottom line: Quality drain line repairs come down to four non-negotiables.
First, no flexible 2-band couplings underground. Period. Second, proper clevis hangers every 8-10 feet to maintain slope. Third, PVC with primer and glue beats rubber couplings every time. Fourth, demand hydrostatic pressure testing before burial.
These aren’t suggestions. They’re requirements for repairs that last decades instead of months.
Yes, quality work costs more upfront. But spending an extra $500 now beats paying $5,000 for full replacement later. We’ve seen it happen countless times.
Don’t let contractors bury substandard work under your home. Use these secrets to get it done right the first time. Your foundation and your wallet & will thank you.
The choice is yours: pay once for quality, or pay twice for shortcuts.
FAQs
What’s the most common mistake in drain line repairs?
Using flexible 2-band couplings underground – they fail in expansive clay soils, leading to expensive re-repairs.
How can I verify my repair will last?
Insist on hydrostatic pressure testing before burial and proper clevis hanger installation every 8-10 feet.
When should I choose trenchless over traditional repair?
Trenchless works for minor cracks and leaks; severe breaks and root damage require excavation.
What’s a realistic timeline for under-slab repairs?
Plan 1-3 days for most repairs, with 1-2 days without water/sewer access during work.
How do I find qualified under-slab specialists?
Ask about hydrostatic testing policies, under-slab experience, and demand to see proper coupling materials.