

Your home’s plumbing system starts long before you see the first pipe or faucet. The foundation of every working bathroom and kitchen begins with rough-in plumbing – the hidden network that makes modern life possible.
Rough in plumbing refers to the basic plumbing installation that happens during the early construction phase.
This includes running water supply lines, drain pipes, and vent systems through walls and floors before the final fixtures get installed. Think of it as the skeleton that supports your entire plumbing system.
Understanding this process helps homeowners make smart decisions during renovations, helps DIY enthusiasts plan projects correctly, and gives contractors a clear roadmap for efficient installation.
Getting the rough-in plumbing right the first time prevents costly fixes later and ensures your plumbing works properly for years to come.
What Is Rough-In Plumbing?
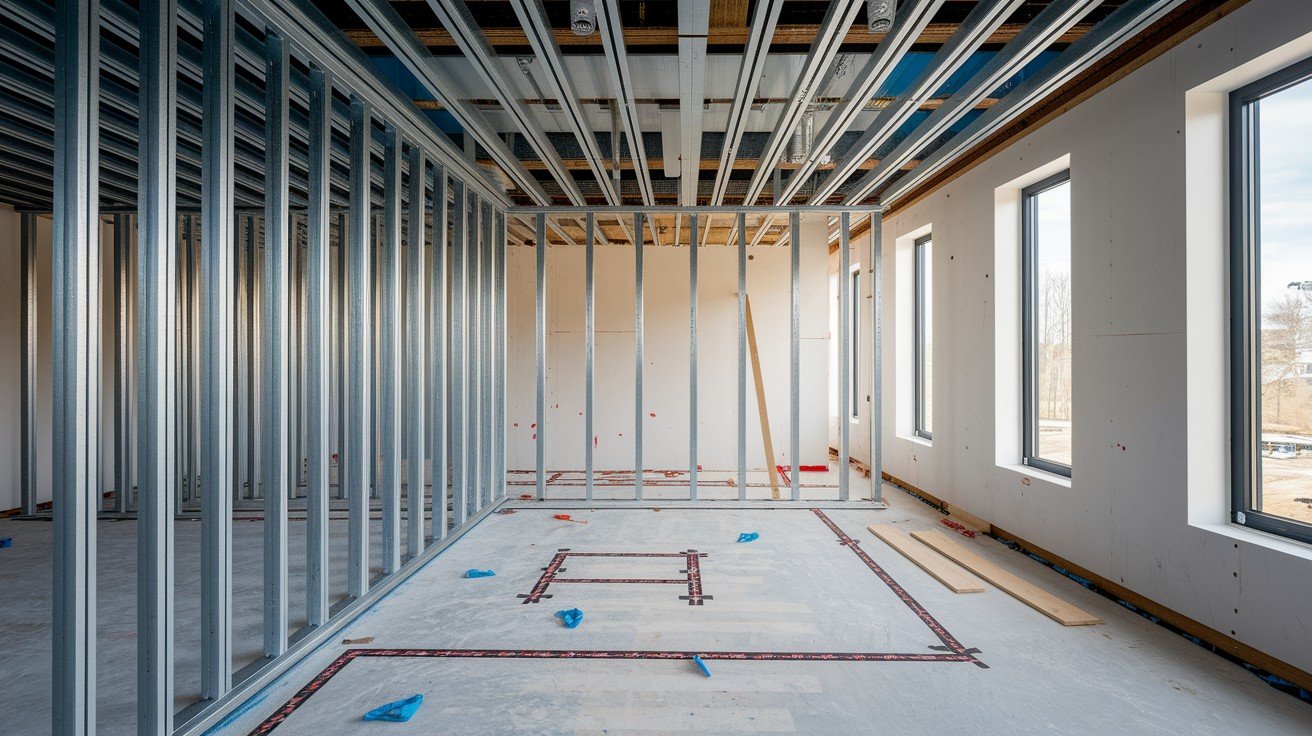
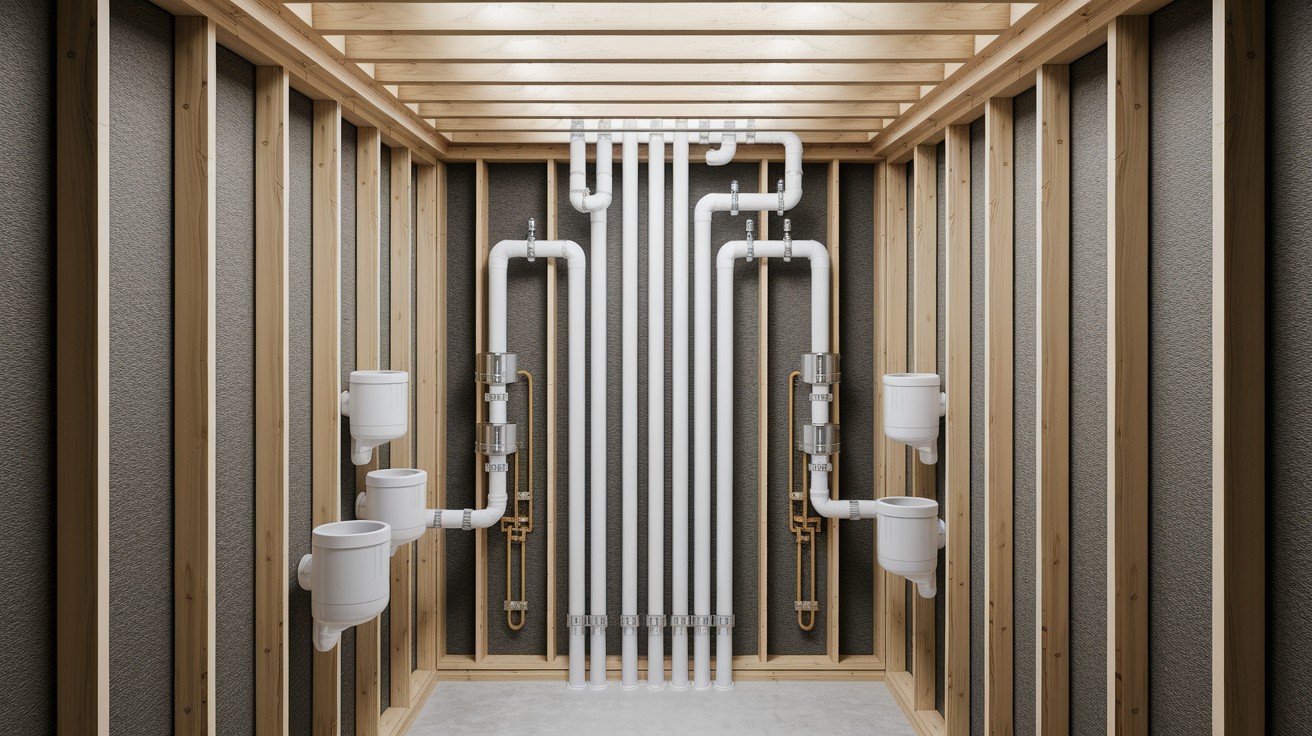
Rough-in plumbing is the stage where contractors install all the basic pipes, drains, and vents before adding fixtures or closing up walls. During this phase, workers run water supply lines and install drain pipes that carry wastewater away from your home.
This phase creates the foundation for your entire water system. Getting the rough in plumbing right is critical because mistakes become very expensive to fix once walls are closed up.
Rough-In vs. Finish Plumbing
Understanding the difference between rough plumbing and finish plumbing helps you plan your project timeline and budget. These two phases happen at different stages of construction and require different skills and materials.
|
Rough-In Plumbing |
Finish Plumbing |
|
Pipe installation inside walls and floors |
Installing sinks, faucets, toilets, and fixtures |
|
Water supply lines and drain connections |
Final hookups and testing |
|
Vent system installation |
Connecting appliances like dishwashers |
|
Must pass inspection first |
Happens after the walls are finished |
|
Done before drywall goes up |
Final step before project completion |
The rough-in plumbing must pass inspection before any finish work begins. This ensures all hidden pipes meet local codes and work properly before contractors close up the walls and install your final fixtures.
Tools and Materials Used
Successful rough-in plumbing requires the right combination of pipes, fittings, and tools. The materials you choose affect both the installation process and the long-term performance of your plumbing system.
Common Pipe Types
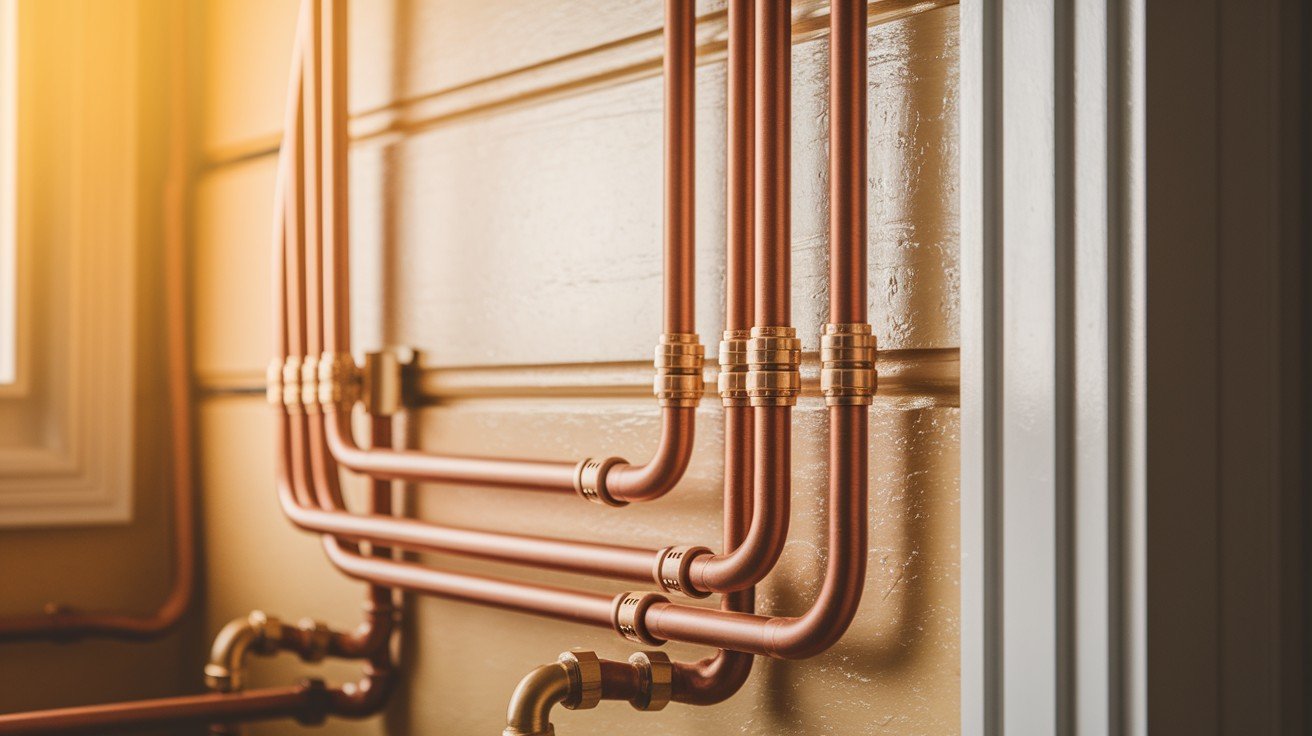
- Copper pipes last the longest, but cost more and require soldering skills
- PEX pipes are flexible, easy to install, and resist freezing damage
- PVC pipes work well for drain lines and cost less than other options
- CPVC pipes handle hot water better than regular PVC
Key Plumbing Components
- Shut-off valves let you stop water flow for repairs or emergencies
- Drain traps prevent sewer gases from entering your home
- Clean-outs provide access points for clearing blocked drains
- Vent stacks allow proper drainage and prevent vacuum issues
Basic Tools Needed
- Pipe cutters make clean, straight cuts in different pipe materials
- Drills and hole saws create openings through studs and floor joists
- Adhesives and fittings connect pipes securely at joints
- Pressure testers check for leaks before closing up walls
Having quality tools and materials makes the rough-in plumbing process faster and more reliable. Cheap materials often cause problems later, so invest in good components that meet local building codes.
Planning Your Rough-In Layout
Proper fixture positioning starts with accurate measurements and following standard spacing requirements.
Toilets need at least 15 inches from the center to any wall, while bathtubs require specific drain locations for rough-in plumbing connections. Plan sink heights carefully for supply lines and drain access underneath.
Local building codes set strict rules for pipe sizing, spacing, and venting that your rough-in plumbing must follow.
You need accessible shut-off valves for each fixture and clean-out points for future maintenance. Plan inspection access points so officials can check your work before closing up walls.
Step-by-Step Rough-In Plumbing Process
Following the right sequence for rough-in plumbing ensures proper connections and helps avoid costly mistakes during installation.
Step 1 – Locate Main Utility Lines
Start by finding your water main entry point and sewer main connection before running any new pipes. Mark the location of your main vent stack since all other vents must connect to this central point.
Know where gas lines and electrical cables run to avoid dangerous conflicts during installation. Call 811 to have utilities marked before digging or drilling through walls.
Step 2 – Run Water Supply Lines
Install main ¾-inch supply pipes from your water meter to the distribution points in your home. Reduce pipe size to ½-inch for individual fixture connections to maintain good water pressure.
Add shut-off valves at each fixture location so you can turn off the water for repairs. Use proper fittings and supports to prevent sagging or movement in the rough plumbing lines.
Step 3 – Install Drain Lines

Ensure all drain pipes have proper slope for gravity-based drainage – typically ¼ inch per foot of horizontal run. Larger pipes, like 3-inch toilet drains, need less slope than smaller sink drains.
Connect all drain lines to the main sewer line with proper fittings. Test the slope by running water through the system before moving to the next step.
Step 4 – Run Vent Pipes
Extend vent pipes vertically through the roof and connect them to your central vent stack. Each fixture needs proper venting to prevent slow drainage and sewer gas problems.
Size vent pipes according to local codes – usually 1½ to 2 inches for most fixtures. Make sure vents extend above the roof line and don’t terminate near windows or air intakes.
Step 5 – Tie In Systems and Test

Connect all supply lines, drain pipes, and vents into one complete rough-in plumbing system. Cap all open pipes temporarily to prepare for pressure testing.
Pressurize the water supply system and check every joint for leaks. Fill the drain lines with water to test for proper flow and check the vent connections for air movement.
Common Mistakes and How to Avoid Them
Even experienced contractors make mistakes during rough-in plumbing installation. Learning about these common problems helps you avoid expensive fixes and ensures your system works properly from day one.
- Poor slope causes water to sit in the drain pipes and creates slow drainage or clogs
- Wrong pipe sizing reduces water pressure or prevents proper waste removal
- Inadequate venting leads to gurgling sounds and sewer odors in your home
- Forgetting shut-off valves makes future repairs difficult and messy
- Skipping permit requirements can halt your project and require costly rework
- Missing inspections means problems stay hidden until walls are closed up
Taking time to plan your rough-in plumbing layout and following local codes prevents most of these issues. Double-check measurements, use proper materials, and schedule inspections at the right times to keep your project on track.
Timeline and Who Should Do It
Most rough-in plumbing projects take 3 to 5 days for a typical bathroom or kitchen, though complex jobs with multiple fixtures can take longer. The timeline depends on your home’s layout, pipe accessibility, and local inspection schedules that may add extra days to the process.
This phase is best left to licensed plumbers who understand local codes and proper installation techniques. DIY rough-in plumbing often leads to failed inspections, expensive rework, and potential safety issues with gas or sewer connections.
Professional plumbers also carry insurance and warranties that protect you from costly mistakes during installation.
Benefits of Proper Rough-In Plumbing
Investing in quality rough-in plumbing installation pays off in multiple ways throughout your home’s life. Good planning and professional work create a foundation that serves you well for decades.
- Supports long-term reliability with fewer emergency repairs and water damage
- Improves home value and gives buyers confidence in your plumbing system
- Ensures smoother inspections without delays or required rework
- Makes finishing plumbing installation faster and more accurate
- Reduces future maintenance costs and extends fixture lifespan
- Prevents code violations that could complicate home sales
Proper rough-in plumbing installation is an investment that protects your home and saves money over time. Quality work during this phase prevents problems that become expensive and disruptive to fix later.
Conclusion
Rough-in plumbing forms the foundation of your entire water and waste system. This technical phase requires precise measurements, proper materials, and knowledge of local building codes to work correctly.
Getting it right the first time prevents expensive problems down the road. Poor installation leads to leaks, slow drains, and failed inspections that cost far more to fix than doing quality work upfront.
When in doubt, hire a qualified professional plumber who understands code requirements and proper installation techniques. Licensed plumbers carry insurance and warranties that protect your investment.
Remember that rough-in plumbing happens early in construction when mistakes are easier to fix. Take time to plan properly, use quality materials, and follow local codes for a system that works reliably for years.
Frequently Asked Questions
What Should You Ask a Plumber Before Starting a Rough-In Job?
Ask about licensing, timeline, experience with local codes, and who handles inspections. Get references from recent rough-in plumbing projects and confirm they carry proper insurance coverage for the work.
Can Rough-In Plumbing Be Moved After Walls Are Closed?
It can, but it’s costly and requires demolition and re-inspection. Moving pipes after drywall installation often means cutting open walls, floors, or ceilings to access the rough-in plumbing connections.
How Much Does Rough-In Plumbing Typically Cost?
Expect between $4,000 and $12,000, depending on size, materials, and labor rates. Complex layouts with multiple fixtures or difficult access areas increase costs significantly above basic installations.
Do Plumbing Codes Differ by State or County?
Yes. Always check local code requirements before planning or building. Your rough-in plumbing must meet specific rules for pipe sizing, venting, and fixture placement in your area.
Is Rough-In Plumbing Required for Remodels or Just New Homes?
It’s needed for both. Any new or relocated plumbing fixture requires rough-in plumbing work and proper permits, even in existing homes during renovation projects.