

Skip trowel texture gives walls a subtle, handcrafted look that stands out without being too bold. If you’ve ever tried it yourself, you know it’s not just about spreading mud it takes the right timing, tools, and feel.
I’ve worked with this method on all kinds of walls and helped many homeowners get the hang of it without hiring a pro. This guide is built on real jobs I’ve done, not just general advice. You’ll get step-by-step instructions, plus tips for choosing tools and prepping your surface the right way.
I’ll also point out common problems beginners run into and how to fix them fast. Everything here is based on what’s worked for me in real homes. By the end, you’ll know how to get that clean, natural finish without wasting time or supplies. It’s all about keeping it simple and doing it right the first time.
What is Skip Trowel Texture?

Skip trowel texture is a wall finishing technique that creates an intentionally imperfect surface. You get random ridges and valleys across your wall. This isn’t about being messy. It’s about being strategic.
The texture gives your walls a handcrafted, artistic appearance with a natural look. Think of it like controlled chaos on your walls. Here’s what makes it different: Skip trowel is a one-step process with wider spacing than knockdown texture.
You don’t need to go back and flatten anything. The spacing between textured areas is what gives it that signature skip trowel look: bigger gaps, bolder statements.
Essential Tools and Materials
Getting the right tools and materials makes skip trowel texture easier and helps you achieve professional results from the start.
Required Tools
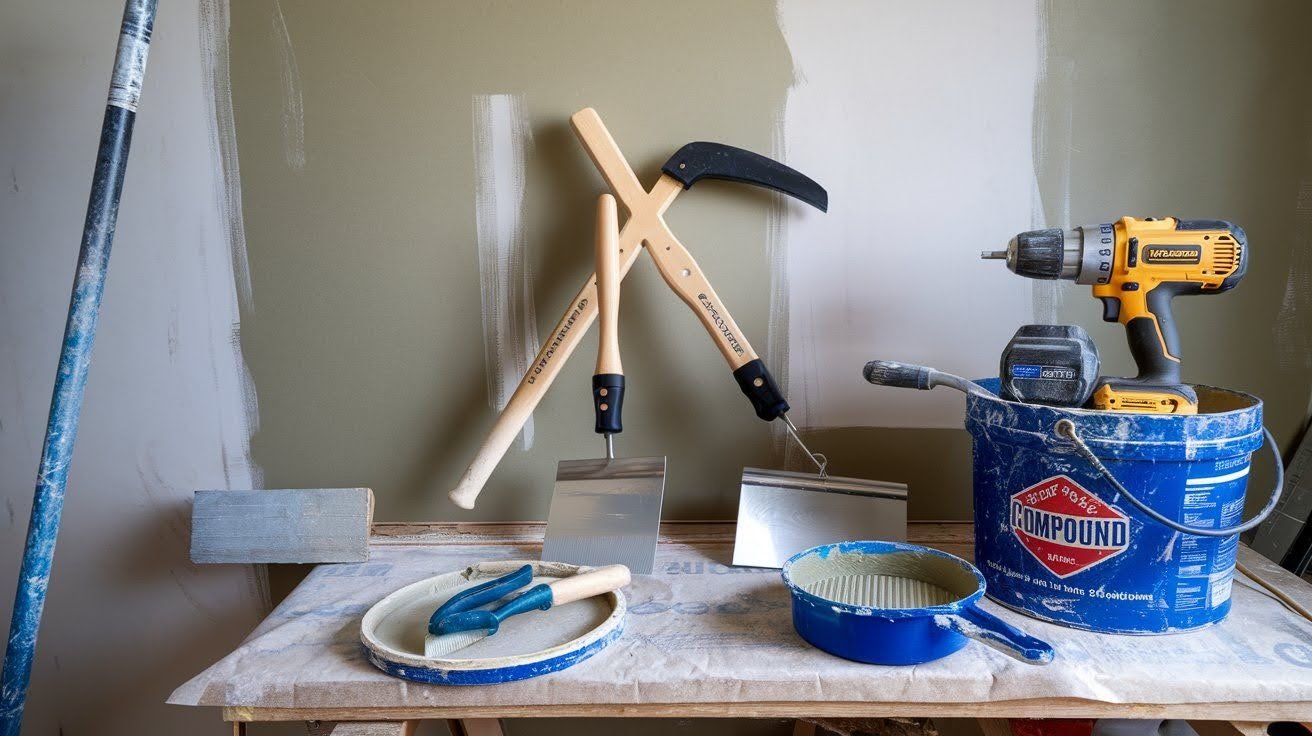
- Hawk and trowel are your primary weapons here. You can use a standard drywall taping knife as an alternative if that’s what you have. Cost: $15-30.
- The pole sander gets your surface ready. No shortcuts on prep work. Price: $20-40.
- An electric drill with a paddle attachment mixes your compound properly. Hand mixing? That’s a recipe for a lumpy texture. Cost: $30-80.
- A mud pan holds your compound while you work. Keep it close, keep it handy. Price: $8-15.
Materials Needed
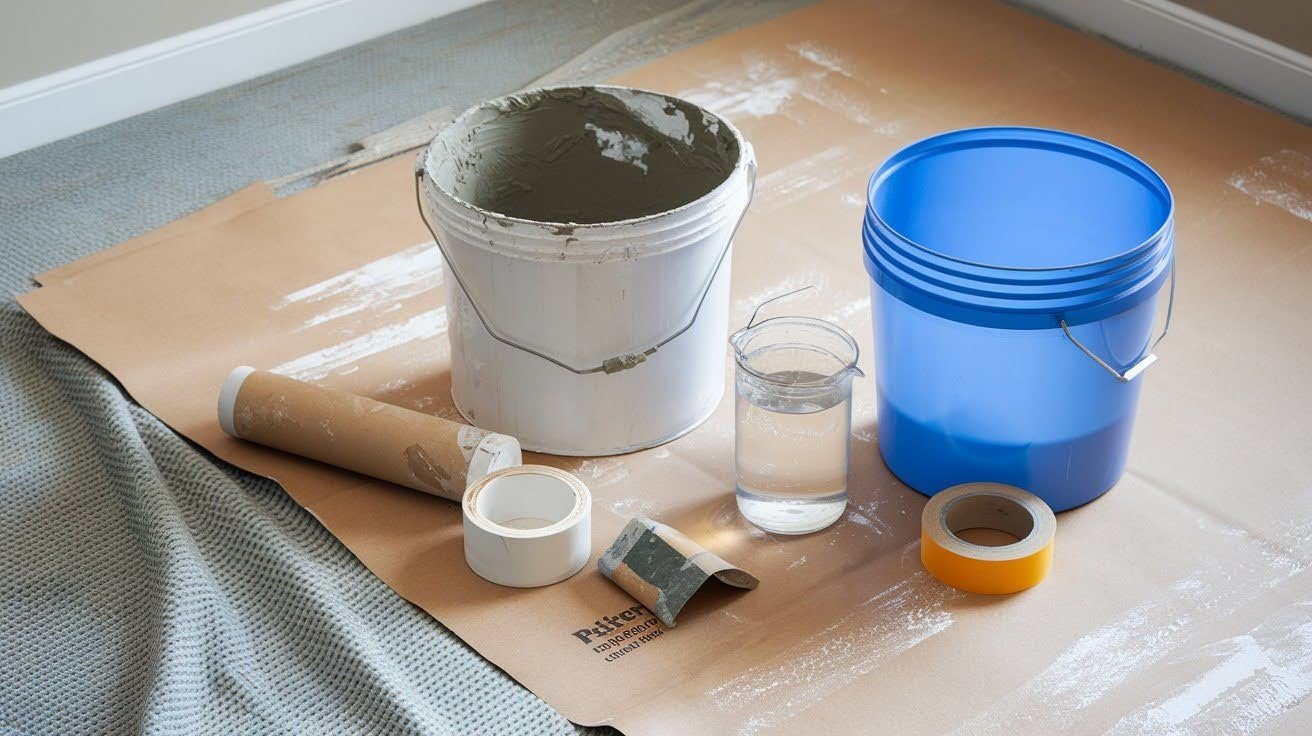
- All-purpose joint compound is your base material. Avoid hot mud or compounds with sand and grit. They make the job harder. Cost: $12-18 per bucket.
- Water adjusts your mixing consistency. Free from your tap.
- 5-gallon plastic bucket for mixing larger batches. Price: $8-12.
- Drop cloths and painter’s tape protect your floors and trim. Trust me, you’ll need them. Cost: $15-25.
Total investment: Around $100-200 for quality results.
Step by Step to Apply Skip Trowel Texture
Follow these seven straightforward steps to apply skip trowel texture correctly and get professional-looking results on your walls.
Step 1: Prepare Your Surface
Sand all edges, lines, and imperfections with your pole sander. This step matters more than you think. Why? Because every bump and ridge will show through your texture.
I always tell people: Good prep work makes everything else easier. Skip this step and you’ll regret it later. Remove all dust and debris with a damp rag. Get into the corners and along the baseboards.
Dust creates weak spots in your texture. You need to allow the surface to dry completely before moving forward. Wet surfaces don’t hold the compound properly.
Here’s something most people forget: Protect surrounding areas with drop cloths. Skip trowel texture gets messy fast. Cover your floors, furniture, and trim. Your future self will thank you when cleanup time comes.
Step 2: Mix Your Joint Compound
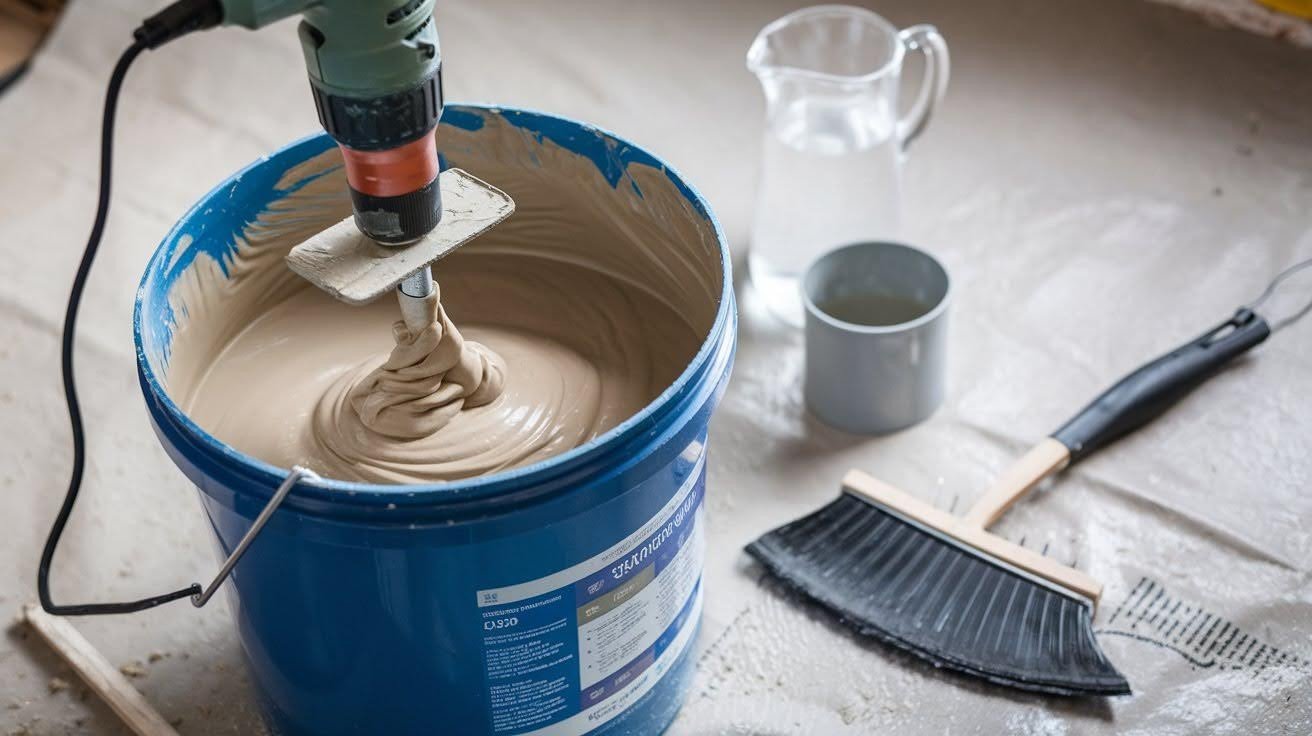
Start with one box of all-purpose joint compound in your 5-gallon bucket. Don’t dump it all at once. Add approximately 1 cup of water to begin. You can always add more, but you can’t take it back.
Here’s the key: Mix to the consistency of thick pancake batter. Not too thin, not too thick.
Use your electric drill with a paddle attachment. Hand mixing creates lumps that will ruin your texture.
The compound should be thick enough to stay on your hawk but spread easily across the wall. If it slides off your hawk, add more compound. If it won’t spread smoothly, add a little water. Test it on a small area first.
Step 3: Apply the Initial Mud Layer
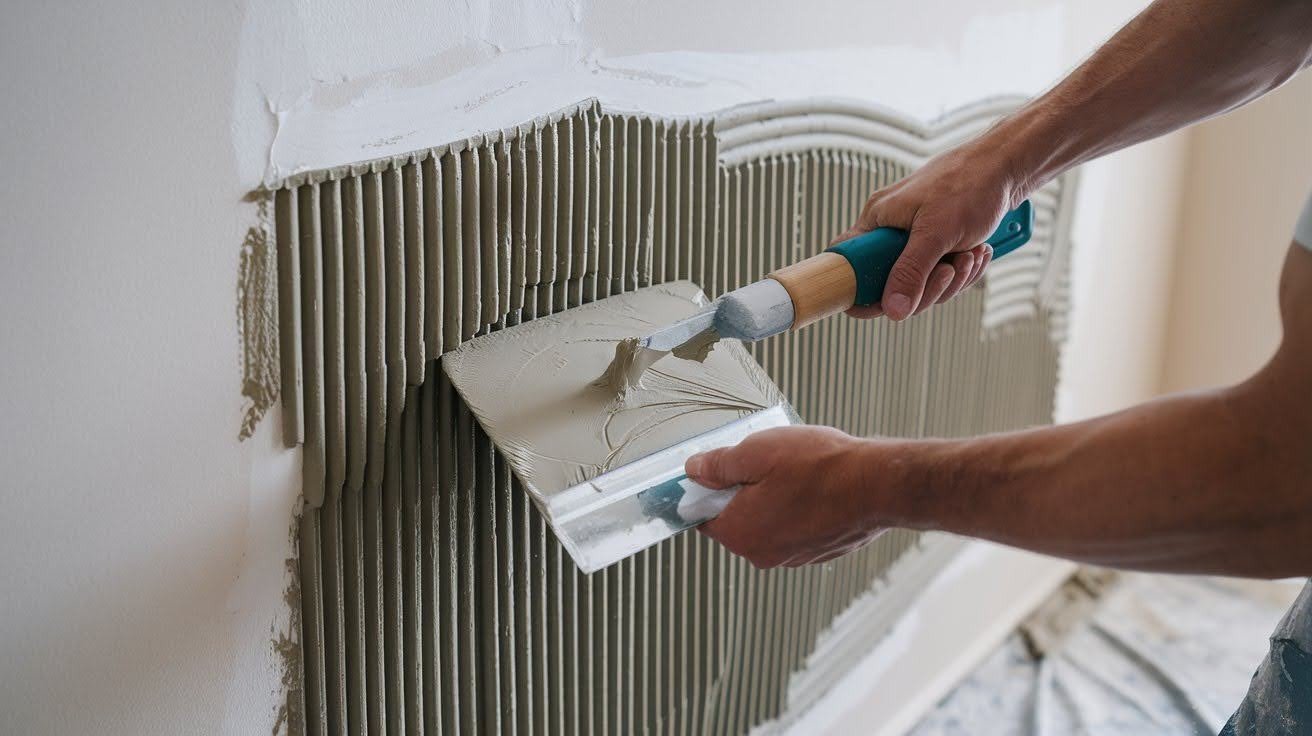
Load your hawk with a moderate amount of compound. Don’t overload it. You want control, not a mess. Use the corner of your trowel to spread compound in side-to-side strokes. Keep your movements smooth and steady.
Here’s what works: Work in small 4×4-foot sections. Bigger sections dry out before you can finish them. Don’t rush this part. Take your time with each section.
Apply a thin, even layer as your foundation. This isn’t the final texture yet. You’re just getting compound on the wall.
Think of it like buttering toast. You want coverage, but not thick globs. The texture magic happens in the next step.
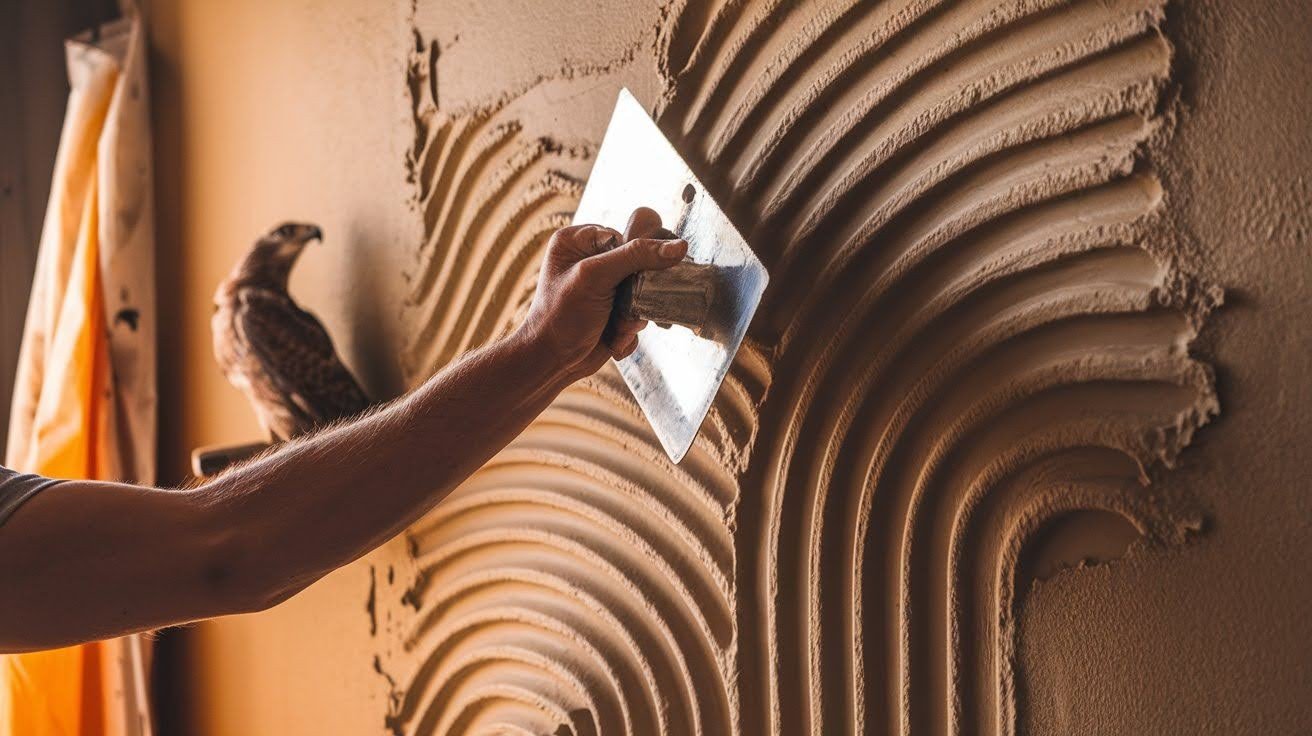
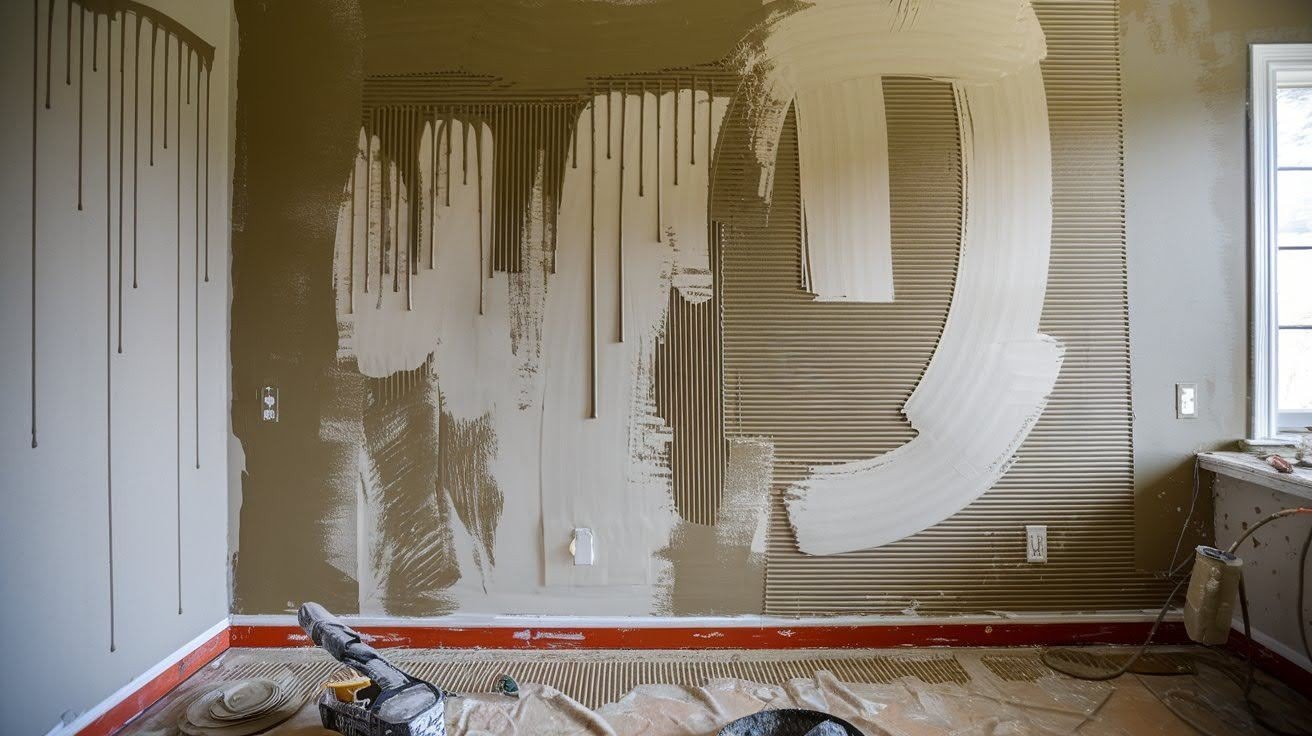
Step 4: Create the Skip Pattern

Hold your trowel at a 15-degree angle to the wall. Not too flat, not too steep. Use short, arching strokes across your applied mud. Think of it like painting with a brush, but faster.
Here’s the magic moment: Quickly bend your wrist away from the wall at the end of each stroke. This creates those signature ridges and valleys.
Don’t overthink the pattern. Random is good. Create random directional patterns for a natural look. Up, down, sideways – mix it up.
If you get too systematic, it looks fake. Work fast but stay controlled. The compound sets up quickly once you start creating texture.
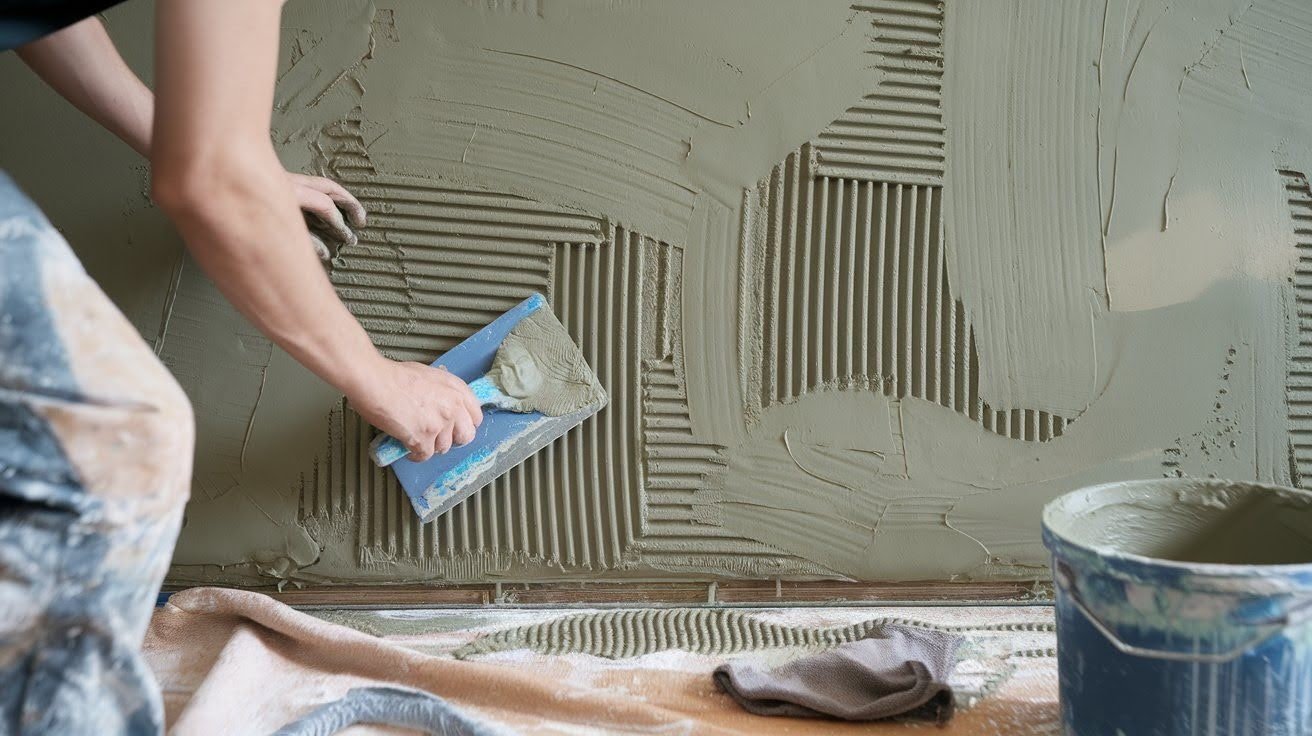
Step 5: Perfect the Wiping Technique
Maintain a slight trowel angle with the front edge about 1/2 inch up from the wall. This angle is everything. Pull your trowel along the wall with moderate pressure. Not too hard, not too soft.
Here’s where experience pays off: Adjust your pressure to control texture depth. More pressure flattens the texture. Less pressure keeps it bold. Don’t go for perfectly straight lines.
That screams amateur. Avoid perfectly straight lines for a natural appearance. Let your hand move naturally.
Small wobbles and curves make it look handcrafted. Practice on a test area first. Once you get the feel, the rest comes easily.
Step 6: Monitor Texture Variation
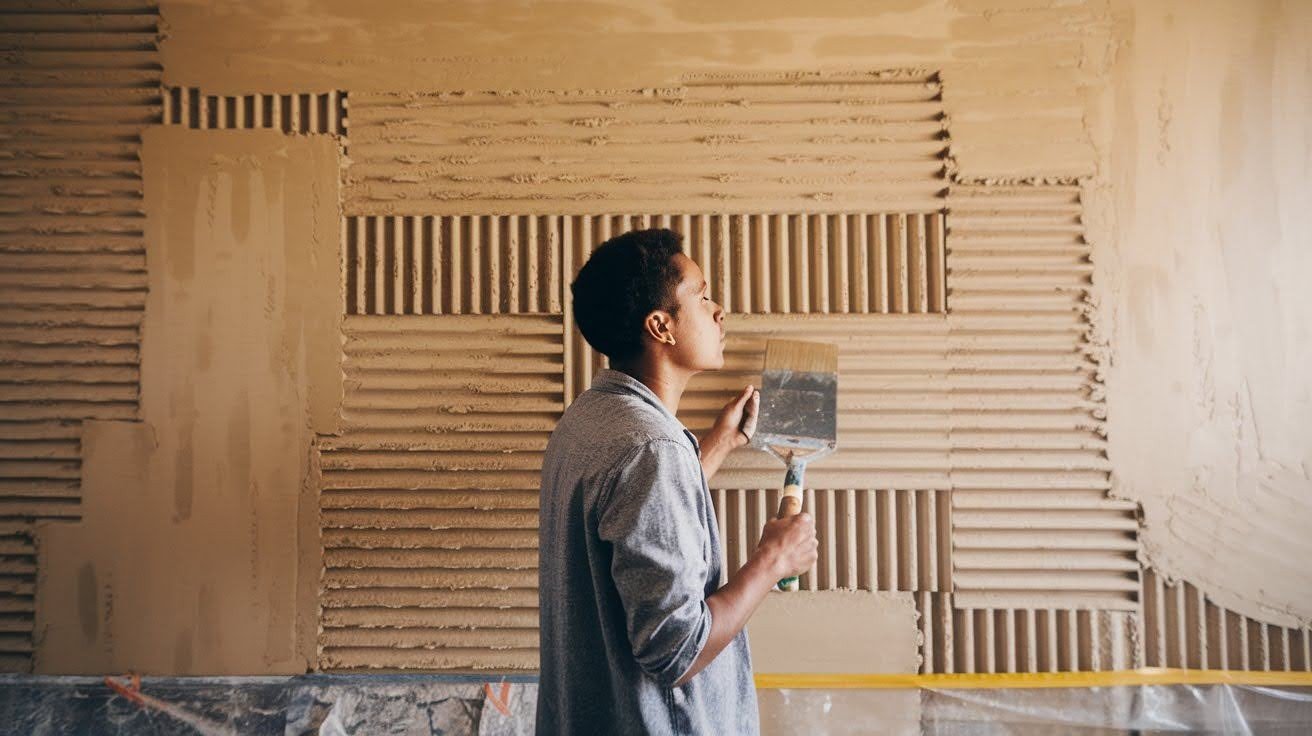
More mud and action create a deep, heavy texture. Want dramatic walls? Load up your trowel and press harder. Less mud and gentle action produce a lighter look.
Subtle texture needs a soft touch. Here’s what pros do. Step back regularly to assess overall appearance. You can’t see the whole picture when you’re nose-to-wall.
Distance shows the truth.
Step 7: Make Real-Time Corrections
Work while the compound remains workable – you have 10-30 minutes tops. After that, it’s game over. Dab additional mud for bare spots. Don’t let patches show through.
Scrape and reapply for over-coated areas. Too much compound looks sloppy. Remove the dripping compound immediately. Drips dry hard and create problems later.
Keep a damp rag handy for quick cleanup.
Step 8: Drying and Primer Application
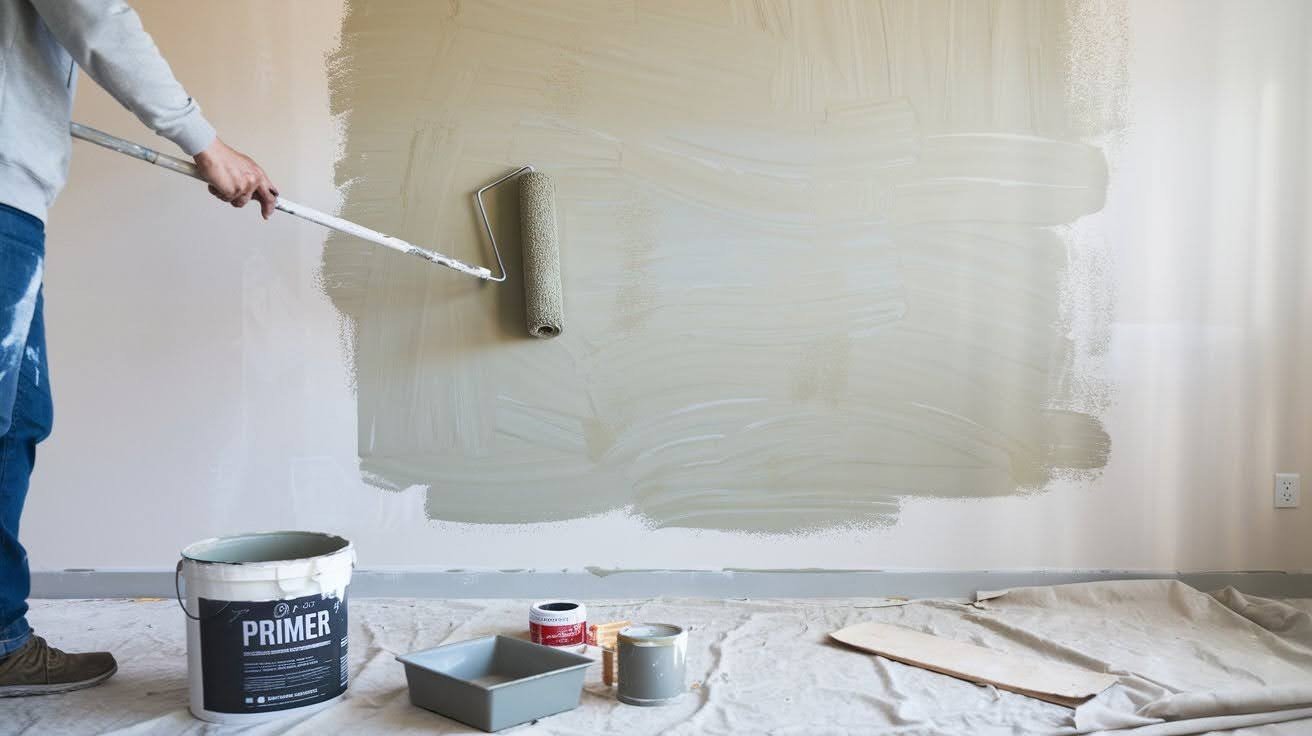
Allow a minimum of 24 hours for complete drying. I know it’s tempting to rush, but patience pays off here. Thick texture takes longer to dry than flat walls. Don’t cut corners on drying time.
Apply inexpensive drywall primer tinted to 50% of your final color. This step saves you money and headaches later.
Why tint the primer? Because it prevents expensive paint absorption into joint compounds. Skip the trowel texture. It will drink up your topcoat without a proper primer.
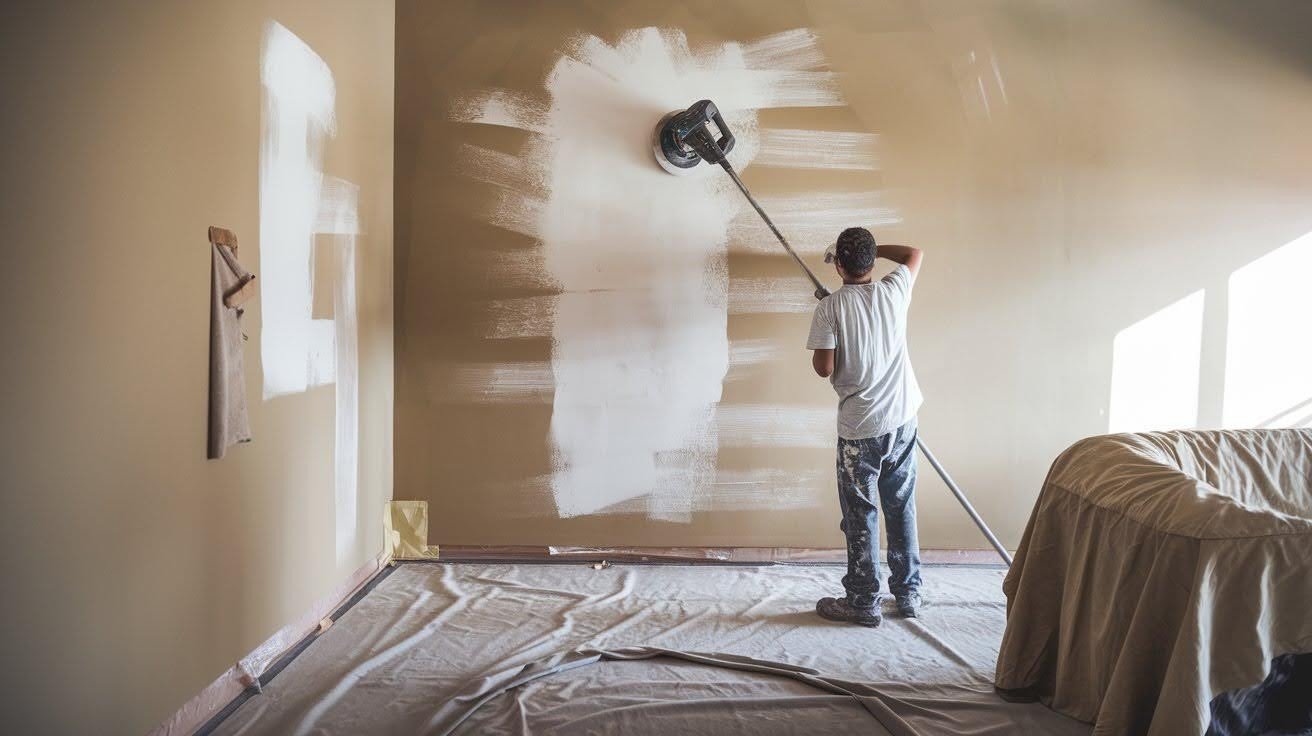
Step 9: Apply Final Paint Coat
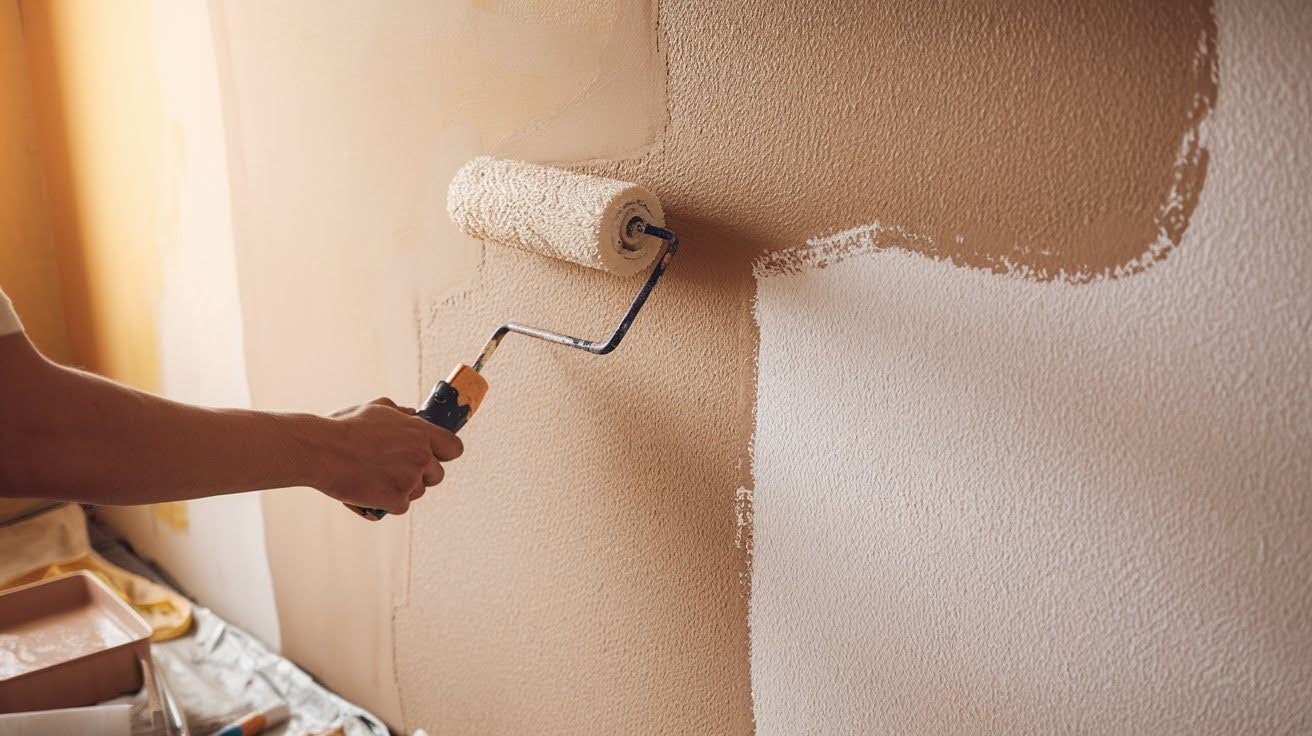
Use a roller suitable for textured surfaces. Regular rollers won’t work well on your new texture. Get a roller with a thick nap – 3/4 inch works great.
Apply your topcoat after the primer has dried completely. Usually 2-4 hours, depending on humidity. Roll in multiple directions to get paint into all the texture valleys. Your skip trowel work deserves a proper finish.
Common Mistakes to Avoid
Using the wrong compound type kills your project before you start. Avoid lightweight or sandy compounds – they don’t texture properly. Mixing compounds too thin creates drips everywhere. Too thick?
It won’t spread at all. Here’s the truth: Most failures happen in the mixing stage. Rushing the process instead of working methodically always backfires. I’ve seen people try to texture an entire room in 30 minutes. It never works.
Skip trowels need patience and timing. Not protecting the surrounding areas adequately turns your texture project into a cleanup nightmare. Compound splatter gets everywhere. Cover twice as much as you think you need.
Trust me on this one. Other common mistakes I see include working in sections that are too large, failing to step back and review your work, and attempting to correct wet texture with additional compound. Once you start the texture process, commit to it. Don’t second-guess yourself halfway through.
Conclusion
You now have everything you need to create a beautiful skip trowel texture on your walls. From proper surface prep to the final paint coat, these steps will help you achieve that professional look you’re after.
The key is taking your time with each step. Don’t rush the process. Good texture work requires patience, but the results are worth it. Remember, your first wall might not be perfect, and that’s okay. Skip trowel texture is forgiving, and you’ll get better with practice.
Ready to transform your walls? Start with a small area to build your confidence. Once you see how great it looks, you’ll want to texture every room in your house.
Have questions about your specific project? Drop a comment below. I’d love to help you troubleshoot any issues.
Frequently Asked Questions
What is the skip trowel texture?
Skip trowel texture is a wall finishing technique that creates intentional ridges and valleys with random spacing. It gives walls a handcrafted, artistic look using joint compound applied with a trowel in arching motions.
How long does a skip trowel texture take to dry?
Allow a minimum of 24 hours for complete drying before priming. Thick textured areas may take longer, depending on humidity and temperature. Don’t rush this step or your primer won’t adhere properly.
Can beginners apply skip trowel texture successfully?
Yes, with proper preparation and patience. Start with a small test area first. The technique is forgiving, and slight imperfections add to the natural, handcrafted appearance.
What type of joint compound works best for skip trowel texture?
Use all-purpose joint compound mixed to a thick pancake batter consistency. Avoid lightweight compounds, hot mud, or compounds with sand or grit, as they don’t texture properly.
Do I need special tools for skipping the trowel texture?
Basic tools include a hawk, trowel (or drywall knife), electric drill with paddle, and mud pan. Most DIYers already own these tools or can buy them affordably at any hardware store.