

Got wood paneling that’s looking a bit tired?
You’re not alone! Those brown, grooved walls that once screamed “retro chic” might now feel more like a design relic from decades past.
But here’s the good news: wood paneling is making a serious comeback, and with the right approach, your walls can go from dated to absolutely fabulous.
The secret? Smart wood paneling makeover ideas that work with what you’ve got instead of fighting against it.
Think fresh paint colors, creative textures, and clever design tricks that’ll have your friends asking for your decorator’s number.
Ready to transform those walls? We’ve rounded up 11 incredible makeover ideas that’ll breathe new life into your space, from budget-friendly weekend projects to show-stopping transformations.
Let’s turn that paneling into your home’s best feature!
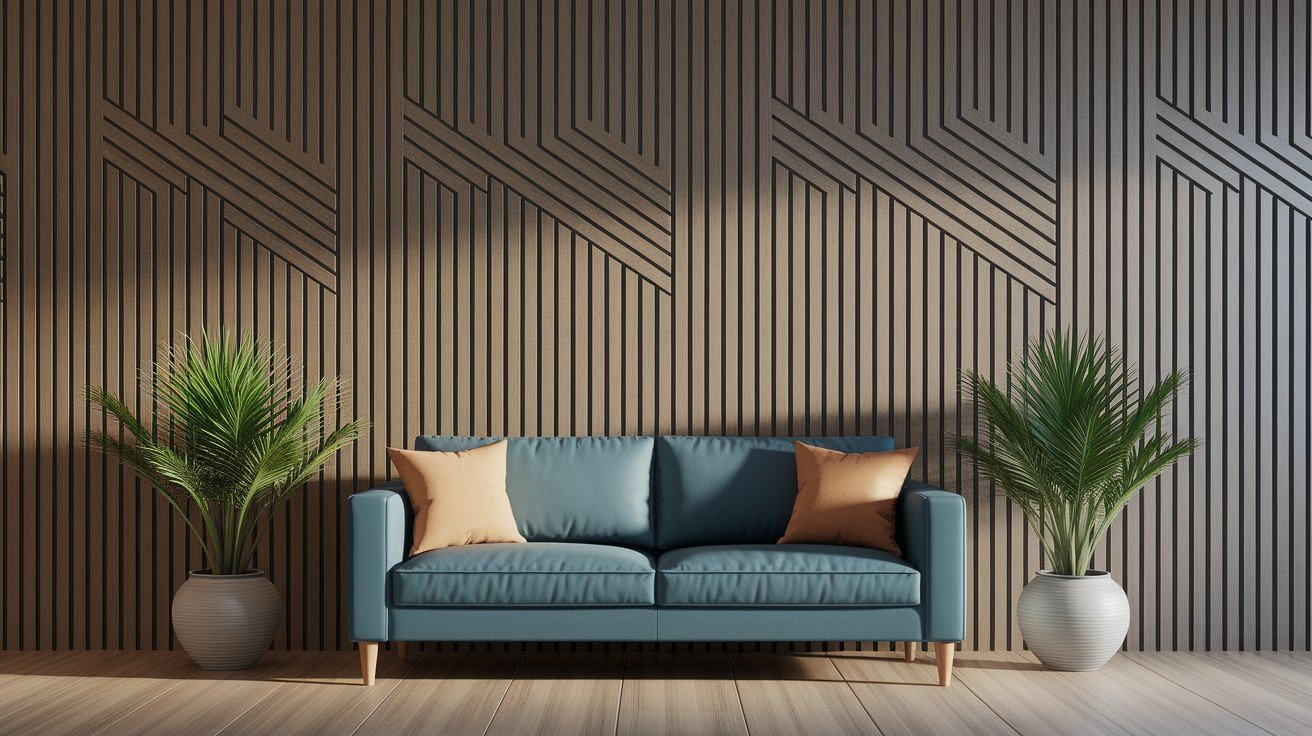
Wood Paneling Reimagined for the Modern Home
From Outdated to On-Trend
Wood paneling has shed its reputation as a 1970s relic and emerged as a sought-after design element. What once felt heavy and dark now serves as a foundation for fresh, contemporary spaces.
The key difference? Today’s approach focuses on lighter treatments, strategic placement, and mixing textures.
Why Homeowners Are Embracing Paneling Again?
The appeal lies in paneling’s versatility and character. It adds instant texture and warmth that flat drywall simply can’t match. Plus, it’s budget-friendly, transforming existing paneling costs far less than full wall replacement.
Many homeowners appreciate the sustainable aspect of working with what’s already there.
Design Styles That Work Well with Paneling
Modern spaces benefit from painted paneling in crisp whites or bold accent colors. Rustic homes celebrate natural wood tones with updated stains.
Cottagecore enthusiasts love soft, weathered finishes that create cozy, lived-in charm.
What to Consider Before Starting a Wood Paneling Makeover?
Type of Wood Paneling (Solid Wood, Veneer, MDF)
First, identify what you’re working with. Solid wood panels can handle aggressive sanding and multiple paint coats. Veneer requires gentler treatment; too much sanding can damage the thin wood layer.
MDF paneling is paintable but needs a proper primer to prevent moisture absorption. Run your hand along the surface; real wood feels substantial, while veneer may show slight flexibility.
Surface Preparation Essentials (Cleaning, Sanding, Priming)
Clean panels thoroughly with degreasing cleaner to remove years of buildup. Light sanding creates better paint adhesion, focuses on glossy areas, and raised sections.
Don’t skip primer, especially on dark or glossy panels. It prevents bleed-through and ensures even color coverage.
Setting a Makeover Goal (Brighten, Modernize, Add Texture)
Define your vision early. Want brighter rooms?
Choose light, reflective colors. Seeking modern vibes? Consider geometric patterns or bold contrasts. Adding texture? Explore techniques like whitewashing or decorative overlays.
Tools & Materials You May Need
Basic DIY Supplies (Paint, Primer, Brushes, Caulk)
- High-quality primer – essential for proper paint adhesion on wood surfaces
- Interior paint – latex or acrylic works best for most paneling projects
- Angled brushes – 2-inch and 4-inch sizes for cutting in and detail work
- Paint rollers – small nap rollers for smooth finishes on grooved surfaces
- Caulk – paintable acrylic caulk to fill gaps and seams
- Sandpaper – 120-grit for light scuffing, 220-grit for smoothing
- Drop cloths – protect floors and furniture during painting
- Painter’s tape – clean lines around trim and adjacent walls
Advanced Tools (Nail Gun, Level, Stud Finder)
- Finish nail gun – for attaching trim or additional molding
- 4-foot level – ensures straight lines when adding decorative elements
- Stud finder – locates wall studs for secure mounting
- Miter saw – precise cuts for trim and molding pieces
- Oscillating multi-tool – removes old caulk and makes detailed cuts
Decorative Additions (Wallpaper, Trim, Tiles)
- Peel-and-stick wallpaper – a quick refresh option for smooth panels
- Decorative molding – creates frames or board-and-batten effects
- Adhesive tiles – add texture over existing paneling
- Wood strips – create custom patterns or cover seams
11 Wood Paneling Makeover Ideas to Try Today
1. Paint It White for a Clean, Airy Look
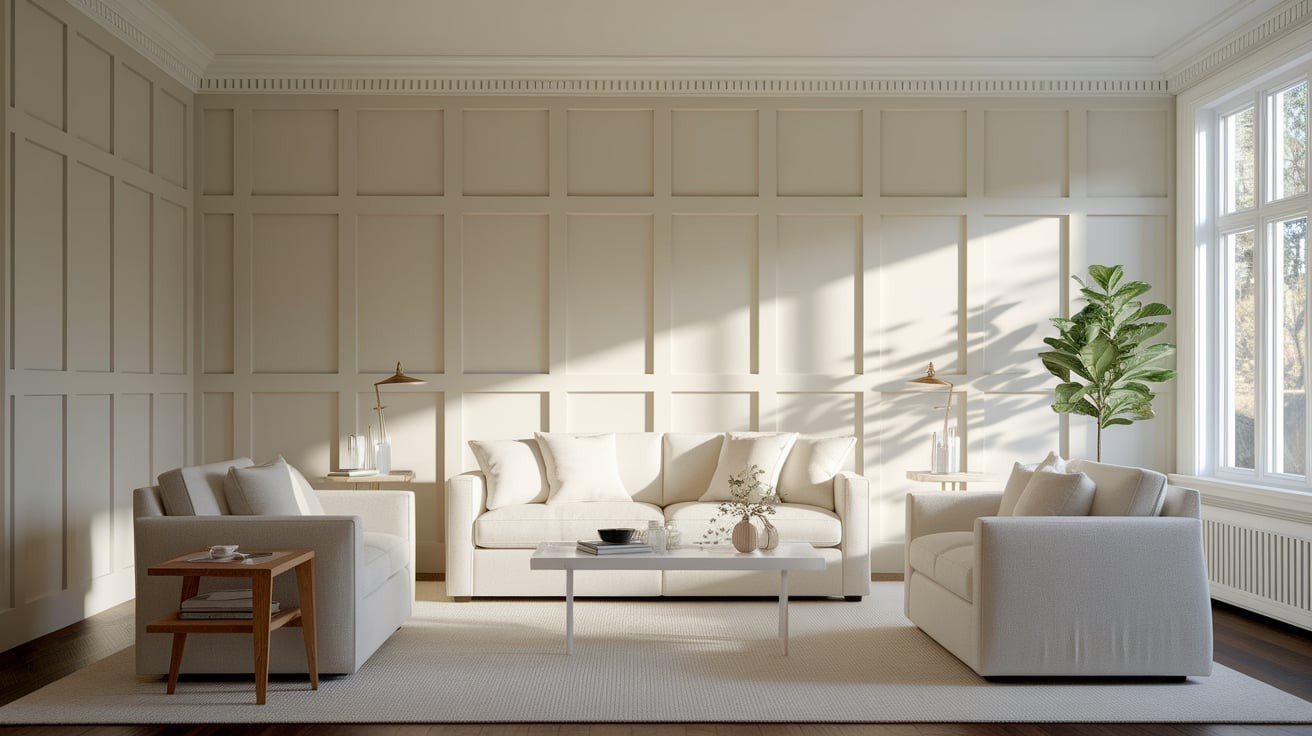
White paint instantly brightens dark paneling and makes rooms feel larger. Choose warm whites like cream or ivory to avoid sterile hospital vibes.
Use a high-quality primer first to prevent wood tannins from bleeding through. Apply thin, even coats with a small roller to get into grooves. Semi-gloss finish works best for easy cleaning and subtle light reflection.
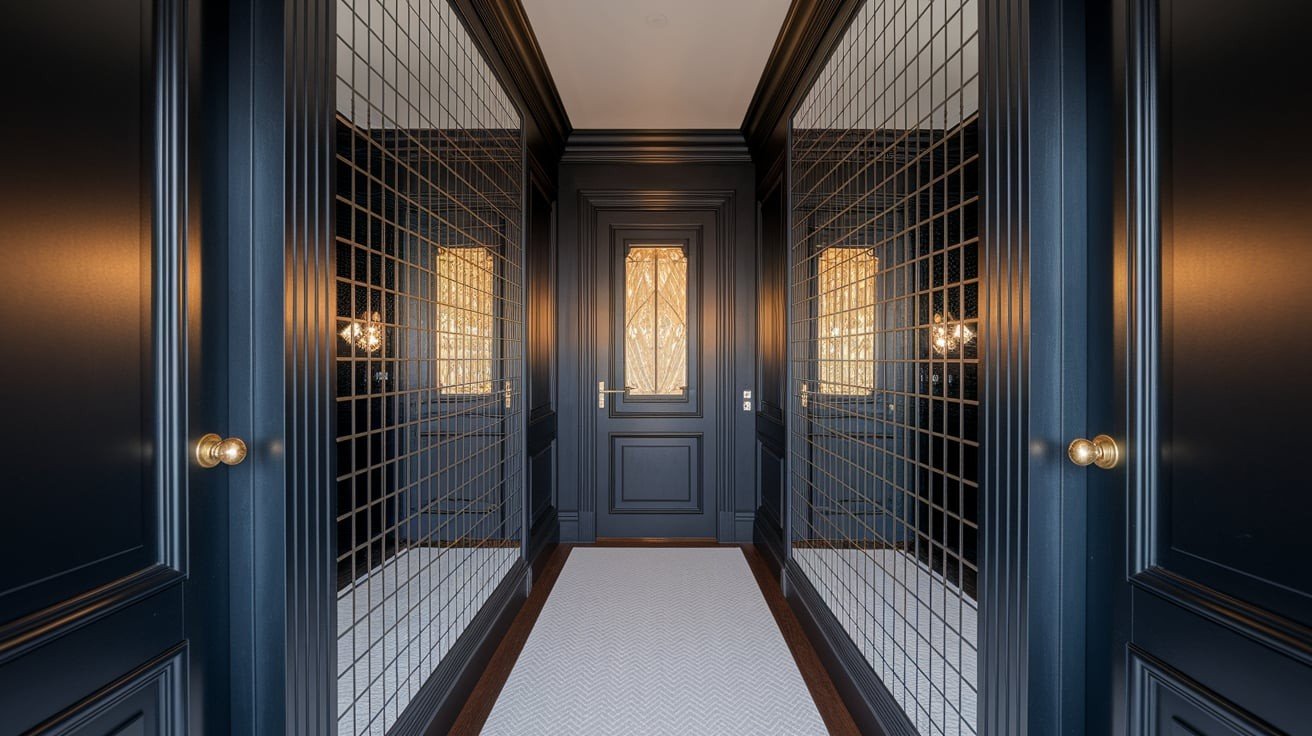
2. Go Bold with Deep, Moody Colors
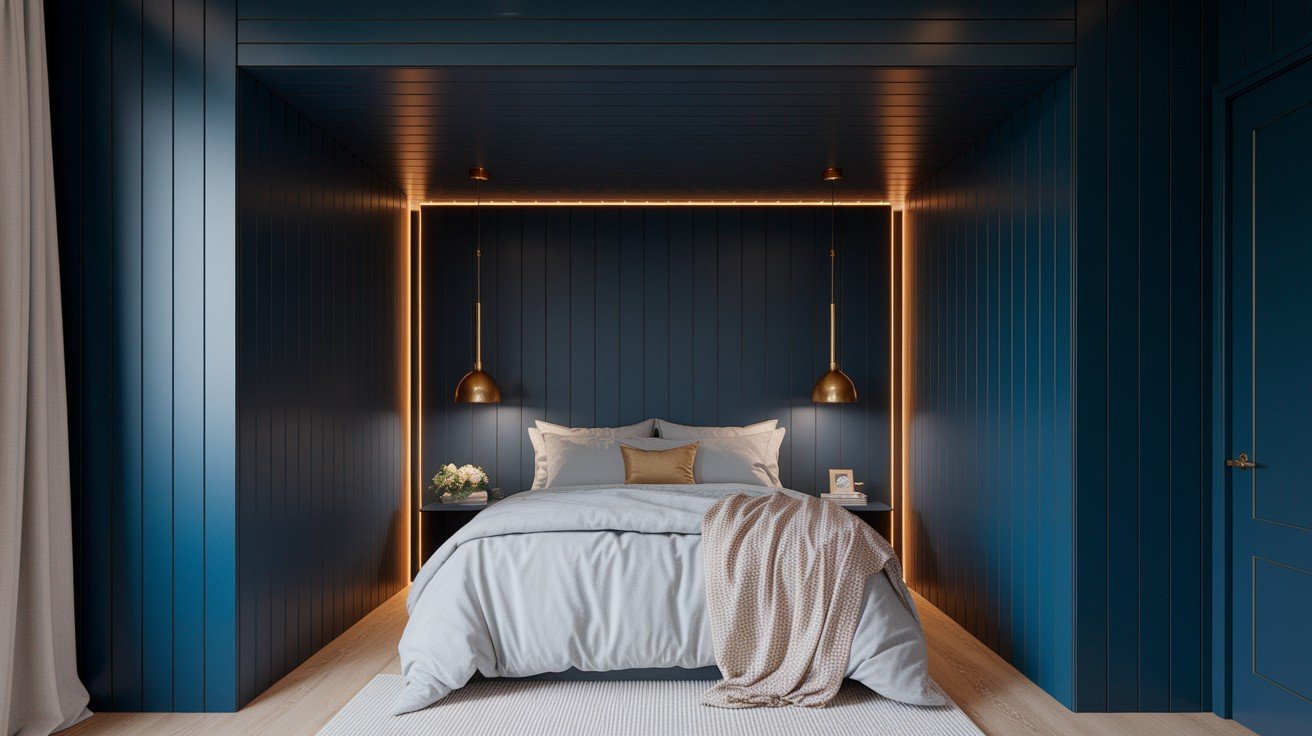
Dark colors like navy, forest green, or charcoal create dramatic focal walls that feel intentional and sophisticated. These rich tones work especially well in dining rooms or bedrooms where a cozy atmosphere matters more than brightness.
Balance dark paneling with lighter furniture and plenty of artificial lighting. Consider accent lighting to highlight the wood’s natural texture through the paint.
3. Create a Shiplap Look with Vertical or Horizontal Lines
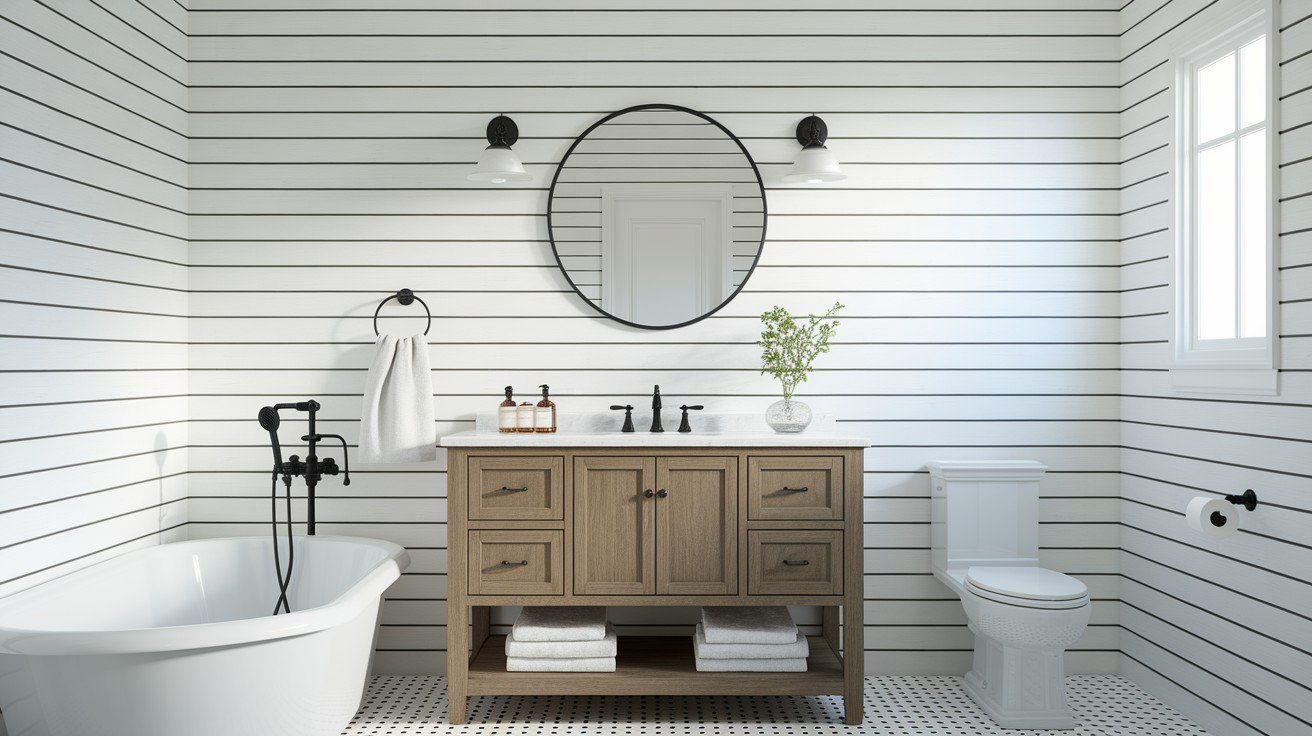
Transform grooved paneling into trendy shiplap by adding thin wood strips or using painter’s tape to create clean lines.
Install 1×2 furring strips horizontally every 6-8 inches for authentic shiplap spacing. Paint everything the same color for a cohesive look.
This technique works particularly well in bathrooms, kitchens, or accent walls where you want that modern farmhouse vibe without full renovation costs.
4. Add Peel-and-Stick Wallpaper for a Quick Refresh
Peel-and-stick wallpaper offers the fastest transformation with minimal commitment. Choose patterns that complement your paneling’s grooves rather than fighting them; geometric designs or wood-look patterns work beautifully.
Clean the surface thoroughly before application and use a smoothing tool to prevent air bubbles. This solution works best on flat or lightly textured panels and can be easily removed when you’re ready for a change.
5. Stain It Dark Walnut or Driftwood Grey
Rich walnut stain brings out wood grain while creating sophisticated, modern appeal. Driftwood grey offers a weathered coastal vibe that’s currently trending.
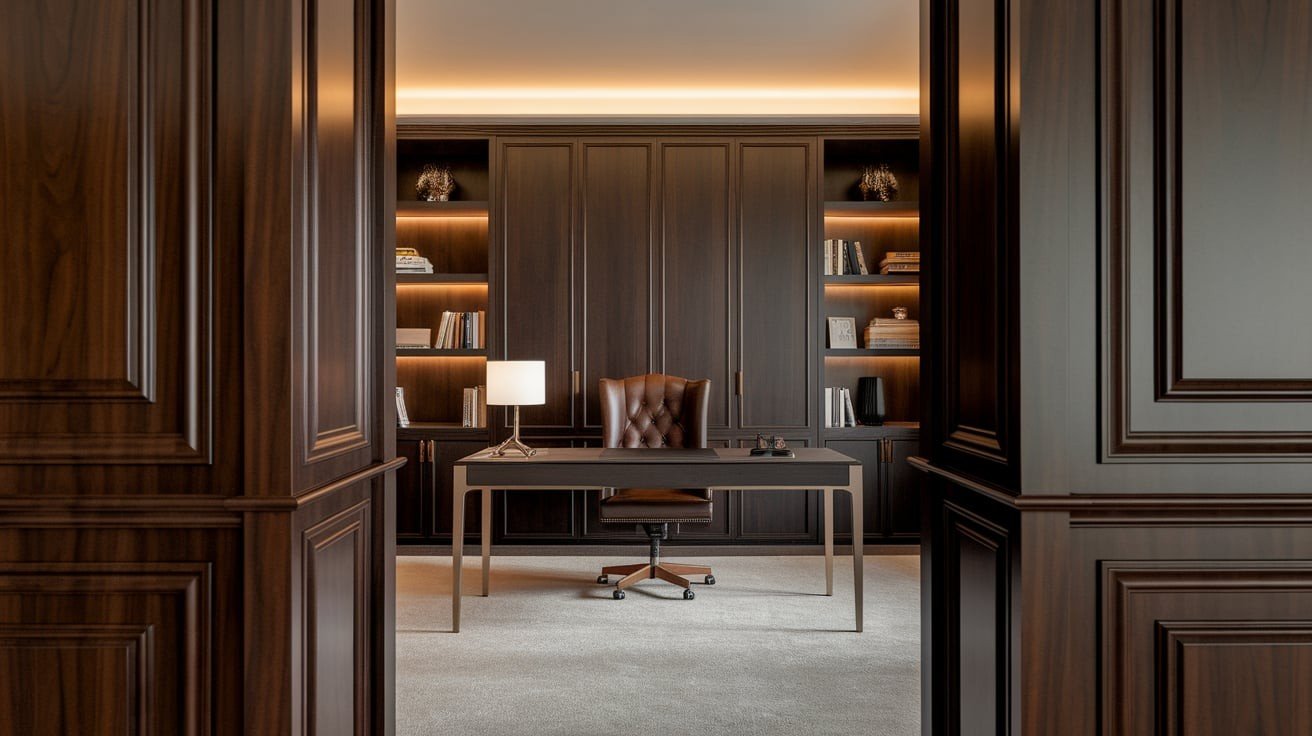
Sand lightly first to ensure even absorption, then apply stain with a brush following the wood grain. Wipe excess immediately for consistent color. These darker tones work beautifully in home offices, libraries, or dining rooms where you want warmth without overwhelming brightness.
6. Use Whitewashing or Limewashing Techniques for Texture
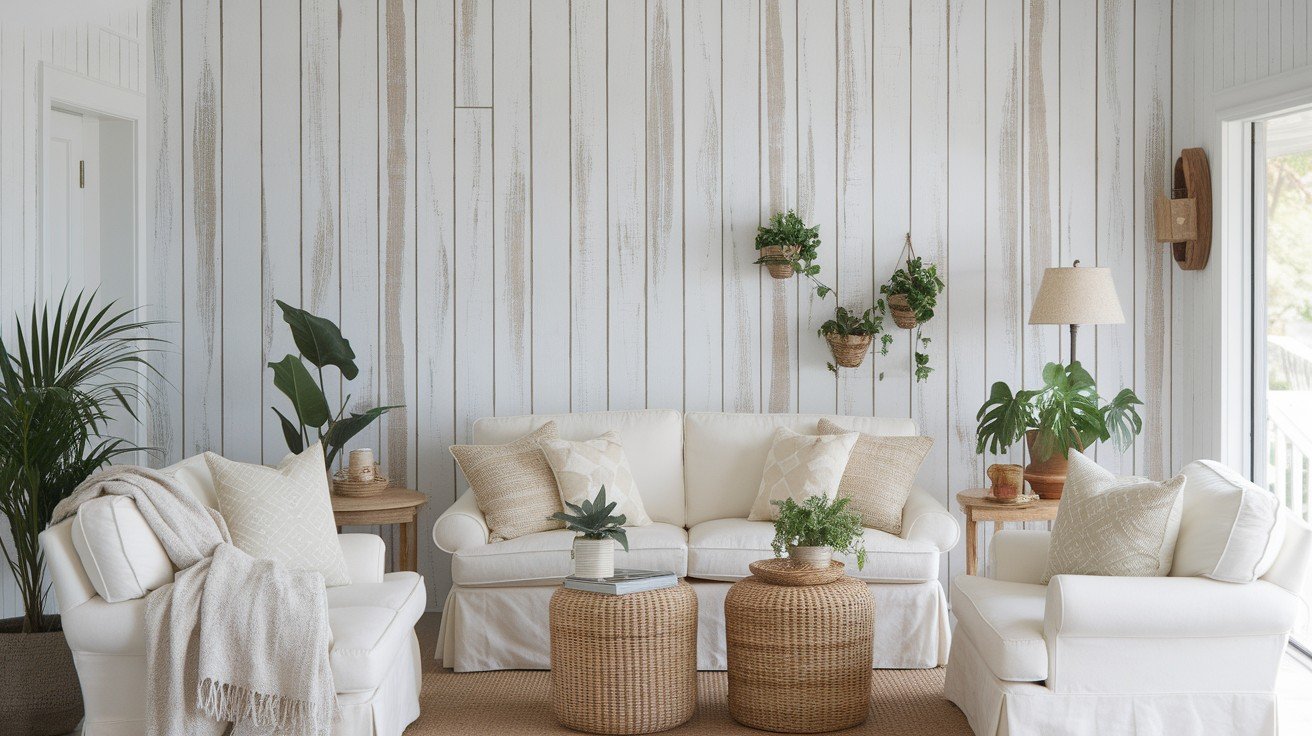
Whitewashing creates a soft, weathered finish that lets wood grain show through for authentic character. Mix white paint with water (1:1 ratio) and brush on, then immediately wipe with a clean rag.
Limewashing offers similar results with added texture and depth. Both techniques work exceptionally well in bedrooms, living rooms, or anywhere you want that relaxed, beachy cottage feel without completely covering the wood’s natural beauty.
7. Install Board and Batten Over Existing Panels
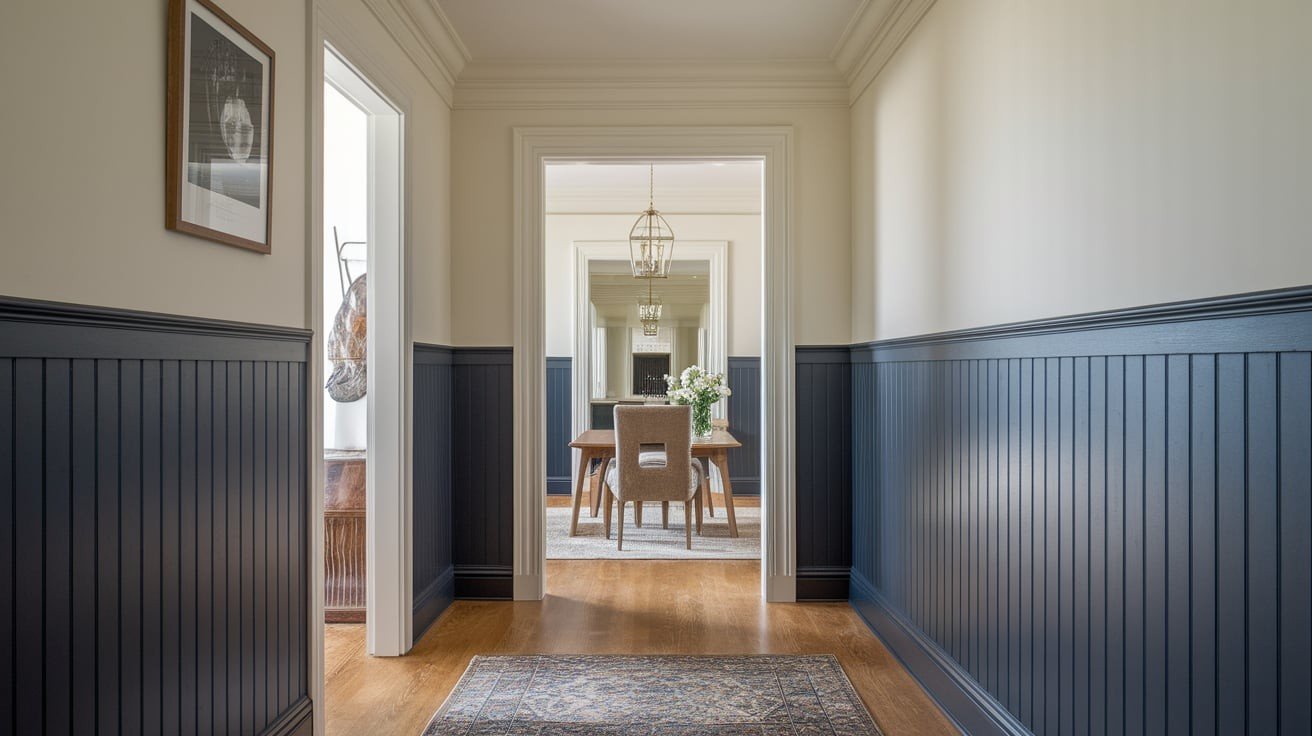
Board and batten adds architectural interest while covering outdated paneling completely. Install vertical 1×4 boards every 12-16 inches, then add thin cap molding at the top.
This creates classic wainscoting that works in any room. Paint the entire surface one color for clean lines, or use two-tone paint with darker lower sections.
Perfect for entryways, dining rooms, or hallways where you want traditional charm with contemporary appeal.
8. Frame Panels with Decorative Molding for an Upscale Look
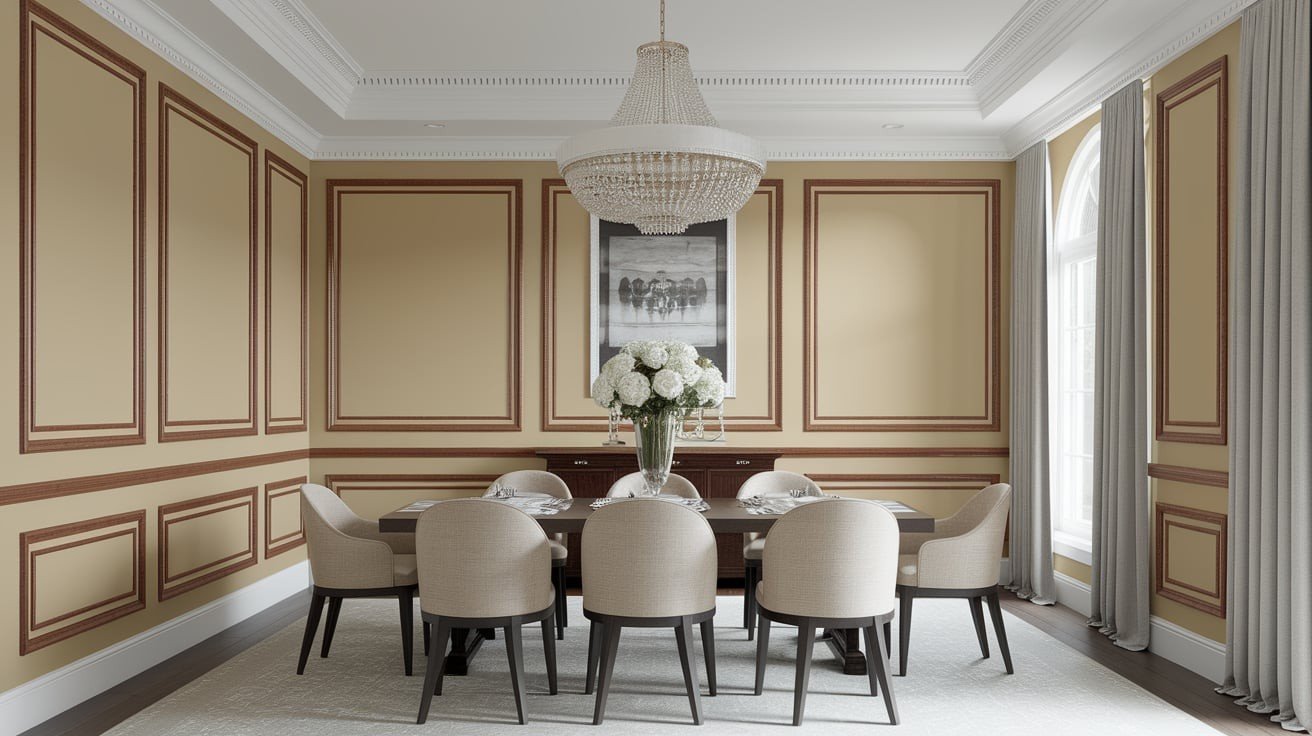
Add picture frame molding around existing panel sections to create a custom millwork appearance. Use 1×2 or 1×3 boards to outline each panel, mitering corners for professional results.
This technique transforms basic paneling into expensive-looking built-ins. Paint everything the same color for cohesive sophistication, or use contrasting colors to highlight the frames.
Works especially well in formal dining rooms, home offices, or master bedrooms where refined details matter most.
9. Apply Mirror or Metallic Panels Between Wood Sections
Insert mirror tiles or metallic panels between existing wood grooves for glamorous contrast. This technique reflects light and creates visual interest without major construction.
Use adhesive mirror squares or peel-and-stick metallic sheets cut to fit panel widths. Gold, silver, or copper finishes work beautifully against painted or stained wood.
Perfect for powder rooms, entryways, or dining rooms where you want to add sparkle and make spaces appear larger.
10. Use Chalkboard Paint in Kitchens or Kids’ Rooms

Transform lower paneling sections into functional chalkboard surfaces for grocery lists, kids’ artwork, or menu planning.
Sand lightly, prime, then apply chalkboard paint in thin, even coats. Create designated chalkboard zones by framing sections with contrasting paint colors.
This works particularly well in breakfast nooks, playrooms, or home offices where interactive surfaces add both style and practicality to your space.
11. Add Built-In Shelving or Artwork for Function & Style
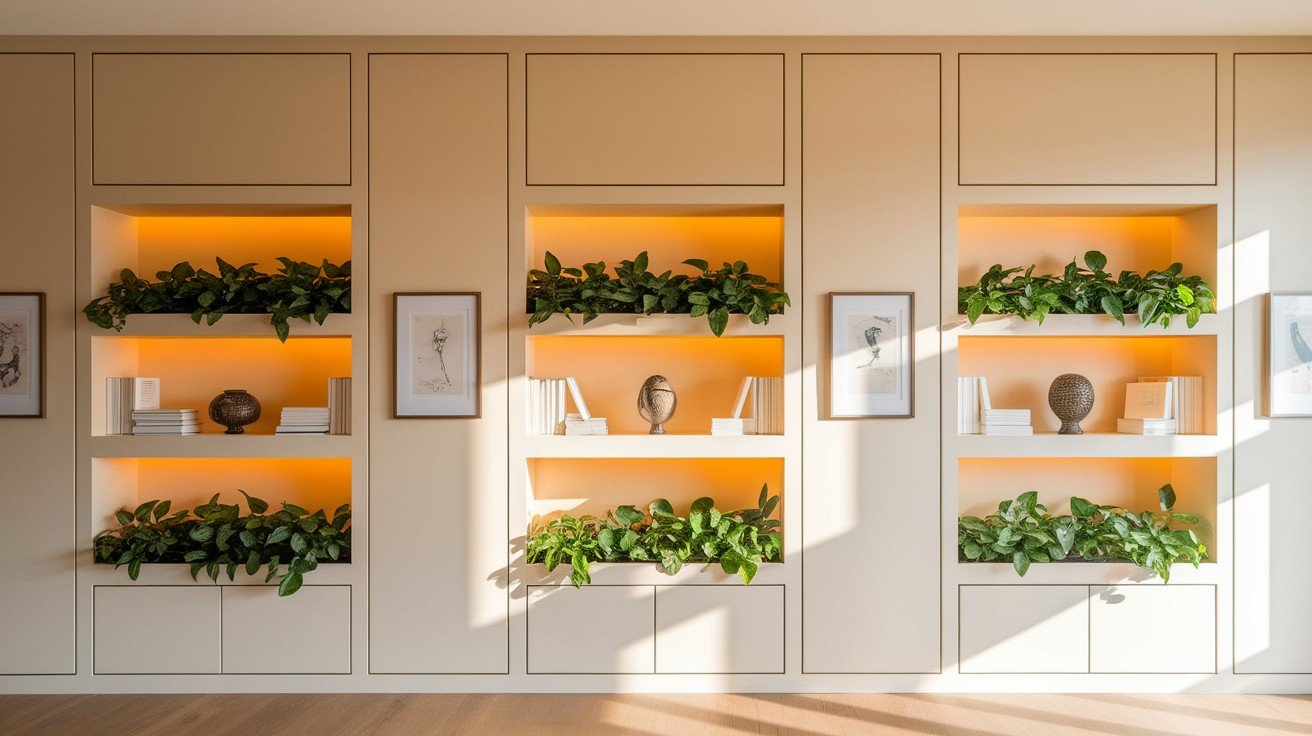
Install floating shelves between panel grooves or mount artwork directly onto painted paneling for curated gallery walls.
Use the vertical lines as natural guides for spacing artwork evenly. Built-in shelving transforms paneling into functional storage while maintaining visual interest.
This approach works especially well in living rooms, home offices, or bedrooms where you need both storage solutions and decorative impact from your wall treatment.
Budgeting for Your Makeover Project
|
Budget Category |
Cost Range |
What’s Included |
Best For |
|
Low-Cost DIY Ideas Under $100 |
$25-$100 |
• Paint and primer • Basic brushes and rollers • Painter’s tape • Drop cloths • Sandpaper • Peel-and-stick wallpaper • Chalkboard paint treatment |
Small rooms, accent walls, weekend projects, first-time DIYers |
|
When to Invest in a Contractor |
$500-$2,500+ |
• Complex electrical work • Structural modifications • Built-in shelving installation • Professional trim work • Large multi-room projects • Textured finishes requiring expertise |
Whole-house projects, intricate designs, time constraints, and quality guarantees |
|
Tips for Shopping Smart |
Varies |
• End-of-season paint sales (30-50% off) • Contractor-grade supplies from home improvement stores • Repurposed wood from construction sites • Facebook Marketplace for tools • Bulk buying with neighbors • Store loyalty programs for discounts |
Any budget level, planning, and community projects |
Conclusion
Your wood paneling doesn’t have to be a design dilemma anymore. With these 11 creative approaches, those once-dreaded walls can become your home’s most talked-about feature.
From simple paint jobs that cost under $50 to sophisticated built-ins that add real value, there’s a solution for every budget and skill level.
The best part? You’re working with what you already have, which means less waste and more savings.
Start small with one accent wall to test your chosen technique, then expand from there. Remember, even the most dramatic transformations began with a single brush stroke.
So grab your supplies, put on some good music, and get ready to fall in love with your paneling all over again. Your walls are about to thank you!
Frequently Asked Questions
Can I paint over wood paneling without sanding first?
Light sanding is recommended for better paint adhesion, but high-quality bonding primer can work on clean, non-glossy surfaces.
How long does a typical wood paneling makeover take?
Simple paint jobs take 2-3 days, including drying time. More complex projects like adding trim require 1-2 weekends.
Will painting wood paneling decrease my home’s value?
Updated, well-executed paneling makeovers typically increase home value by modernizing outdated spaces and improving overall room appeal.